
 Pin it
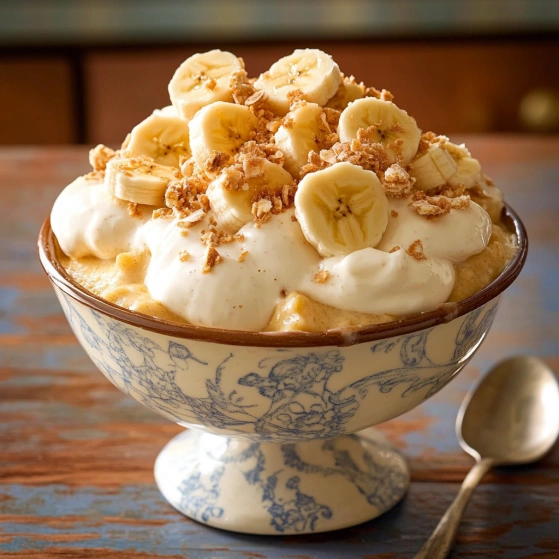
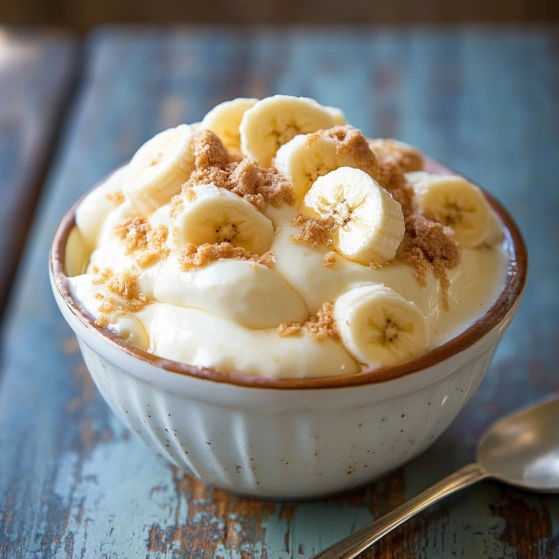
Magnolia Bakery's banana pudding is a timeless dessert that perfectly balances creamy pudding, fresh bananas, and classic vanilla wafers in layers of pure comfort. This nostalgic treat has become legendary for good reason - the contrast between the silky pudding, soft cookies, and sweet bananas creates an irresistible combination that never fails to impress guests. I've recreated this famous recipe many times, staying true to the original while ensuring you can achieve the same delicious results at home.
The first time I made this pudding for my family, my daughter actually closed her eyes while eating it! She said it tasted exactly like the version we had in New York. I've since made it for countless dinner parties, and guests always request the recipe before leaving.
Ingredients and Why They Matter
- Sweetened Condensed Milk: Provides the rich, sweet base for the pudding; never substitute with evaporated milk as you'll lose the crucial sweetness
- Ice Cold Water: Temperature matters here; cold water helps the pudding set properly
- Instant Vanilla Pudding Mix: The shortcut ingredient that makes this recipe accessible; use name-brand for best results
- Heavy Cream: Creates the cloud-like texture when whipped; don't substitute with half-and-half or milk
- Barely Ripe Bananas: Slightly firm bananas hold their shape and resist browning; choose ones with minimal brown spots
- Nilla Wafers: The authentic cookie choice that softens perfectly; store-brand vanilla wafers can work but may lack the classic flavor
Step-by-Step Instructions
- Step 1: Create the Pudding Base
- Mix the sweetened condensed milk and ice-cold water in a large bowl using an electric mixer for about 1 minute. You want a smooth, well-incorporated mixture before adding other ingredients. Next, add the instant vanilla pudding mix and continue beating for a full 2 minutes - this activates the thickening agents in the pudding. The mixture will still look quite liquid at this point, which is normal. Cover the bowl with plastic wrap pressed directly onto the surface (this prevents a skin from forming) and refrigerate for at least 3-4 hours or overnight. This resting time is non-negotiable - the pudding needs this time to properly set or you'll end up with a runny dessert.
- Step 2: Prepare the Whipped Cream
- In a separate large, chilled bowl, whip the heavy cream until stiff peaks form. This usually takes 3-5 minutes with an electric mixer on medium-high speed. You'll know it's ready when the cream holds its shape when the beater is lifted. Be careful not to overbeat, which creates a grainy texture. The cream should look smooth and glossy.
- Step 3: Combine the Mixtures
- Once your pudding base has set completely, remove it from the refrigerator. Using a rubber spatula, gently fold the whipped cream into the pudding mixture with a light, sweeping motion. Fold just until combined with no visible streaks remaining - overworking will deflate the mixture and lose the airy texture. This folding process typically takes 1-2 minutes of careful incorporation.
- Step 4: Assemble the Layers
- Choose either individual serving dishes or a large glass trifle bowl (4-5 quart capacity). Begin with a layer of Nilla wafers covering the bottom surface, slightly overlapping the cookies for stability. Next, add a layer of sliced bananas, arranging them in an even layer. Carefully spoon about one-third of the pudding mixture over the bananas, spreading gently to create an even layer that reaches the edges of your container.
- Step 5: Complete the Assembly
- Repeat the layering process twice more: wafers, bananas, then pudding mixture. For the final layer, you can either arrange whole Nilla wafers in a decorative pattern or crush some wafers into crumbs for a pretty garnish. Cover the finished dessert tightly with plastic wrap without touching the surface, and refrigerate for at least 4 hours before serving, allowing the flavors to meld and the wafers to soften to cake-like perfection.
 Pin it
My grandmother always claimed bananas were nature's perfect food. She lived to 96 and ate one daily, often incorporating them into desserts like this pudding. When my own children were small, I would make single-serving versions in clear plastic cups for special occasions, and they'd watch with fascination as the layers appeared.
The Secret to Perfect Banana Selection
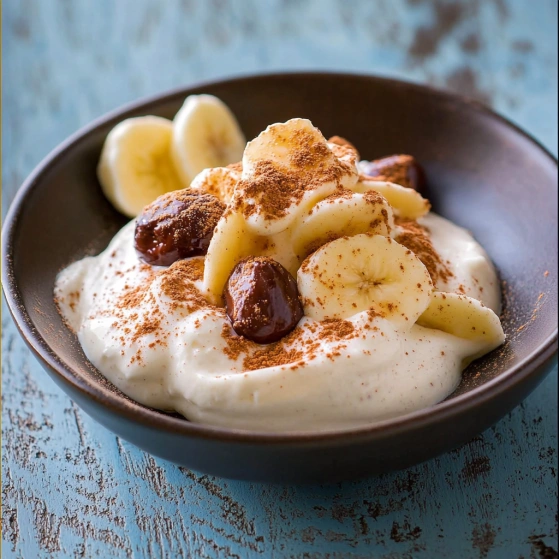
Choosing the right bananas is crucial for this recipe's success. Too ripe, and they'll turn to mush; too green, and they'll taste astringent. Look for bananas that are yellow with just the slightest green at the stems. They should feel firm but not hard when gently squeezed. I've found that purchasing bananas 2-3 days before making the pudding allows me to monitor their ripening. If your bananas ripen too quickly, separate them from the bunch - they release ethylene gas that speeds ripening when clustered together. For preventing browning, a light brush of lemon juice on sliced bananas helps, though the pudding mixture will naturally coat and protect them.
Make-Ahead and Storage Tips
Despite its simplicity, this dessert benefits from thoughtful timing. The pudding base can be made up to two days ahead and stored covered in the refrigerator. Whip the cream and assemble the layers the day before serving for best results. Once assembled, the pudding keeps well for up to 8 hours before bananas begin deteriorating. If you need to prepare further in advance, consider assembling in stages - make the pudding mixture, then add the layers of cookies and bananas just before serving. Leftover pudding will keep for one additional day, though the appearance may suffer slightly as bananas darken. I've found storing individual portions in mason jars with tight-fitting lids helps maintain freshness and makes for charming presentation when unexpected guests arrive.
 Pin it
Variations Worth Trying
While Magnolia's classic version remains unbeatable, I've experimented with delicious variations over the years. Substituting chocolate wafers for vanilla creates a striking contrast against the white pudding and yellow bananas. For adults, adding a tablespoon of rum to the pudding mixture introduces sophistication, while a sprinkle of shaved dark chocolate between layers adds textural interest and visual appeal. During summer months, I sometimes fold fresh berries into the pudding layers or arrange them decoratively on top. My personal favorite adaptation is adding a thin layer of dulce de leche between the pudding and bananas, which introduces a caramel note that complements the bananas beautifully. Don't be afraid to make this recipe your own while respecting the fundamental technique that makes it so special.
Frequently Asked Questions
- → Can I use overripe bananas for this dish?
Overripe bananas are too soft and may become mushy in this dessert. Use barely ripe bananas for the best texture and sweetness balance.
- → How can I prevent bananas from browning?
Brush sliced bananas with a thin layer of lemon juice before layering. This helps preserve their color without impacting flavor.
- → Can I substitute Nilla wafers?
Yes, graham crackers or other plain tea biscuits can be used, though Nilla wafers provide a classic flavor and texture.
- → Is it necessary to refrigerate the pudding mixture overnight?
Refrigerating the pudding mixture allows it to properly set, ensuring a creamy, firm texture. Skipping this step may result in a watery consistency.
- → How long can the assembled dessert be stored?
The dessert can be stored in the refrigerator for up to 8 hours. Beyond this, the bananas may begin to brown and affect the presentation.