
 Pin it
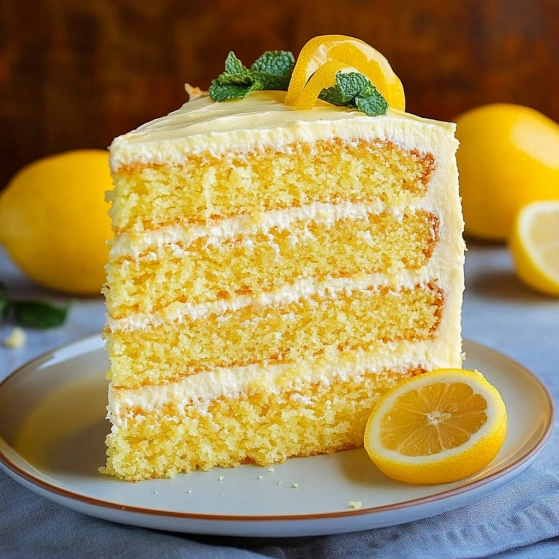
This lemon velvet cake brings together the perfect balance of citrusy brightness and velvety texture. The combination of all-purpose and cake flours creates that ideal crumb structure that practically melts in your mouth with each bite, while the lemon zest and extract provide a refreshing flavor that's not overwhelming but definitely present. It's one of those cakes that works beautifully as a celebration centerpiece or a simple afternoon treat with tea.
I made this cake for my sister's birthday last spring, and everyone kept asking for the recipe. What surprised me most was how the texture remained so perfectly moist even on day three—that is, for the small slice that somehow survived that long!
Ingredients and Selection Tips
- All-purpose flour (1¼ cups, sifted): Provides structure while the cake flour ensures tenderness
- Cake flour (1½ cups, sifted): Lower protein content creates that fine, soft crumb
- Baking soda (½ teaspoon): Reacts with the acidic buttermilk for proper rise
- Baking powder (1½ teaspoons): Additional leavening for perfect height
- Salt (1 teaspoon): Enhances all flavors, especially important in sweet bakes
- Sugar (1½ cups): Use pure cane sugar for best results
- Vegetable oil (⅔ cup): Creates moisture that stays even when refrigerated
- Vegetable shortening (⅓ cup): Adds structure and helps with that velvet texture
- Vanilla extract (1 teaspoon): Use good quality; it's worth it for background depth
- Lemon extract (2 teaspoons): Provides concentrated flavor throughout the cake
- Eggs (3 large): Room temperature eggs incorporate better into batter
- Buttermilk (1½ cups): Creates tenderness and reacts with leaveners for rise
- Lemon zest (from two small or one large lemon): Contains the essential oils that give fresh flavor
- Frosting ingredients: Powdered sugar, unsalted butter, lemon extract, lemon zest, milk
Step-by-Step Instructions
- Step 1 - Preparation:
- Preheat your oven to 325°F. Take time to properly prepare your pans—grease two 9-inch round cake pans thoroughly, then dust with flour, tapping out excess. Cut parchment paper circles to fit the bottom of each pan exactly. This three-step process ensures your cake will release perfectly without sticking.
- Step 2 - Dry Ingredient Mixture:
- Sift both flours together into a large bowl—this isn't just fussy baking; it actually aerates the flour and removes any lumps. Add baking soda, baking powder, salt, and sugar to the sifted flours and whisk thoroughly to distribute everything evenly. The uniform distribution of leavening agents ensures consistent rise throughout.
- Step 3 - Fat Mixture:
- In your stand mixer bowl, combine the vegetable oil and room-temperature shortening. Make sure your shortening is truly at room temperature for proper incorporation. Add the vanilla and lemon extracts. Beat at high speed using the whisk attachment until the mixture becomes notably lighter in color and fluffy in texture—about 3-4 minutes. Don't rush this step as it creates the base texture.
- Step 4 - Egg Incorporation:
- Add eggs one at a time, beating for about 30 seconds after each addition. This gradual addition allows each egg to fully emulsify into the fat mixture before adding the next, preventing separation and ensuring a smooth batter.
- Step 5 - Zest Addition:
- Gently fold in the finely chopped lemon zest using a spatula. The folding motion preserves the air you've worked to incorporate while distributing the zest evenly throughout the batter.
- Step 6 - Final Mixing:
- Now comes the critical alternating addition. Start by folding in about one-third of your dry ingredient mixture until barely combined. Then add half the buttermilk, again folding gently until just incorporated. Add another third of dry ingredients, followed by remaining buttermilk, and finish with the last portion of dry ingredients. This method prevents gluten formation while ensuring even mixing. Stop folding the moment you no longer see dry flour streaks.
- Step 7 - Baking:
- Immediately divide the batter equally between your prepared pans. Gently tap each pan on the counter once or twice to release any large air bubbles. Place in the preheated oven and bake for 30-35 minutes. Test for doneness by inserting a wooden toothpick in the center—it should come out clean or with a few moist crumbs, but no wet batter.
- Step 8 - Cooling:
- Allow the cakes to rest in their pans for exactly 10 minutes—this settling time helps prevent collapse. Then run a thin knife around the edges and carefully invert onto cooling racks. Peel off parchment paper and allow to cool completely before frosting, at least 2 hours.
 Pin it
I've grown to appreciate lemon desserts more as I've gotten older. My grandmother always had a lemon tree in her yard, and watching her zest lemons for baking is one of my earliest kitchen memories. The scent of fresh lemon zest still takes me back to her sunny kitchen, and this cake in particular reminds me of her spring birthday celebrations.
The Science Behind the Velvet
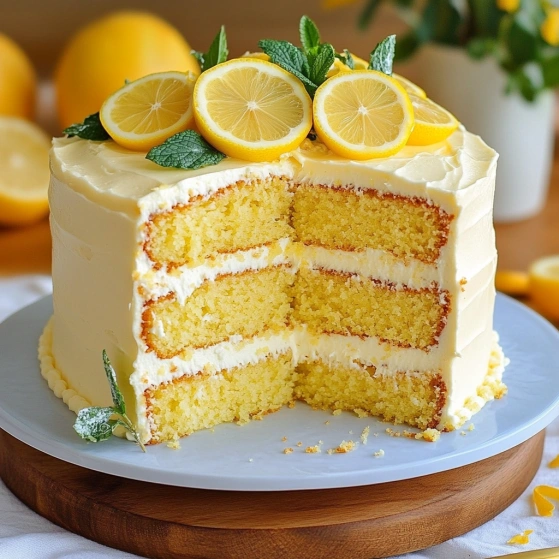
This cake's exceptional texture comes from the careful balance of ingredients and mixing techniques. The combination of cake flour and all-purpose flour creates the perfect protein content—enough structure to hold the cake together but not so much that it becomes tough. The oil provides moisture while the shortening contributes to structure and that characteristic 'velvet' mouthfeel. When these ingredients meet the acidic buttermilk, a chemical reaction occurs that breaks down gluten strands, resulting in that tender crumb we're after. It's not just delicious by accident—it's kitchen chemistry at work.
Serving and Storage Tips
For the most impressive presentation, chill the frosted cake for about 30 minutes before serving to allow the frosting to set. This makes cleaner slices and a more polished look. Store leftover cake in an airtight container at room temperature for up to two days, or refrigerate for up to five days. If refrigerating, I recommend allowing slices to come to room temperature before serving—about 20 minutes on the counter restores that perfect texture. And here's a tip from many trials: a very thin slice of bread placed in the storage container helps maintain moisture and prevents the cake from drying out.
 Pin it
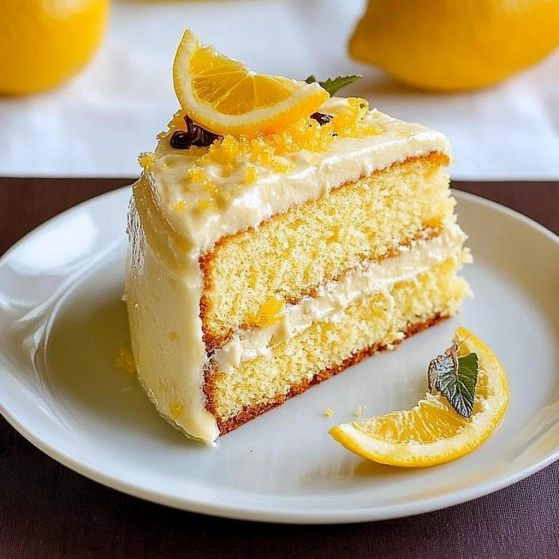
Flavor Variations to Consider
While this lemon velvet cake is perfect as written, I've experimented with several variations that work beautifully with the same base recipe. Adding fresh blueberries between the layers creates a stunning color contrast and flavor pairing. For a more intense citrus experience, try adding a tablespoon of lemon juice to the frosting or creating a simple lemon syrup to brush on the layers before frosting. During the holidays, I've added a teaspoon of rosemary to the batter for a sophisticated herbal note that pairs wonderfully with the lemon. The versatility of this cake makes it a true kitchen staple that can be adapted for any season or occasion.
Frequently Asked Questions
- → What makes this lemon cake so fluffy?
The combination of sifted flours, buttermilk, and proper mixing ensures light and tender layers.
- → Can I substitute the vegetable shortening?
Yes, you can replace shortening with an equal amount of butter, but it may slightly affect the texture.
- → How do I prevent the cake from sticking to the pan?
Grease and flour the pans thoroughly, and line with parchment paper for easy release.
- → Is the lemon zest necessary?
Lemon zest enhances the citrus flavor, but you can omit it or replace it with a bit more lemon extract.
- → Can the frosting be made less sweet?
To reduce sweetness, try adding a pinch of salt or a bit more lemon juice for balance.