
 Pin it
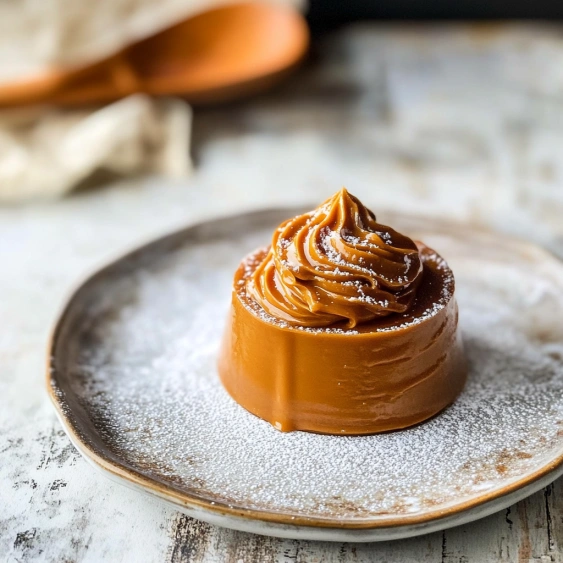
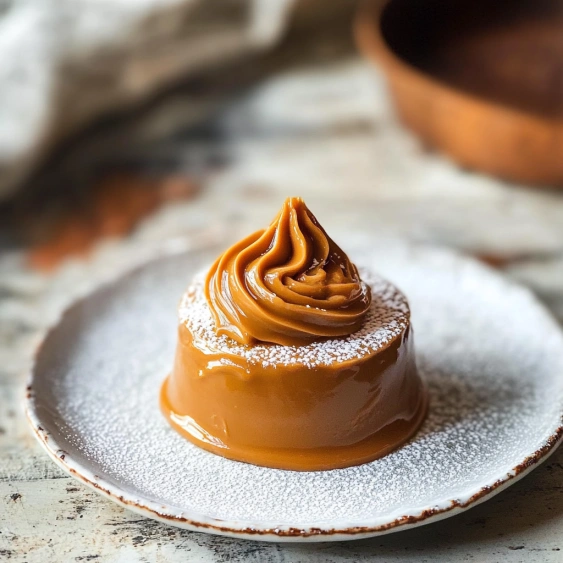
This magical homemade dulce de leche transforms a simple can of sweetened condensed milk into a luscious caramel sauce with virtually no hands-on effort. The pressure cooker method creates that distinctive deep amber color and rich flavor in just minutes instead of hours of traditional stovetop simmering.
I discovered this technique during a late-night dessert emergency when I needed caramel for a birthday cake. Now I always keep a can of sweetened condensed milk in my pantry for spontaneous dulce de leche cravings.
Ingredients
- Sweetened condensed milk: The only ingredient you need with its perfect balance of milk and sugar that caramelizes beautifully under pressure. Choose full-fat versions for the richest results.
Step-by-Step Instructions
- Remove Label:
- Take the paper label completely off the can of sweetened condensed milk. Make sure no paper residue remains that could float in the water.
- Inspect Can:
- Carefully examine the can for any dents or damage. This is crucial for safety reasons as damaged cans could potentially rupture under pressure.
- Position in Pressure Cooker:
- Place the sealed intact can inside your Instant Pot and fill with water until the can is completely submerged with about an inch of water above it.
- Set Cooking Parameters:
- Close the Instant Pot lid and set to high pressure cooking mode. Ensure the valve is in the sealed position.
- Pressure Cook:
- Once the pot reaches full pressure begin timing for 35 minutes. This will create a medium-dark dulce de leche with spreadable consistency.
- Cool Completely:
- Turn off the heat after cooking and allow the pressure to release naturally. Let the can cool completely in the water before handling or opening. This cooling period is essential for safety and may take 2-3 hours.
 Pin it
My favorite thing about this recipe is the incredible transformation that happens inside that humble can. The first time I made this with my daughter, her eyes widened with pure delight when we finally opened the can to reveal the golden caramel inside. That moment of kitchen magic is why I love sharing this recipe.
Cooking Time Variations
The standard 35-minute cooking time produces a perfectly spreadable dulce de leche with a medium caramel color. For a lighter, more pourable consistency, reduce cooking time to 25 minutes. The result will be a light golden sauce perfect for drizzling over ice cream or into coffee.
For an ultra-thick, darker dulce de leche suitable for candy fillings or thicker dessert layers, increase cooking time to 45 minutes. The extended cooking creates an intensely flavored, deeply colored spread that holds its shape when piped.
Storage Instructions
Once cooled and opened, transfer your dulce de leche to an airtight container and refrigerate for up to two weeks. The caramel may thicken when cold but returns to its creamy consistency when gently warmed. For longer storage, portion into small containers and freeze for up to three months.
If you make large batches, consider canning properly in sterilized jars for pantry storage. Always mark with the preparation date to track freshness.
Serving Suggestions
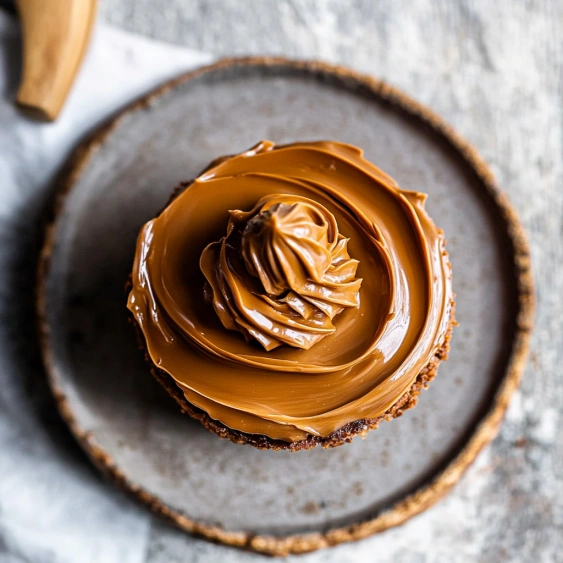
Dulce de leche shines as a filling for cakes, cookies or crepes. Spread between layers of vanilla cake for an elevated twist on traditional frosting. Warm it slightly and drizzle over vanilla ice cream or use as a dip for fresh apple slices.
For an impressive yet simple dessert, fold a few spoonfuls into freshly whipped cream to create a dulce de leche mousse. This caramel spread also makes a delicious topping for breakfast items like pancakes, waffles or French toast for a special occasion treat.
 Pin it
Frequently Asked Questions
- → Is it safe to pressure cook an unopened can?
Yes, it's safe as long as you follow key precautions: ensure the can has no dents, completely submerge it in water, and most importantly, allow it to cool completely before opening to prevent hot caramel splatters.
- → How long does homemade dulce de leche last?
When transferred to an airtight container and refrigerated, homemade dulce de leche typically lasts 2-3 weeks. For longer storage, you can freeze portions for up to 3 months.
- → Can I make a thicker or thinner consistency?
Yes, the cooking time determines thickness. For thinner dulce de leche, reduce cooking time to 25-30 minutes. For a thicker, spreadable consistency, increase to 40-45 minutes.
- → What if I don't have an Instant Pot?
You can use any pressure cooker following the same method. Alternatively, you can simmer the can in a large pot of water (fully submerged) for about 3 hours, adding water as needed.
- → How can I use dulce de leche?
Dulce de leche is incredibly versatile. Use it as a spread on toast, filling for crepes, topping for ice cream, filling for cakes, flavoring for coffee, or an ingredient in caramel desserts like banoffee pie.
- → Why must the can cool completely before opening?
The contents remain extremely hot and pressurized even after cooking. Opening while hot can cause the hot caramel to explode out of the can, potentially causing severe burns.