
 Pin it
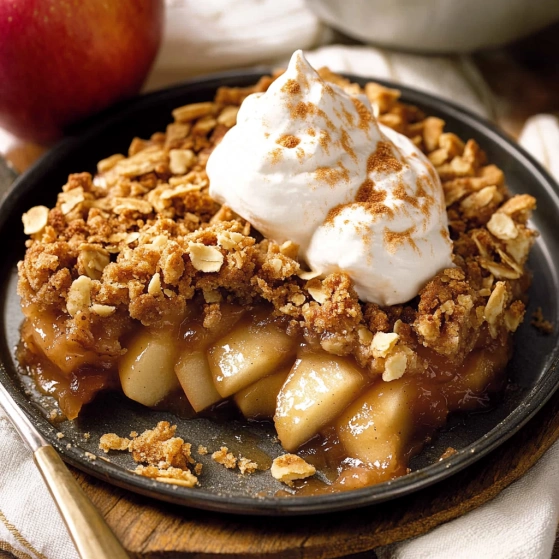
This homemade apple crisp combines the perfect balance of sweet, tender apples with a crunchy, buttery topping that creates the ultimate comfort dessert. I've perfected this recipe over years of autumn baking sessions, tweaking it until it consistently delivers that nostalgic aroma that fills the kitchen and makes everyone gather around.
I first made this apple crisp when my in-laws were visiting during a particularly chilly fall weekend. The scent of cinnamon and baking apples created such a warm atmosphere that it's now become our unofficial welcome tradition whenever family visits.
Ingredients
- Honeycrisp apples: Fresh, firm apples with the perfect balance of sweet and tart flavors that hold their shape during baking
- Lemon juice: Brightens the apple flavor and prevents browning
- Granulated sugar: Provides the right sweetness to balance the fruit's natural tartness
- Flour: Thickens the fruit juices into a luscious sauce
- Cinnamon: The classic warming spice that makes apple desserts irresistible
- Vanilla extract: Adds depth and complexity to the fruit filling
- Kosher salt: Enhances all flavors and creates balance
- Old fashioned rolled oats: Creates that classic crisp texture you can't achieve without them
- Brown sugar: Adds caramel notes and moisture to the topping
- Cold butter: The secret to a perfectly crumbly topping with rich flavor
Step-by-Step Instructions
- Prep Your Oven and Pan:
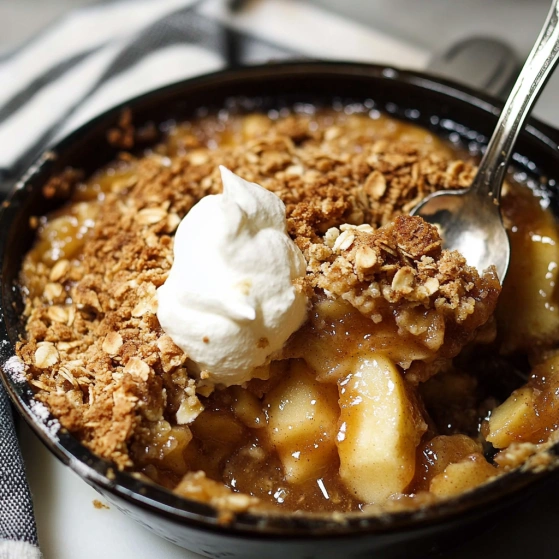
- Heat your oven to 375 degrees and take a moment to lightly grease your 9-inch cast iron skillet. The cast iron creates beautiful caramelization around the edges that you just can't achieve with other baking dishes.
- Create Your Apple Filling:
- In a large bowl, combine your sliced Honeycrisp apples with lemon juice, granulated sugar, flour, cinnamon, vanilla extract, and kosher salt. Use your hands to gently toss everything together, ensuring each apple slice gets evenly coated. This careful mixing ensures consistent sweetness and texture throughout the dessert.
- Transfer to Baking Dish:
- Carefully transfer your seasoned apple mixture to your prepared cast iron skillet, arranging them in an even layer. Don't press them down too firmly as some air pockets will allow for better steam circulation during baking.
- Make the Crisp Topping:
- In a medium bowl, combine flour, old fashioned rolled oats, brown sugar, cinnamon, and kosher salt. Add your cold cubed butter and work it into the dry ingredients using your fingers, a fork, or a pastry cutter. Continue until the mixture resembles coarse crumbs with butter pieces about the size of peas. This creates those perfect little pockets of buttery goodness in the finished crisp.
- Add Topping and Bake:
- Sprinkle your topping evenly over the prepared apples, covering the entire surface. Place in your preheated oven and bake for 30 minutes, or until you can easily pierce the apples with a fork and the topping has turned a beautiful dark golden brown. The bubbling around the edges is your signal that the filling has thickened perfectly.
 Pin it
You Must Know
My absolute favorite part of this recipe is watching guests take their first bite topped with melting vanilla ice cream. There's always that moment of closed eyes and that little sigh that tells me the dessert has hit the perfect comfort food spot.
Choosing the Best Apples
While this recipe calls for Honeycrisp apples, don't feel limited to just one variety. I often use a mix of apples for more complex flavor. Granny Smith provides tartness, while Jonagold or Braeburn add sweetness. The key is using firmer apples that won't turn to mush during baking. Avoid softer varieties like McIntosh or Red Delicious which break down too quickly. For the best texture, slice your apples to a consistent thickness of about ¼ inch so they cook evenly.
Make-Ahead and Storage Options
This apple crisp is remarkably forgiving when it comes to storage. You can refrigerate leftovers for up to 5 days in an airtight container. To reheat, warm individual portions in the microwave for 30-45 seconds, or place the entire crisp back in a 350°F oven for 15-20 minutes until heated through. The topping might lose some crispness in the refrigerator, but a quick stint in the oven will revive it beautifully. You can also freeze baked apple crisp for up to 3 months just be sure to thaw overnight in the refrigerator before reheating.
Customization Ideas
The beauty of this apple crisp recipe lies in its adaptability. Try adding a handful of fresh or dried cranberries for a tart contrast. Chopped nuts like walnuts or pecans in the topping provide extra crunch and nutty flavor. For a more indulgent version, drizzle caramel sauce over the apples before adding the topping. Spice lovers can add a pinch of nutmeg, cardamom, or ginger to the filling for more complex warmth. During the holidays, I sometimes add a tablespoon of bourbon to the apple mixture for a sophisticated twist that everyone loves.
 Pin it
Serving Suggestions
While vanilla ice cream is the classic pairing, don't stop there. Try serving your warm apple crisp with freshly whipped cream, a dollop of Greek yogurt, or a drizzle of creme anglaise. For breakfast, top with a spoonful of plain yogurt and a drizzle of maple syrup. Apple crisp also makes a beautiful dessert for entertaining when served in individual ramekins topped with a cinnamon stick. For an elegant presentation, serve in champagne coupes with a small scoop of cinnamon ice cream.
Frequently Asked Questions
- → What's the best type of apple to use for apple crisp?
Honeycrisp apples are excellent for this dish as they hold their shape when baked while providing a nice balance of sweetness and acidity. Other good options include Granny Smith (more tart), Braeburn, or Jonagold. You can also use a mix of apple varieties for more complex flavor.
- → Can I make apple crisp ahead of time?
Yes! You can prepare the entire dish and refrigerate it unbaked for up to 24 hours. You can also bake it completely, cool it, and refrigerate for 3-4 days. Reheat in a 350°F oven until warmed through (about 20 minutes).
- → Do I need to peel the apples?
This recipe uses unpeeled apples, which adds texture and nutrition. However, peeling is a personal preference - if you prefer no peels, feel free to peel them. The cooking time remains the same either way.
- → Can I make this dessert gluten-free?
Absolutely! Simply substitute the all-purpose flour with a gluten-free flour blend in both the filling and topping. Make sure your oats are certified gluten-free as well, as some may have cross-contamination.
- → Why is my topping not crispy?
For a crispy topping, make sure your butter is cold when mixing the topping ingredients. Also, don't overwork the topping mixture - you want pea-sized butter pieces distributed throughout. If it's still not crispy, you can increase the baking temperature to 400°F for the last 5-10 minutes.
- → Can I freeze apple crisp?
Yes, apple crisp freezes well. You can freeze it either before or after baking. For unbaked crisp, freeze in an airtight container for up to 3 months and bake from frozen (adding 15-20 minutes to baking time). For baked crisp, cool completely before freezing and reheat in a 350°F oven when ready to serve.