
 Pin it
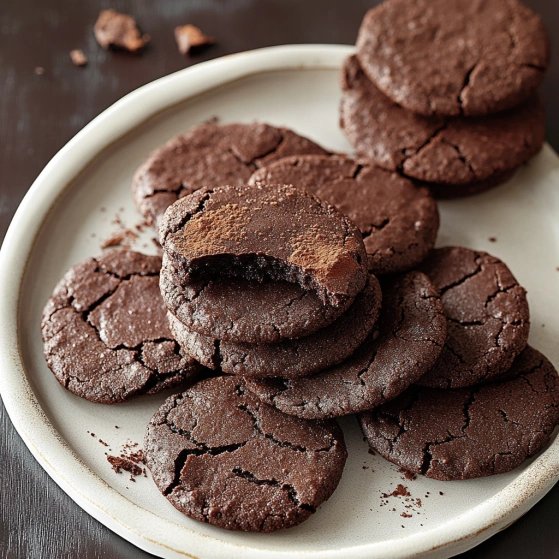
This homemade chocolate wafer cookie recipe transforms simple pantry ingredients into crisp, rich treats perfect for snacking, making ice cream sandwiches, or crushing into pie crusts. The deep chocolate flavor and satisfying snap make these cookies irresistible for chocolate lovers of all ages.
I discovered this recipe when looking for cookies to make homemade ice cream sandwiches one summer. After one batch, they quickly became my go-to chocolate cookie base for everything from simple snacking to elaborate dessert components.
Ingredients
- All-purpose flour: Forms the structure without making cookies too dense
- Unsweetened cocoa powder: Provides that deep chocolate flavor without excessive sweetness
- Salt: Balances the sweetness and enhances the chocolate notes
- Unsalted butter: Gives richness and helps create that perfect crisp texture
- Granulated sugar: Sweetens while helping create crisp edges
- Vanilla extract: Adds depth and complements the chocolate flavor
- Milk: Helps bind everything and creates the perfect consistency
Step-by-Step Instructions
- Preparation:
- Preheat your oven to a moderate 350°F and line your baking sheets with parchment paper. This temperature allows the cookies to cook evenly without burning the chocolate, while parchment prevents sticking and ensures easy cleanup.
- Combine Dry Ingredients:
- Whisk together flour, cocoa powder, and salt thoroughly in a medium bowl. Take care to break up any cocoa powder lumps for even distribution throughout the dough. This careful combining ensures consistent flavor and texture in every cookie.
- Cream Butter and Sugar:
- Beat softened butter and granulated sugar together until the mixture becomes noticeably lighter in color and fluffy in texture. This process typically takes about 3 minutes with an electric mixer and incorporates air that helps create the perfect cookie structure.
- Add Vanilla and Milk:
- Pour in the vanilla extract and milk, mixing until the wet ingredients are completely incorporated and smooth. The mixture may look slightly curdled at first but will come together nicely with thorough mixing.
- Incorporate Dry Ingredients:
- Add the cocoa mixture gradually to your wet ingredients, mixing just until a cohesive dough forms. Overworking can develop gluten and lead to tough cookies, so stop mixing once everything is combined to maintain tenderness.
- Roll and Slice:
- Form the dough into a log about 1 to 1.5 inches in diameter, wrap it tightly in plastic wrap, and refrigerate for 30 minutes. This chilling step is crucial as it firms the butter, making the dough easier to slice and helping the cookies maintain their shape during baking.
- Bake:
- Place thinly sliced cookie rounds on prepared baking sheets, leaving about an inch between each. Bake for 8 to 10 minutes until the edges are set but centers still look slightly soft. Watch carefully as dark cookies can be tricky to judge doneness by color alone.
- Cool and Enjoy:
- Transfer cookies to a wire cooling rack immediately after removing from the oven. These cookies will continue firming as they cool, developing their characteristic snap. Once completely cooled, store in an airtight container to maintain crispness.
 Pin it
Cocoa powder is truly the star ingredient here. I always opt for Dutch processed cocoa when possible as it provides a smoother, more intense chocolate flavor. My family knows these cookies are coming when they smell that distinctive rich chocolate aroma filling the kitchen.
Storage Solutions
These chocolate wafer cookies maintain their crispness beautifully when stored properly. Keep them in an airtight container at room temperature for up to two weeks. For longer storage, the cookies freeze exceptionally well for up to three months. I often make double batches and freeze half for later use. If the cookies soften over time from humidity, you can refresh their crispness with a quick five minute reheat in a 300°F oven.
Creative Variations
While perfect in their classic form, these versatile cookies welcome customization. Add a teaspoon of espresso powder to intensify the chocolate flavor without tasting like coffee. For mint chocolate wafers, incorporate a quarter teaspoon of peppermint extract. Spice lovers might enjoy adding a dash of cinnamon or even a pinch of cayenne for Mexican chocolate inspired wafers. During holidays, I sometimes press a pattern into the dough log before slicing for decorative edges.
Serving Suggestions
These chocolate wafers shine in numerous dessert applications beyond simple snacking. Crush them to create the perfect chocolate crust for cheesecakes or icebox cakes. Sandwich vanilla ice cream between two cookies for homemade ice cream sandwiches. My personal favorite use is making a classic icebox cake by layering the cookies with lightly sweetened whipped cream and refrigerating overnight, allowing the cookies to soften into cake like layers. They also make delightful accompaniments to afternoon coffee or tea.
 Pin it
Frequently Asked Questions
- → How long do homemade chocolate wafer cookies stay fresh?
When stored in an airtight container at room temperature, these cookies will maintain their freshness and crisp texture for up to 2 weeks. For longer storage, they can be frozen for up to 3 months in a freezer-safe container with parchment between layers.
- → Can I make the dough ahead of time?
Absolutely! The dough can be prepared and rolled into logs up to 3 days in advance when kept refrigerated. You can also freeze the dough logs for up to 2 months - just thaw in the refrigerator overnight before slicing and baking.
- → What desserts can I make with these chocolate wafers?
These versatile cookies can be used to create icebox cakes, pie crusts, cookie crumbs for cheesecake bases, ice cream sandwiches, or crushed as a topping for various desserts. They're an excellent substitute for store-bought chocolate wafers in any recipe.
- → How thin should I slice the cookie dough?
For the best texture, slice the chilled dough log into rounds approximately 1/8 to 1/4 inch thick. Thinner slices will produce crispier cookies that are perfect for dessert components, while slightly thicker slices will yield cookies with a bit more chew in the center.
- → Can I add other flavors to these chocolate wafers?
Yes! Consider adding 1/2 teaspoon of espresso powder to enhance the chocolate flavor, a pinch of cinnamon for warmth, or orange zest for a citrus twist. You can also incorporate mini chocolate chips or finely chopped nuts for texture variation.
- → How can I tell when the cookies are done baking?
The cookies are ready when the edges are set but the centers still appear slightly soft, typically after 8-10 minutes at 350°F. They will continue to firm up as they cool. Overbaking can make them bitter, so watch them carefully during the final minutes of baking.