
 Pin it
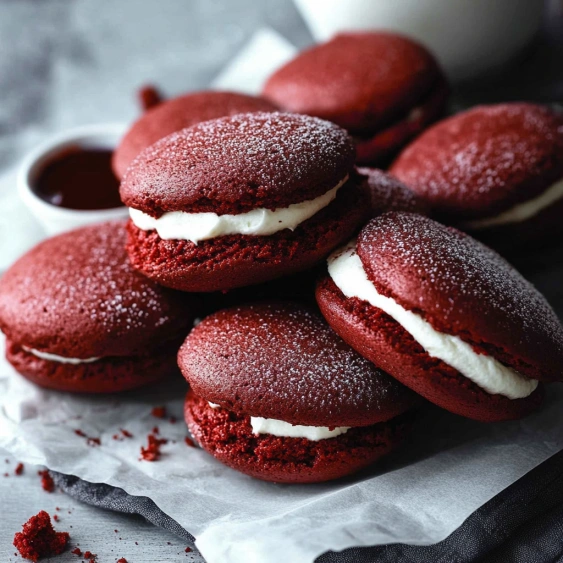
This classic red velvet whoopie pie recipe transforms the beloved cake flavor into delightful handheld treats. The soft, cake-like cookies sandwich a creamy raspberry-infused filling, creating the perfect balance of chocolatey goodness with bright berry notes. Each bite delivers that distinctive red velvet flavor in a portable, gluten-free format that's perfect for gatherings or special treats.
I first made these for my niece's birthday when she was diagnosed with celiac disease. Seeing her face light up when she realized she could enjoy these without worry made them an instant family tradition for celebrations.
Ingredients
For the Whoopie Pies
- Gluten free flour: 2 cups, provides the structure while keeping these treats celiac friendly
- Unsweetened cocoa powder: 3 tablespoons, gives that subtle chocolate flavor characteristic of red velvet
- Baking soda: 1 teaspoon, ensures proper rise and texture
- Salt: ½ teaspoon, balances sweetness and enhances flavors
- Unsalted butter or vegan baking stick: 1 stick, creates tenderness and richness
- Light brown sugar: 1 cup packed, adds moisture and caramel notes
- Cornstarch and water mixture: acts as an egg replacer for binding
- Milk of choice: 1 cup, adds moisture while accommodating dairy sensitivities
- White vinegar: 1 tablespoon, reacts with baking soda for proper rise
- Pure vanilla extract: 2 teaspoons, enhances overall flavor
- Red food coloring: 1 tablespoon plus 1 teaspoon, creates that signature vibrant color
For the Filling
- Frozen raspberries: ½ cup, provides natural color and bright flavor
- Granulated sugar: ¼ cup, sweetens and helps break down the berries
- Vegan baking stick: ½ cup, creates a creamy base without dairy
- Confectioners' sugar: 3 cups plus 3 tablespoons, provides structure and sweetness
- Water: 3 tablespoons, adjusts consistency as needed
- Pure vanilla extract: ½ teaspoon, rounds out the flavor profile
Step-by-Step Instructions
- Prepare Your Oven and Pan:
- Preheat oven to 350 degrees Fahrenheit and line a baking sheet with parchment paper. The parchment prevents sticking and ensures even baking of these delicate cookies.
- Combine Dry Ingredients:
- In a large bowl whisk together the gluten free flour, cocoa powder, baking powder, and salt. This uniform distribution prevents unpleasant pockets of any single ingredient.
- Make Buttermilk Substitute:
- Measure out 1 cup milk and add the tablespoon of white vinegar. Stir and let sit for 5 to 10 minutes until it becomes slightly chunky. This creates a buttermilk substitute that adds tenderness to the final product.
- Prepare Egg Replacement:
- Mix cornstarch and water in a small bowl until thin and watery. It will initially be thick and tacky but keep stirring until it loosens. This mixture helps bind ingredients together in place of eggs.
- Cream Butter and Sugar:
- Beat softened butter or vegan baking stick until soft and creamy for about 1 to 2 minutes. Then add brown sugar and beat on medium speed until fluffy and well combined. This creates air pockets for a lighter texture.
- Add Wet Ingredients:
- Beat in the cornstarch water mixture followed by the milk vinegar mixture and vanilla. Scrape down bowl sides to ensure even mixing. The order matters for proper emulsification.
- Incorporate Dry Ingredients:
- On slow speed gradually add the dry ingredients and mix until just combined. Overmixing can develop the gluten in the flour making tough cookies.
- Add Food Coloring:
- Mix in red food coloring until fully incorporated and batter turns deep red. The vibrant color is the signature element of red velvet.
- Portion and Shape Cookies:
- Scoop batter onto prepared sheets with 2 inches between each cookie. Wet your fingers and gently press each mound into a dome shape as gluten free batters hold their shape during baking.
- Bake to Perfection:
- Bake for 16 to 17 minutes until set. Allow to cool on the baking sheet as they will be fragile while hot.
- Prepare Raspberry Puree:
- In a saucepan over medium heat combine frozen raspberries and granulated sugar. Stir constantly for about 5 minutes until berries liquefy and sugar dissolves. Mash raspberries with the back of your spoon.
- Strain Raspberry Mixture:
- Set a strainer over a bowl and strain the raspberry mixture to remove seeds. You need approximately 1 tablespoon of liquid for the filling.
- Make Cream Filling:
- Beat softened vegan baking stick until creamy then add confectioners' sugar, water, strained raspberry liquid, and vanilla. Beat until smooth and combined. If the raspberry liquid has solidified slightly use a spatula to incorporate it fully.
- Assemble Whoopie Pies:
- Once cookies are completely cool, spread filling on the flat side of one cookie and top with another to create a sandwich. Press gently to distribute filling evenly.
 Pin it
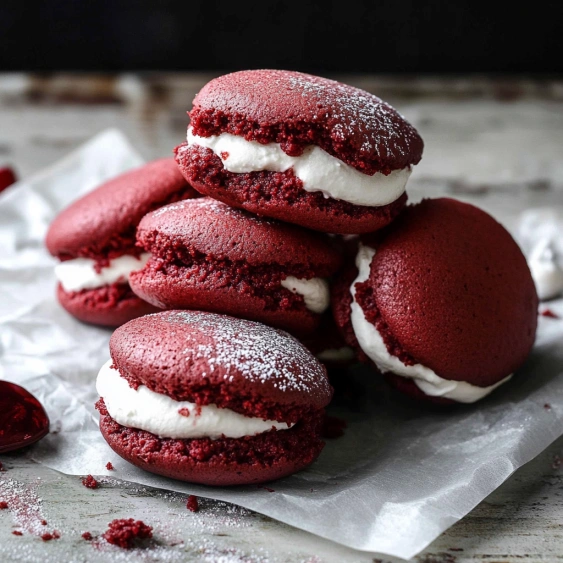
The secret to these whoopie pies is the combination of cocoa and vinegar which creates that distinctive red velvet flavor profile. My grandmother always said red velvet was about the subtle tang not just the color and this recipe captures that perfectly even without buttermilk.
Storage Tips
These whoopie pies stay fresh in an airtight container at room temperature for up to 2 days. For longer storage refrigerate them for up to a week though the texture is best when brought back to room temperature before serving. The cookies can also be frozen unfilled for up to 3 months just thaw at room temperature and add filling when ready to serve. Keep them separated with parchment paper to prevent sticking.
Troubleshooting Common Issues
If your whoopie pies spread too much during baking your butter might have been too soft. Try chilling the batter for 30 minutes before scooping. For cookies that are too dry you might have overbaked them or used too much flour. Remember that different gluten free flour blends absorb moisture differently so you may need to adjust liquid slightly. If the filling is too runny add more confectioners' sugar a tablespoon at a time until it reaches spreading consistency.
 Pin it
Variations to Try
For a more traditional red velvet experience substitute the raspberry filling with a classic cream cheese frosting. You can add different fruit purees to the filling like blackberry or strawberry for different flavor profiles. During the holidays add peppermint extract to the filling and garnish with crushed candy canes for a festive touch. You can also make mini whoopie pies by using a smaller scoop for more bite sized treats perfect for parties.
Frequently Asked Questions
- → Can I make these Red Velvet Whoopie Pies without food coloring?
Yes, you can omit the food coloring entirely. Your whoopie pies will have a brown chocolate appearance instead of the red color, but they'll still taste delicious. Alternatively, you can use natural food coloring like beet powder for a more subtle red hue.
- → How should I store these whoopie pies?
Store assembled whoopie pies in an airtight container in the refrigerator for up to 5 days. Let them come to room temperature before serving for the best texture and flavor. You can also freeze them for up to 3 months.
- → Can I make these with regular flour instead of gluten-free?
Absolutely! Simply substitute the gluten-free flour with the same amount of all-purpose flour. The texture may be slightly different, but they will work perfectly fine with regular flour.
- → What can I use instead of cornstarch and water mixture?
The cornstarch and water mixture acts as an egg substitute. You can use 2 regular eggs instead if you don't need the recipe to be egg-free. Alternatively, other egg substitutes like applesauce or commercial egg replacers would work.
- → Can I use a different filling instead of raspberry?
Yes! This recipe works well with many different fillings. You could use strawberries instead of raspberries, or skip the fruit entirely for a classic cream cheese frosting. Chocolate ganache or vanilla buttercream would also be delicious alternatives.
- → Why did my whoopie pies spread too much during baking?
This could be due to butter that was too soft or warm, or from overmixing the batter. Make sure your butter is at cool room temperature, not melted. Also, be sure to follow the tip about shaping the cookies before baking, as gluten-free batters tend to hold their shape rather than spreading naturally.