
 Pin it
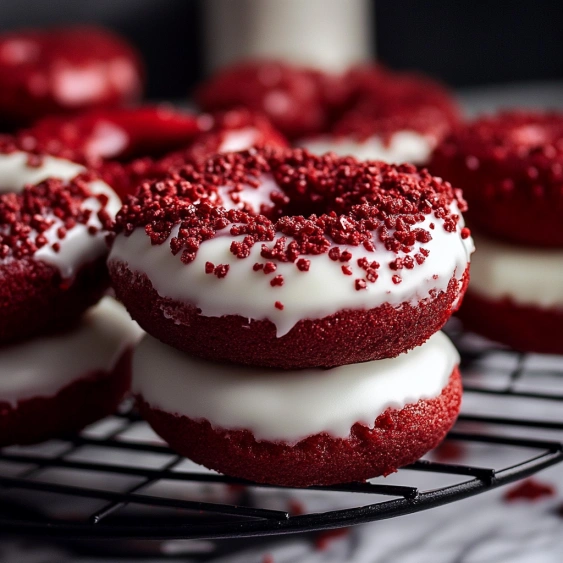
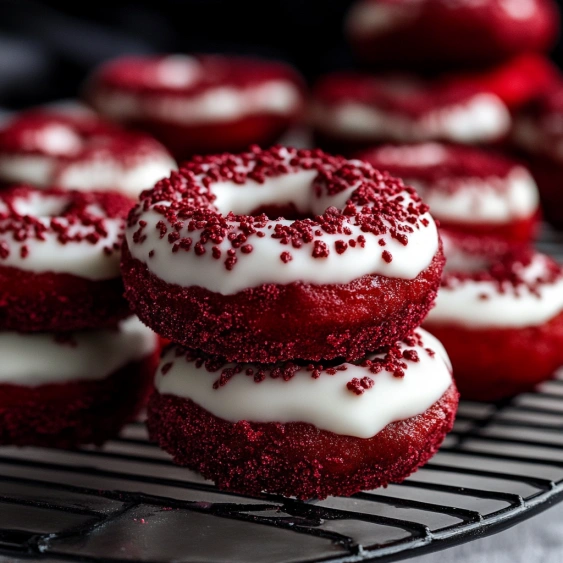
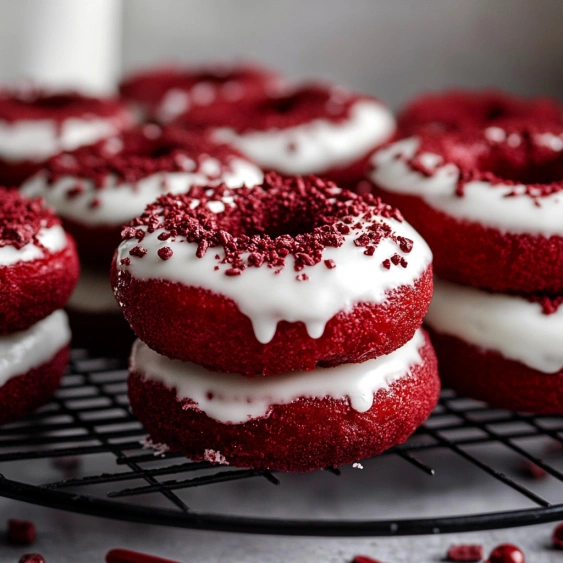
This red velvet donut recipe transforms the classic cake flavor into perfect homemade donuts with a rich cream cheese frosting and signature crimson color. Best of all, they're gluten-free so everyone can enjoy this bakery-style treat at home!
I first created these donuts for my niece's birthday when she requested something red velvet but needed gluten-free options. The look on her face when she bit into these donuts made all the effort worthwhile, and they've become our special celebration treat ever since.
Ingredients
- Gluten free flour: 1.5 cups forms the base of our donuts without the gluten
- Granulated sugar: ¾ cup provides sweetness and helps create that tender crumb
- Cocoa powder: ⅓ cup gives that signature red velvet chocolate note using half Dutch and half Dark cocoa for depth
- Baking powder: 1 teaspoon ensures proper rise for fluffy donuts
- Salt: ½ teaspoon enhances all flavors and balances sweetness
- Milk: 1 cup any variety works here for moisture and tenderness
- White vinegar: 1 tablespoon plus 1 teaspoon creates the tang and helps activate the red color
- Cornstarch: 4 heaping tablespoons mixed with water replaces eggs brilliantly for binding
- Unsalted butter: ½ stick melted adds richness and moisture
- Vanilla extract: 1 teaspoon provides essential flavor complexity
- Red food coloring: 1 tablespoon plus 1 teaspoon creates that signature color
- Confectioners sugar: 1.5 cups creates a smooth sweet base
- Unsalted butter: 4 tablespoons adds richness and stability
- Water: 1-2 tablespoons helps achieve perfect spreading consistency
- Vanilla: 1 teaspoon adds warmth and depth of flavor
- Salt: pinch balances sweetness and enhances flavor
- One baked donut: for crumb topping adds visual appeal and texture
Step-by-Step Instructions
- Prepare Your Equipment:
- Preheat your oven to 350°F and thoroughly grease two donut pans with vegetable oil. Be sure to get into all the crevices to ensure easy removal later. If you only have one pan, you'll need to bake in batches.
- Create Your Milk Mixture:
- Measure one cup of your preferred milk and add one tablespoon of white vinegar. Stir gently and set aside for at least 5 minutes. This creates a homemade buttermilk that adds tenderness and activates the red color.
- Prepare Egg Replacement:
- In a medium bowl, thoroughly mix the cornstarch and water until completely smooth and watery. It will initially be thick and tacky but keep stirring until it thins out. This mixture provides the binding properties that eggs normally would.
- Combine Dry Ingredients:
- In a large bowl, whisk together the gluten free flour, granulated sugar, cocoa powder, baking powder, and salt until evenly distributed. This ensures even flavor and leavening throughout the donuts.
- Melt The Butter:
- Place the butter in a microwave safe bowl and heat in 20-second increments until completely melted. Add the cornstarch water mixture and stir to combine, making sure to remix if it thickens.
- Mix Wet Ingredients:
- Stir the milk and vinegar mixture which will appear chunky and curdled. Add this to the melted butter mixture along with the vanilla, additional teaspoon of white vinegar, and red food coloring. Whisk everything until fully combined.
- Combine Wet And Dry Ingredients:
- Pour the liquid ingredients into the dry ingredients. Begin mixing with a whisk but switch to a spatula when the batter starts thickening. Mix just until combined to ensure tender donuts.
- Fill Donut Pans:
- Transfer the batter to a pastry bag or zip-top bag with a corner cut off. Pipe the batter into the donut wells, filling almost to the top. This method creates cleaner donuts than spooning the batter.
- Bake The Donuts:
- Bake for approximately 15 minutes until the donuts spring back when lightly touched. The tops should be set but still feel slightly soft. Avoid overbaking which can dry them out.
- Cool And Remove:
- Let the donuts cool in the pan for 2-3 minutes before gently loosening with a small spatula and removing to a cooling rack. Allow them to cool completely before frosting to prevent melting.
- Prepare The Frosting:
- Combine the confectioners sugar, softened butter, 1 tablespoon of water, vanilla, and salt in a bowl. Mix with a spatula until smooth, adding more water if needed to reach spreading consistency. The frosting should be thicker than typical glaze.
- Create Donut Crumb Topping:
- Take one fully cooled donut and tear it into very small crumbs with your fingers. This gives a more natural appearance than chopping. Spread the crumbs on a flat plate for easy application.
- Frost And Decorate:
- Use a butter knife to spread frosting on each cooled donut. Immediately sprinkle the donut crumbs onto the frosting before it sets. Work with one donut at a time for best adhesion of the crumbs.
 Pin it
The secret to perfect red velvet anything is that hint of tanginess from the vinegar. When I first started baking these donuts, I accidentally doubled the vinegar and discovered that extra tang made them taste more authentic to the classic red velvet flavor profile we all love. Sometimes the best discoveries come from happy accidents in the kitchen!
Storage Tips
These donuts will stay fresh at room temperature in an airtight container for up to 3 days. The texture is best on day one but they remain delicious. If storing longer, I recommend freezing unfrosted donuts in a sealed freezer bag for up to 2 months. Thaw at room temperature and frost just before serving. Avoid refrigerating as this dries them out quickly.
Ingredient Substitutions
For those avoiding food coloring, beetroot powder can create a natural red hue, though it will be more subtle. Start with 2-3 tablespoons in place of the artificial color. Dairy-free milk works perfectly in this recipe. Almond, oat, or soy milk all produce excellent results. For the frosting, cream cheese can replace half the butter for a more traditional red velvet flavor profile. Simply use 2 tablespoons butter and 2 tablespoons cream cheese.
Serving Suggestions
These donuts pair beautifully with coffee or tea for a special breakfast or afternoon treat. For an elegant dessert presentation, slice donuts in half horizontally and fill with a layer of cream cheese frosting before replacing the top. Garnish with fresh berries for a pop of color. During holidays, customize with seasonal sprinkles or colored sugar instead of donut crumbs for festive variations.
 Pin it
Frequently Asked Questions
- → Can I make these red velvet donuts without food coloring?
Yes, you can omit the red food coloring if preferred. The donuts will have a rich brown color from the cocoa powder and still taste delicious, though they won't have the classic red velvet appearance.
- → What can I substitute for the cornstarch mixture?
The cornstarch mixture acts as an egg replacer. You could substitute 2 eggs instead, though this would change the vegan status of the recipe if that's important to you.
- → How should I store these donuts?
Store frosted donuts in an airtight container at room temperature for up to 2 days, or refrigerate for up to 5 days. For best freshness, you can also freeze unfrosted donuts for up to 3 months.
- → Can I make these as regular (non-gluten-free) donuts?
Absolutely! Simply substitute the gluten-free flour with the same amount of all-purpose flour for a traditional version.
- → Do I need a special donut pan to make these?
Yes, this recipe is designed for baked donuts using a donut pan. If you don't have one, you could adapt the batter for muffins or a small cake, though baking times would need to be adjusted.
- → What makes these donuts 'red velvet'?
The combination of cocoa powder, red food coloring, and a hint of vinegar creates the classic red velvet flavor and appearance. Traditional red velvet relies on this specific combination for its distinctive taste.