
 Pin it
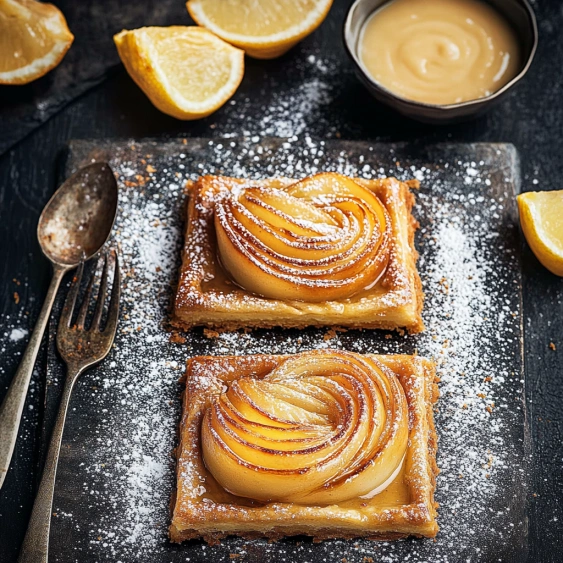
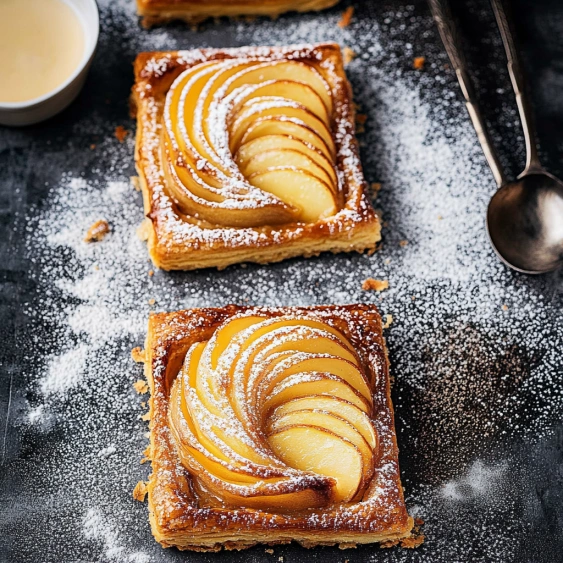
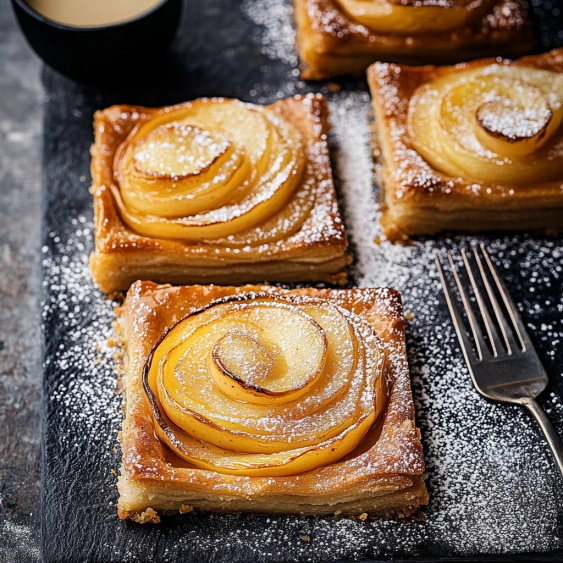
These elegant pear puff pastry tarts transform simple ingredients into a bakery-worthy dessert that will impress any guest. The combination of buttery pastry and tender, caramelized pears creates a dessert that looks sophisticated but requires minimal effort.
I first made these tarts for a last-minute dinner party and they received more compliments than desserts I had spent hours preparing. The simplicity of good puff pastry combined with fresh pears creates a dessert that tastes like it came from a French patisserie.
Ingredients
- Puff pastry: Store-bought or homemade rough puff pastry creates the flaky, buttery base that elevates this simple dessert
- Pears: Choose firm but ripe pears for the best texture and flavor when baked
- Almond flour: Absorbs excess moisture from the pears and adds a subtle nutty flavor
- Brown sugar: Caramelizes beautifully while baking and adds depth of flavor
- Egg: Helps create that golden shine on the pastry edges
- Splash of milk: Thins the egg wash for easier application
Step-by-Step Instructions
- Prepare the pastry:
- Thaw puff pastry sheets until workable but still cold. This is crucial for maintaining those beautiful flaky layers. If the pastry becomes too warm at any point during preparation, place it in the refrigerator for a few minutes to chill.
- Prepare the pears:
- Cut pears lengthwise and remove cores carefully. Slice the pear halves very thinly so they will cook evenly and arrange beautifully. Use paper towels to blot away excess moisture which could make your pastry soggy.
- Assemble the tarts:
- Cut each pastry sheet into 6 even rectangles. Place half a tablespoon of almond flour in the center of each piece this creates a barrier that absorbs juices from the pears as they bake. Arrange one half pear over the almond flour in a fan pattern. Sprinkle generously with brown sugar to create a caramelized finish.
- Apply egg wash:
- Whisk an egg with a splash of milk until well combined. Brush this mixture around the edges of the pastry but avoid getting it on the pears. This creates a beautiful golden shine and helps seal the edges.
- Bake to perfection:
- Bake at 190C/370F without fan for about 45 minutes. After the first 15 minutes, cover loosely with foil to prevent over-browning. The pastry should be deeply golden and puffed around the edges, with the pears tender and caramelized.
- Cool and serve:
- Allow tarts to cool in the pan for 3 minutes before transferring to a cooling rack. This brief resting period helps the pastry set up and makes them easier to move without breaking.
 Pin it
My favorite part of making these tarts is watching the transformation in the oven. The butter in the pastry creates steam pockets that push the layers apart, creating that irresistible flakiness that makes puff pastry so special. The first time I served these to my in-laws, my mother-in-law asked for the name of the bakery where I had purchased them.
Perfecting Your Pear Selection
The variety of pear you choose will significantly impact the flavor and texture of your finished tarts. Bosc pears hold their shape well during baking and have a naturally sweet, honey-like flavor. Anjou pears are another excellent option, with a firm texture that softens beautifully in the oven without becoming mushy. For the best results, select pears that are ripe but still firm to the touch. If your pears are very ripe, you might want to add an extra half tablespoon of almond flour to absorb the additional juices.
Make-Ahead Options
These tarts are perfect for entertaining because you can prepare them in advance. Assemble the tarts up to the point of baking, then cover and refrigerate for up to 24 hours. When ready to serve, simply bake directly from the refrigerator, adding about 5 minutes to the baking time. For an even quicker dessert option, you can prepare a large batch and freeze them unbaked. Freeze the assembled tarts on a baking sheet until solid, then transfer to freezer bags. Bake directly from frozen, adding 10-15 minutes to the total baking time.
 Pin it
Serving Suggestions
These pear tarts shine in their simplicity, but a few accompaniments can take them to another level. Dust with powdered sugar just before serving for a professional bakery look. For a more indulgent dessert, serve warm with a scoop of vanilla ice cream or a dollop of lightly sweetened whipped cream. A drizzle of caramel sauce creates a decadent finish, especially for fall entertaining. These tarts also pair beautifully with afternoon tea or coffee, making them versatile for any occasion from brunch to dinner parties.
Frequently Asked Questions
- → Can I use homemade puff pastry for these tarts?
Yes, you can use either store-bought puff pastry or homemade rough puff pastry. Both options work well, though store-bought offers convenience while homemade may provide better flavor and texture.
- → Why do you need to add almond flour to the tarts?
The almond flour serves an important purpose - it absorbs excess moisture from the pears during baking, preventing the pastry from becoming soggy. It also adds a subtle nutty flavor that complements the pears.
- → What's the best way to slice the pears for these tarts?
Cut the pears lengthwise first, remove the cores, then slice them very thinly. Thin slices cook more evenly and create an attractive fan pattern on the tarts. Be sure to pat them dry with paper towels to remove excess moisture.
- → How do I prevent my puff pastry from getting too brown?
After the first 15 minutes of baking, cover the tarts loosely with foil to prevent over-browning while allowing them to continue cooking. This ensures a golden exterior while fully cooking the pastry underneath.
- → Can these pear tarts be made ahead of time?
While they're best served fresh, you can store them in an airtight container at room temperature for 2-3 days. They won't be quite as crisp as when freshly baked, but will still taste delicious.
- → What should I do if my puff pastry becomes too warm to work with?
If the pastry becomes warm and difficult to handle, simply place it in the freezer or refrigerator for a few minutes until it firms up. Cold pastry is essential for achieving those flaky, buttery layers.