
 Pin it
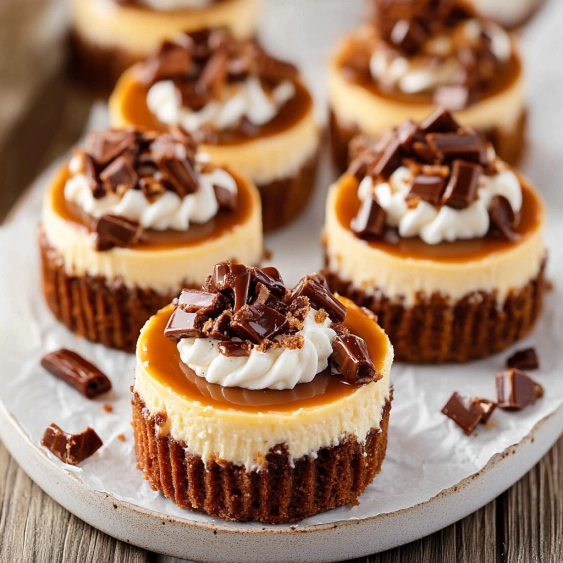
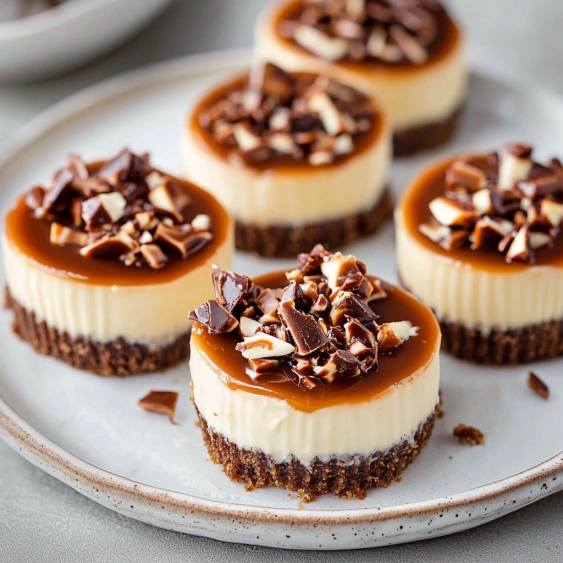
This mini turtle cheesecake recipe transforms a classic dessert into perfect individual servings that deliver all the indulgent flavors of chocolate, caramel, and pecans in every bite. These little treats bring together the creamy texture of cheesecake with the beloved turtle candy flavors for a dessert that feels both special and approachable.
I first made these mini cheesecakes for my sister's birthday when she requested "something with caramel and chocolate" and they've become my most requested dinner party contribution. The combination of rich cheesecake with warm caramel and chocolate creates that perfect balance of flavors that makes everyone think you spent hours in the kitchen.
Ingredients
- Graham cracker crumbs: Serve as the foundation with their subtle honey sweetness and crisp texture. Look for packages of pre-crushed crumbs to save time.
- Unsalted butter: Binds the crust together while allowing you to control the salt level. Quality butter makes a difference in flavor.
- Full fat cream cheese: Provides that signature tangy richness crucial for authentic cheesecake flavor. Always use blocks, not spreadable versions.
- Granulated sugar: Balances the tanginess without overwhelming the delicate flavor profile. Regular white sugar works perfectly.
- Vanilla extract: Adds warmth and depth to the filling. Pure extract rather than imitation makes a noticeable difference.
- Large eggs: Provide structure and that silky mouthfeel. Room temperature eggs incorporate more evenly.
- Jarred caramel sauce: Creates that signature turtle flavor with minimal effort. Choose a thick, premium variety for best results.
- Semisweet chocolate chips: Melt perfectly for the ganache. The balanced sweetness complements the other components beautifully.
- Heavy whipping cream: Creates silky ganache with proper fat content for ideal texture. Look for cream with at least 36% fat content.
- Chopped pecans: Add the essential crunch and nutty dimension. Toasting them briefly enhances their flavor significantly.
Step-by-Step Instructions
- Prepare the crust:
- Combine graham cracker crumbs with melted butter until they resemble wet sand with a texture that holds together when squeezed. Press firmly into muffin cups using the bottom of a measuring cup to create an even, compact layer with slightly raised edges. The brief 5-minute bake sets the crust and brings out a subtle toasty flavor that complements the filling.
- Create the cheesecake base:
- Beat cream cheese and sugar until completely smooth and no lumps remain, taking care to scrape down the sides of the bowl frequently. The mixture should look fluffy and slightly lighter in color, indicating that air has been incorporated for the ideal texture. Room temperature cream cheese is absolutely essential here as cold cream cheese will remain lumpy.
- Add eggs and vanilla:
- Mix just until incorporated, stopping as soon as the mixture looks homogeneous. Overbeating at this stage incorporates too much air, which leads to cracks during baking. The mixture should flow slowly off the beater in a ribbon-like texture, indicating the perfect consistency.
- Bake with care:
- Fill liners almost to the top as these cheesecakes don't rise significantly during baking. Look for the slightly jiggly center which indicates perfect doneness—the edges should appear set, but the center should have a gentle wobble when the pan is lightly shaken. This slight underbaking ensures the creamy texture that makes cheesecake so luxurious.
- Cool properly:
- Allow cheesecakes to cool gradually to prevent cracking and condensation. The minimum four-hour chill allows flavors to develop fully and the texture to set to that perfect creamy consistency. The patience required here pays off in texture and flavor.
- Create the signature toppings:
- Layer caramel sauce first, which will slightly sink into the cheesecake creating a flavor bridge. Follow with room temperature ganache, which should be thick enough to stay in place, but fluid enough to settle into a smooth layer. Finish with chopped pecans which add both visual appeal and essential crunch for the full turtle experience.
 Pin it
My grandmother always insisted that the secret to perfect cheesecake is patience, particularly with mixing the eggs. She taught me to beat the cream cheese and sugar thoroughly, but to treat the eggs with a gentle hand. This method creates that silky smooth texture that makes these mini cheesecakes feel so luxurious despite their simple preparation.
Make Ahead and Storage
These mini cheesecakes actually benefit from being made ahead of time. The flavors meld and develop during refrigeration, making them ideal for party planning. Without toppings they can be refrigerated for up to five days in an airtight container.
For longer storage, freeze the plain cheesecakes without toppings on a baking sheet until solid, then transfer to freezer bags. They will keep for up to three months. Thaw overnight in the refrigerator and add toppings just before serving for the freshest presentation.
Creative Variations
While the classic turtle combination is beloved, you can easily customize these mini cheesecakes. Try a strawberry variation with fresh berries and strawberry sauce or go for an Oreo crust with white chocolate ganache. The versatile base recipe works beautifully with countless flavor combinations.
For holiday versions, add peppermint extract to the ganache for Christmas or pumpkin puree and spices to the cheesecake mixture for Thanksgiving. The individual serving size makes them perfect for dessert tables where guests can try different varieties.
Serving Suggestions
These mini cheesecakes shine as the star of a dessert table but can be elevated further with thoughtful accompaniments. Serve alongside fresh berries, a small scoop of vanilla bean ice cream, or even a shot of espresso for a sophisticated coffee pairing.
For special occasions, create a cheesecake bar with various toppings, allowing guests to customize their own. Include different sauces, chopped nuts, whipped cream, and fresh fruits for an interactive dessert experience that feels special but requires minimal last-minute effort.
 Pin it
Frequently Asked Questions
- → How do I prevent my mini cheesecakes from cracking?
To prevent cracking, avoid over-mixing the eggs as this introduces air bubbles. Mix the eggs just until the yolks break. Also, don't overbake - the centers should still be slightly jiggly when you remove them from the oven.
- → Can I make these mini cheesecakes ahead of time?
Yes! These mini cheesecakes are perfect for making ahead. After baking and cooling to room temperature, refrigerate them for at least 4 hours. For overnight storage, loosely cover with plastic wrap. Add the toppings just before serving for the best presentation.
- → What nuts work best for the topping?
Pecans are traditional for turtle desserts and work beautifully here, but you can substitute walnuts or even toasted almonds if preferred. For the best flavor, lightly toast the nuts before chopping.
- → Can I freeze these mini cheesecakes?
Yes, these freeze well! Freeze the plain cheesecakes (without toppings) in an airtight container for up to 2 months. Thaw overnight in the refrigerator, then add the caramel, chocolate ganache, and nuts before serving.
- → What's the best way to serve the mini cheesecakes?
Serve these mini cheesecakes well-chilled for the best texture and flavor. Remove them from the refrigerator about 10-15 minutes before serving to take the chill off slightly. Add the toppings just before serving for the most impressive presentation.
- → Can I use low-fat cream cheese?
Full-fat cream cheese is recommended for the richest flavor and creamiest texture. Low-fat cream cheese contains more moisture which can affect the structure and setting of the cheesecakes.