
 Pin it
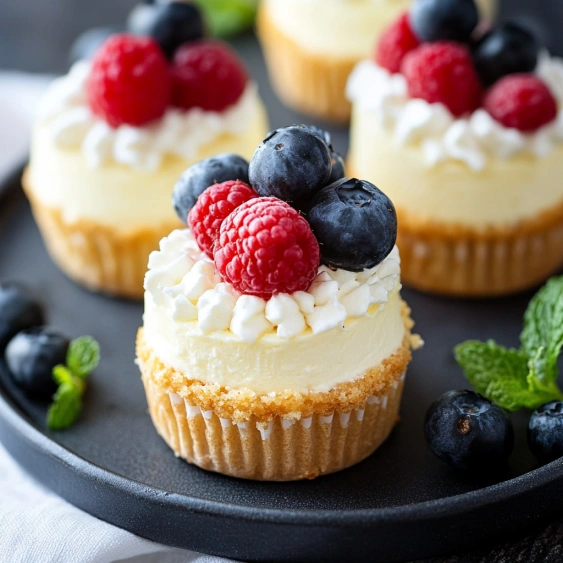
This mini cheesecake recipe transforms a classic dessert into perfectly portioned bites that deliver all the creamy indulgence without the fuss of a full-sized cheesecake. These delightful treats feature a buttery graham cracker crust topped with velvety smooth cream cheese filling, creating an irresistible combination that's perfect for any occasion.
I first made these mini cheesecakes for my daughter's birthday party when I needed a dessert that could be easily served without slicing. They were such a hit that they've become my go-to dessert for gatherings, with guests always requesting the recipe to take home.
Ingredients
- Graham cracker crumbs: Form the perfect textured base with a subtle sweetness that complements the filling
- Unsalted butter: Binds the crust together while adding richness; look for high quality butter for best flavor
- Full fat cream cheese: Provides that signature tangy creaminess; use Philadelphia for consistent results
- Granulated sugar: Balances the tanginess without overwhelming the delicate cheese flavor
- Vanilla extract: Adds warmth and depth to the filling; use pure extract not imitation for best results
- Large eggs: Provide structure and richness to the filling; bring to room temperature for smoother mixing
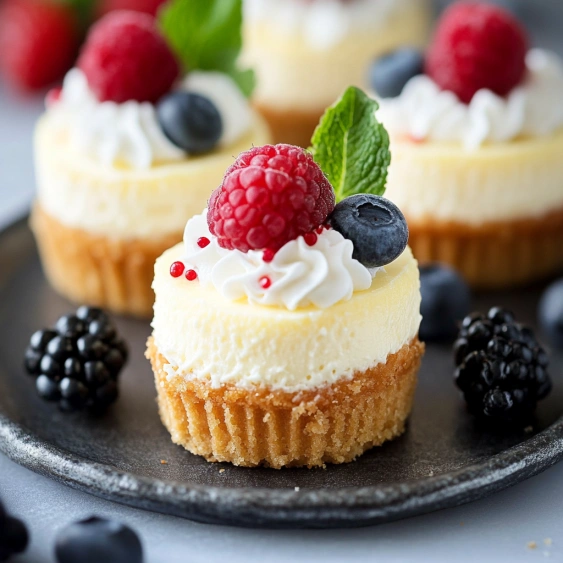
- Whipped cream: Creates a light cloud-like topping that balances the dense cheesecake below
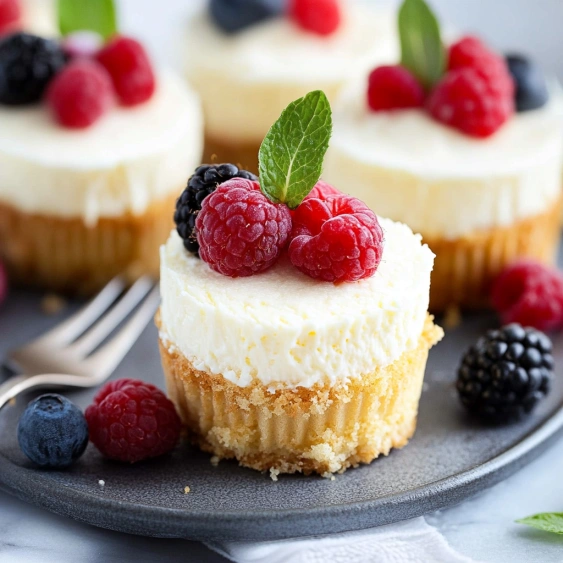
- Fresh fruit: Adds vibrant color, bright flavor, and a nutritious element to your dessert
Step-by-Step Instructions
- Prepare the Crust:
- Preheat your oven to 350°F and line a standard muffin tin with paper liners. Mix graham cracker crumbs with melted butter until the texture resembles wet sand. Spoon 1-2 tablespoons of this mixture into each liner, then use a measuring cup to firmly press down, creating a compact base. Bake for exactly 5 minutes until just set. The pre-baking step ensures your crust stays crisp rather than soggy.
- Mix the Filling:
- In a large bowl, beat room temperature cream cheese and sugar until completely smooth and no lumps remain, about 1-2 minutes. The room temperature cream cheese is crucial here as cold cream cheese will create lumps that never fully incorporate. Watch for a slight change in texture as the mixture becomes silky.
- Add Eggs and Vanilla:
- Gently incorporate vanilla extract and eggs into your cream cheese mixture. This is the most critical step where restraint matters. Mix only until the eggs are just incorporated. The more you beat, the more air gets incorporated, which leads to cracks and an uneven texture. You want a silky, dense cheesecake, not a fluffy one.
- Fill and Bake:
- Divide your creamy batter evenly among the prepared crusts, filling each liner nearly to the top. Bake for 15-17 minutes until the centers have a slight jiggle when gently shaken. The cheesecakes will continue to set as they cool, so resist the urge to bake until completely firm or you'll end up with dry, overcooked centers.
- Chill and Serve:
- Allow the cheesecakes to cool completely at room temperature before refrigerating for at least 4 hours, preferably overnight. This resting period allows the flavors to develop and the texture to reach perfect creaminess. Top with fresh whipped cream and fruit just before serving for the most impressive presentation.
 Pin it
The cream cheese quality makes all the difference in this recipe. I once tried using a store brand to save money, and the texture was noticeably different. My family immediately asked what I had changed! Some things are worth the extra dollar, and cream cheese for cheesecake is definitely one of them.
Storage Tips
These mini cheesecakes keep beautifully in the refrigerator for up to 5 days when stored in an airtight container. For best results, store them without toppings and add fresh whipped cream and fruit just before serving. This prevents the whipped cream from deflating and the fruit from making the tops soggy.
If you want to freeze them, place the completely cooled cheesecakes on a baking sheet until frozen solid, then transfer to a freezer bag. They'll keep for up to 3 months. Thaw overnight in the refrigerator before topping and serving.
Flavor Variations
These mini cheesecakes serve as the perfect canvas for creativity. Try adding lemon zest to the batter for a bright citrus version, or fold in mini chocolate chips for a chocolate chip cheesecake experience. For a festive touch, drizzle cooled cheesecakes with caramel sauce and a sprinkle of sea salt, or swap the graham crackers for chocolate cookie crumbs.
My personal favorite variation is adding a tablespoon of espresso powder to the filling and topping with chocolate ganache for a sophisticated mocha cheesecake that pairs perfectly with after-dinner coffee.
Troubleshooting Tips
If your cheesecakes crack on top, you likely overmixed the batter or baked them too long. Next time, mix just until ingredients are incorporated and remove from the oven while centers still have a slight jiggle.
For perfectly clean removal from liners, refrigerate the cheesecakes completely before peeling. Room temperature cheesecakes tend to stick to the paper.
If your crust seems too crumbly, add an additional tablespoon of melted butter to help it hold together better during baking and serving.
 Pin it
Frequently Asked Questions
- → How do I know when my mini cheesecakes are done baking?
Mini cheesecakes are done when the edges are set but the center is still slightly jiggly. After baking for 15-17 minutes at 350°F, they should have this consistency. Avoid overbaking, as this can cause cracking and a dry texture.
- → Can I make these mini cheesecakes ahead of time?
Yes! These mini cheesecakes are perfect for making ahead. After baking and cooling to room temperature, refrigerate them for at least 4 hours. For overnight storage, loosely cover with plastic wrap. They'll keep well in the refrigerator for up to 3 days.
- → Why did my mini cheesecakes crack on top?
Cracking is typically caused by overbeating the eggs, which incorporates too much air into the batter. Mix the eggs in just until the yolks break and the mixture is smooth. Other causes include overbaking or rapid temperature changes. Allow cheesecakes to cool gradually at room temperature before refrigerating.
- → What other toppings work well with these mini cheesecakes?
While fresh berries and whipped cream are classic options, you can also try chocolate ganache, caramel sauce, lemon curd, fruit compotes, crushed cookies, toasted nuts, or fruit preserves. For special occasions, try a drizzle of honey with figs or a sprinkle of crushed peppermint candies during the holidays.
- → Can I freeze these mini cheesecakes?
Yes, mini cheesecakes freeze beautifully. Cool them completely, then place in an airtight container and freeze for up to 2 months. Thaw overnight in the refrigerator before serving. Add fresh toppings after thawing, not before freezing.
- → Can I make these without paper liners?
Yes, but you'll need to grease the muffin tin very well or use a non-stick pan. Silicone muffin pans work especially well for liner-free cheesecakes. Allow them to cool completely before carefully removing with a small offset spatula or butter knife around the edges.