
 Pin it
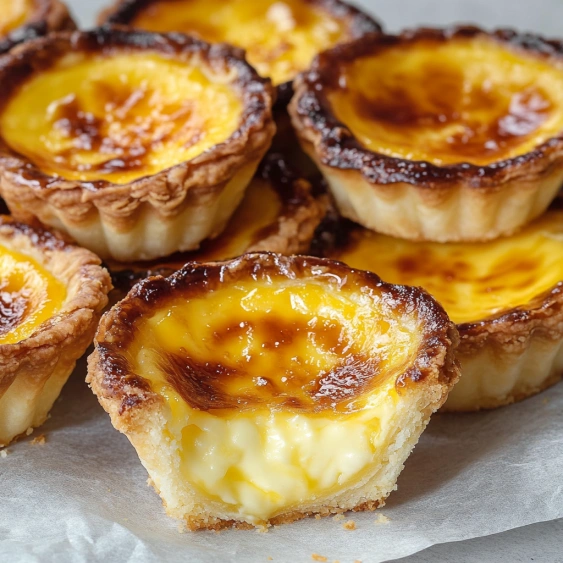
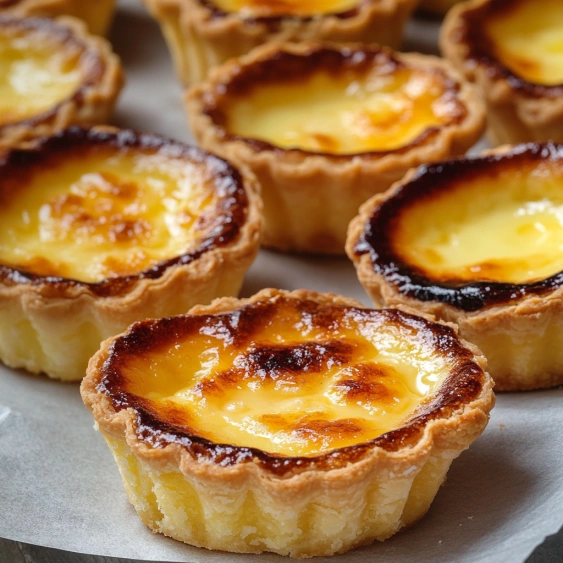
This homemade Hokkaido Baked Cheese Tart recipe brings the famous Japanese-inspired pastry right to your kitchen. The buttery, crisp tart shells cradle a lusciously smooth cheese filling that caramelizes beautifully on top, creating that signature sweet-savory balance that made these tarts a global sensation.
I first encountered these tarts during a trip to Asia and became completely obsessed. After numerous attempts to recreate that perfect texture and flavor, this recipe finally captured the magic that makes these tarts so irresistible.
Ingredients
- For the mini tart shells
- Icing sugar: Adds the perfect sweetness without being grainy
- Pastry flour: Creates that delicate crumbly texture but all purpose works too
- Almond flour: Gives a subtle nutty dimension that elevates the shell
- Salt: Essential for balancing the sweetness
- Cold unsalted butter: The higher fat content creates flakier crusts
- Egg: Binds everything together for the perfect texture
- For the cheese filling
- Cream cheese: Use full fat for the richest flavor and creamiest texture
- Parmesan cheese: Adds that distinctive savory note that makes these tarts special
- Unsalted butter: Ensures silky smoothness in the filling
- Whole milk and heavy cream: Create that luxurious custard base
- Icing sugar: Dissolves perfectly for a smooth filling
- Egg yolks: Provide richness and help the filling set properly
- Corn starch: Stabilizes the filling and ensures the perfect consistency
Step-by-Step Instructions
- Prepare the tart shells:
- Chill the butter. Cut butter into small chunks and place in the freezer briefly. Cold butter is crucial for achieving that perfect flaky texture in your tart shells.
- Create the dry mixture:
- Sift together pastry flour, icing sugar, almond flour and salt in a large bowl. Sifting prevents lumps and ensures even distribution of ingredients.
- Work in the butter:
- Add the very cold butter chunks to your dry ingredients and use your fingertips to rub everything together until it resembles coarse sand. This method creates tiny pockets of butter that will create flakiness when baked.
- Add the egg:
- Incorporate the egg into your mixture, working quickly with your hands just until the dough comes together. Overmixing develops gluten which toughens the pastry.
- Knead briefly:
- Work the dough with your palm for just a minute or two until smooth. This gentle technique keeps the dough tender while ensuring ingredients are properly incorporated.
- Roll the dough:
- Roll your dough between two silicone baking mats to a 2mm thickness. The mats prevent sticking without adding extra flour which can dry out your dough.
- Freeze the dough:
- Place your rolled dough still between mats into the freezer for 15 minutes. This chilling step prevents shrinkage during baking and makes the dough easier to handle.
- Cut and shape:
- Remove from freezer, peel off the top mat, and cut circles using a cookie cutter. Press each circle gently into your muffin tin or tart molds, working quickly while the dough is still cold.
- Prepare for baking:
- Prick the bottoms with a fork to prevent air bubbles, then freeze the formed shells for 1 hour. This long freeze ensures the butter is completely solid before hitting the hot oven.
- Bake in stages:
- Bake initially at 180C for 15 minutes in the muffin pan. Remove the cases from the pan, place them upside down on a baking sheet, and continue baking at 160C for another 10-15 minutes until evenly golden brown.
- Create the filling:
- Prepare the egg base. Whisk together sugar and egg yolks until slightly fluffy, then incorporate the cornstarch until you have a smooth paste. This creates the base that will thicken your filling.
- Heat the dairy mixture:
- Combine milk, cream, butter, cream cheese and Parmesan in a saucepan over low-medium heat until just melted and beginning to simmer. The gentle heat prevents curdling while allowing everything to melt together smoothly.
- Temper the eggs:
- Pour the warm cheese mixture slowly into the egg mixture while whisking vigorously. This gradual addition prevents the eggs from scrambling and ensures a silky smooth result.
- Cook until thickened:
- Return the combined mixture to the saucepan and cook over medium heat, stirring constantly until it thickens to a custard consistency. You will feel the mixture become heavier against your spoon.
- Chill properly:
- Transfer to a shallow bowl, cover with plastic wrap directly touching the surface to prevent skin formation, and refrigerate for at least an hour. This resting time allows flavors to develop and the filling to set to the perfect piping consistency.
- Final assembly:
- Preheat your oven to 220C. This high temperature will create that beautiful caramelization on top of your tarts.
- Fill the shells:
- Use a piping bag to fill each tart shell with the chilled cheese filling. The piping bag gives you control for a neat presentation.
- Apply egg wash:
- Brush a light coating of beaten egg mixed with a splash of water over the filling. This creates that signature golden shiny top as it bakes.
- Bake until caramelized:
- Place in the hot oven for 5-10 minutes, watching carefully until the tops develop a beautiful golden brown color. The high heat creates that characteristic blistered top.
- Serve flexibly:
- These tarts are delicious warm, at room temperature, or chilled from the refrigerator. Each temperature brings out different qualities in the flavor and texture.
 Pin it
The Parmesan cheese is my secret weapon in this recipe. Most recipes only call for cream cheese, but that small addition of aged Parmesan adds an incredible depth that makes these tarts truly special. My family can always tell when I try to skip this ingredient.
Storage Tips
These cheese tarts can be stored in an airtight container in the refrigerator for up to 3 days. The shells may soften slightly, but they will still taste delicious. For the freshest experience, you can store the baked shells and filling separately, then assemble and bake just before serving. The unfilled tart shells can be stored at room temperature in an airtight container for up to a week, or frozen for up to a month.
 Pin it
Cultural Background
Hokkaido cheese tarts originated in Japan's northernmost island of Hokkaido, famous for its dairy production. The tarts blend Western baking techniques with Japanese precision and ingredient quality. Originally introduced by BAKE cheese tart shop in 2011, they quickly became a sensation throughout Asia with people queuing for hours to taste them. The recipe balances Japanese subtlety with the rich dairy tradition of Hokkaido, creating a dessert that's less sweet than Western counterparts but with a more complex flavor profile.
Perfect Pairings
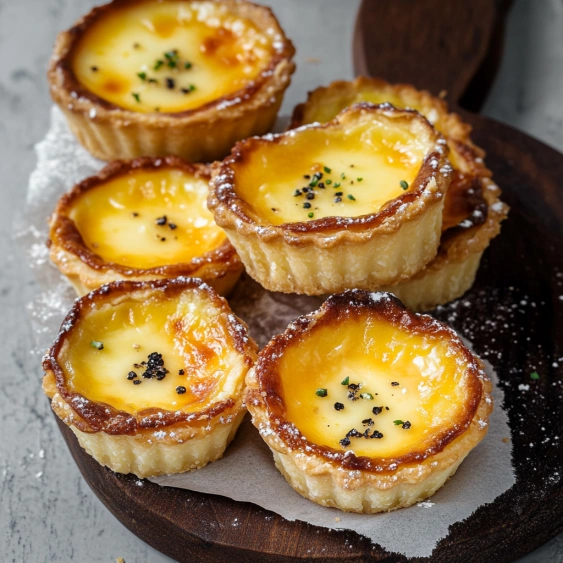
These cheese tarts are wonderful served with a variety of accompaniments. Try them with fresh berries for a bright contrast to the rich filling, or with a drizzle of honey for added sweetness. For a truly indulgent experience, serve them slightly warm with a scoop of vanilla ice cream. They pair beautifully with coffee, especially a strong espresso that cuts through the richness, or with Japanese green tea for an authentic pairing. For special occasions, these tarts also complement a glass of dessert wine or champagne.
Frequently Asked Questions
- → Can I use all-purpose flour instead of pastry flour?
Yes, you can substitute all-purpose flour for pastry flour in equal amounts as mentioned in the ingredients list. The tarts might have a slightly different texture, but they will still turn out delicious.
- → Why do you need to freeze the dough?
Freezing the dough is crucial to maintain its structure and prevent shrinkage during baking. The cold butter creates steam pockets when baked, resulting in a flakier, more tender tart shell.
- → Can I make these tarts ahead of time?
Yes! You can prepare the tart shells and filling separately up to 2 days in advance. Store the baked shells in an airtight container and the filling covered in the refrigerator. Assemble and bake just before serving for the best results.
- → What makes these Hokkaido-style?
Hokkaido-style cheese tarts are inspired by the Japanese island of Hokkaido, known for its dairy products. The signature elements are the combination of different cheeses, the creamy texture, and the caramelized top that creates a distinctive flavor profile.
- → Can I use a different type of cheese?
While cream cheese and Parmesan create the authentic flavor, you could experiment with other combinations. Mascarpone could replace some of the cream cheese for a different texture, or a mild white cheddar could substitute some of the Parmesan for a different flavor profile.
- → Why bake the tart shells upside down in the second step?
Baking the tart shells upside down in the second step ensures that the bottoms get properly baked and achieve a golden color. This prevents soggy bottoms and ensures a crisp texture throughout the entire tart shell.