
 Pin it
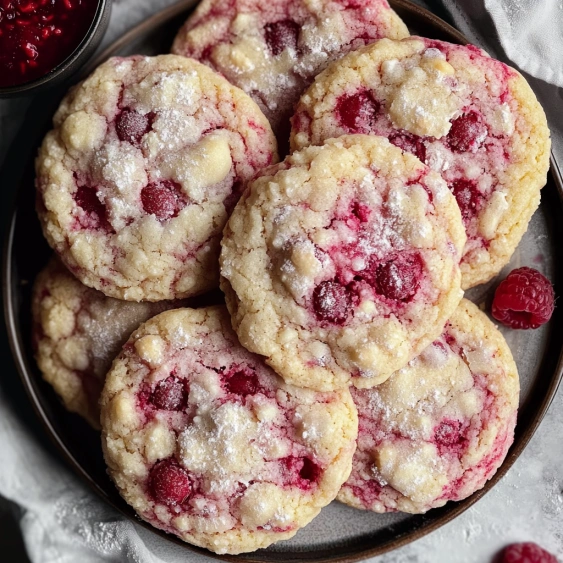
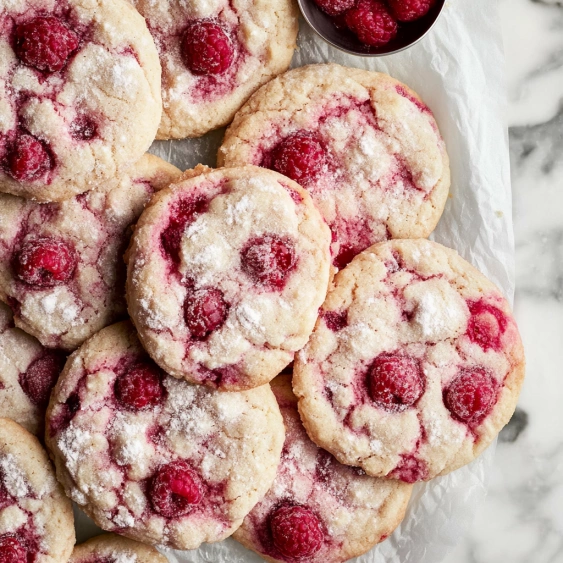
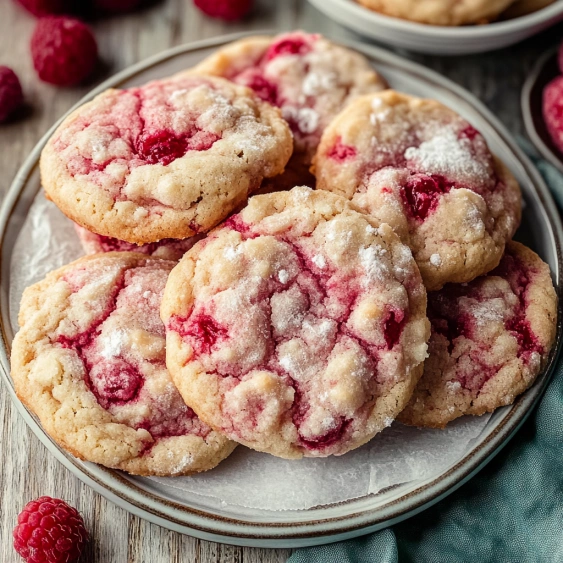
This vibrant raspberry cookie recipe transforms ordinary butter cookies into extraordinary treats with bursts of real raspberry flavor and a gorgeous pink marbled appearance. The delicate balance of sweet and tart makes these cookies irresistible for any occasion, while still being completely gluten-free.
I first created these cookies when looking for a special Valentine's Day treat that would work for my gluten-sensitive friends. The raspberry marbling was an accidental discovery that turned out to be the most complimented feature at the party.
Ingredients
For the Raspberry Syrup
- Frozen raspberries: provide intense berry flavor without the expense of fresh berries in off-season
- Granulated sugar: balances the tartness and helps create the syrupy consistency
For the Cookies
- Gluten free flour blend: with xanthan gum ensures proper structure without gluten
- Cornstarch: creates tenderness in the cookie texture
- Baking powder: provides just enough lift without making them cakey
- Kosher salt: enhances all flavors and balances sweetness
- Room temperature butter: creates the perfect creamy base
- Granulated sugar: for sweetness and that classic crisp cookie edge
- Cornstarch water mixture: works as an egg replacer for structure
- Milk: adds moisture and helps bind ingredients
- Raspberry syrup: infuses genuine raspberry flavor throughout
- Red food coloring: enhances the pink color but remains optional
- Frozen chopped raspberries: create the beautiful marbling effect
Step-by-Step Instructions
- Make the Raspberry Syrup:
- Cook raspberries and sugar over medium heat, stirring constantly for about 10 minutes until broken down and syrupy. The mixture will remain slightly chunky which is perfectly fine. Strain through a mesh colander into a bowl and let cool completely before using. You should end up with 2-3 tablespoons of concentrated raspberry syrup.
- Prepare the Raspberries:
- Chop frozen raspberries into small pieces without turning them into mush. The goal is berry pieces, not berry puree. Return chopped berries to the freezer immediately to keep them firm until needed.
- Mix Dry Ingredients:
- Whisk together gluten free flour, baking powder, cornstarch and salt in a large bowl until well combined. This ensures even distribution of leavening agents throughout the dough.
- Create Cornstarch Slurry:
- Mix cornstarch with water until thin and watery, though it will start out thick and tacky. This mixture helps bind the cookies together in place of eggs.
- Cream Butter and Sugar:
- Beat butter and sugar until soft and creamy, about 2-3 minutes. This incorporates air into the mixture for proper cookie texture and ensures sugar crystals begin dissolving.
- Add Wet Ingredients:
- Slowly beat in the cornstarch water mixture, milk, and raspberry syrup until combined. The mixture will look pink and chunky at this stage which is expected.
- Incorporate Dry Ingredients:
- Add the flour mixture gradually, mixing just until combined. Overmixing will develop the xanthan gum too much, resulting in tough cookies.
- Add Color if Desired:
- Mix in a few drops of red food coloring if you want a more vibrant pink color throughout the dough.
- Fold in Frozen Raspberries:
- Gently fold in the frozen chopped raspberries with a spatula until marbled. Be extremely careful not to overmix or the berries will break down and make the dough slimy.
- Freeze the Dough:
- Cover the bowl with plastic wrap and freeze for at least one hour. This critical step prevents cookies from spreading too much during baking.
- Shape and Bake:
- Scoop dough with an ice cream scoop, roll in additional sugar, and place on parchment-lined baking sheets 3-4 inches apart. Bake at 325°F for 15 minutes.
- Reshape and Cool:
- Immediately reshape cookies with a spatula when they come out of the oven and let cool on the baking sheet for 5 minutes before transferring to a cooling rack. This prevents breakage.
 Pin it
The frozen raspberry pieces are truly the magic ingredient in this recipe. I found that using fresh berries created too much moisture, while the frozen ones maintain their integrity during mixing and baking. My niece calls them "raspberry snow cookies" because of how the berry bits peek through like colorful snowflakes.
Storage Tips
These raspberry cookies maintain their texture best when stored in an airtight container at room temperature for up to 3 days. If you need to keep them longer, place a piece of parchment paper between layers to prevent sticking. The cookies actually develop an even better flavor profile on day two as the raspberry notes continue to meld with the other ingredients.
Make Ahead Options
The cookie dough can be frozen for up to one month. Simply scoop the dough into individual portions, place on a parchment-lined baking sheet, and freeze until solid. Transfer the frozen dough balls to a freezer bag and label. When ready to bake, roll in sugar and add 2-3 minutes to the baking time no need to thaw first.
Troubleshooting
If your cookies spread too much during baking, your dough likely wasn't cold enough. Return the dough to the freezer for at least 30 minutes before trying again. Another common issue is overfolding the raspberries, which releases too much moisture into the dough. Fold just enough to create marbling while keeping most berry pieces intact.
 Pin it
Frequently Asked Questions
- → Can I use fresh raspberries instead of frozen?
Fresh raspberries can be used for the syrup, but frozen raspberries work better for the cookie dough as they maintain their shape and release less moisture during mixing. If using fresh berries in the dough, freeze them first for about 30 minutes before chopping and folding into the mixture.
- → Why must the dough be frozen before baking?
Freezing the dough for at least an hour is crucial to prevent the cookies from spreading too much during baking. The raspberry content adds moisture that can cause excessive spreading if the dough isn't properly chilled. Refrigeration isn't sufficient - it must be frozen.
- → Can I make these cookies without food coloring?
Yes, the food coloring is optional and only enhances the pink color. Without it, the cookies will still have a natural light pink marbled effect from the raspberry syrup and berry pieces.
- → What can I substitute for the cornstarch water mixture?
The cornstarch water mixture acts as an egg replacer. You can substitute with one large egg if you don't need the cookies to be egg-free. If you do need them egg-free but don't have cornstarch, try using 3 tablespoons of applesauce or a commercial egg replacer.
- → Why do my cookies need to be reshaped after baking?
Due to the moisture from the raspberries, these cookies may spread unevenly during baking. Reshaping them immediately after removing from the oven ensures they have a uniform round shape. This step also helps them set properly so they don't fall apart when transferred.
- → Can I use regular all-purpose flour instead of gluten-free?
Yes, you can substitute regular all-purpose flour in equal amounts. If using regular flour, you may not need the xanthan gum that's typically in gluten-free flour blends, which might change the texture slightly. The cookies will likely be a bit chewier with regular flour.