
 Pin it
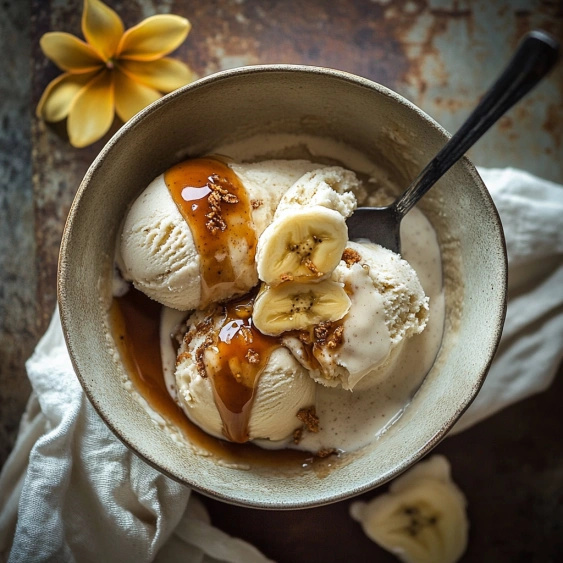
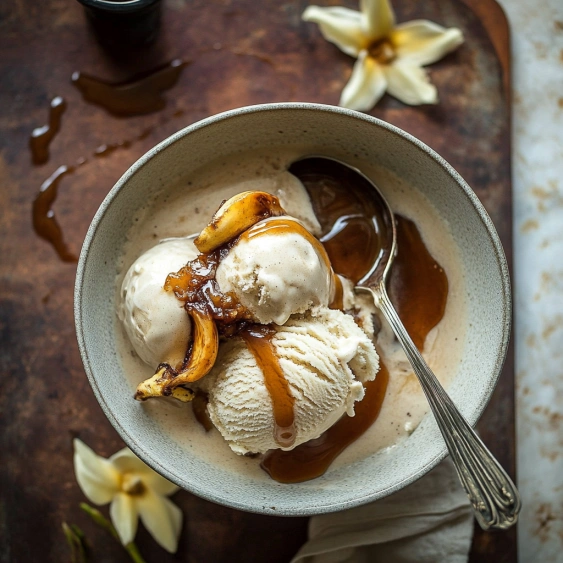
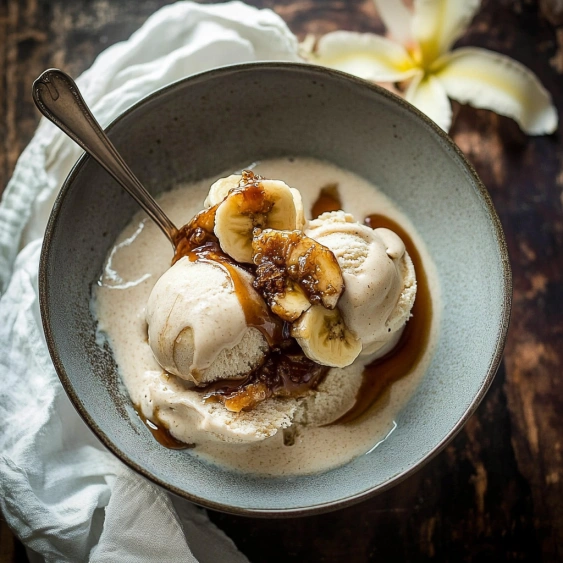
This caramelized banana vanilla bean ice cream transforms ordinary bananas into a luxurious frozen treat that rivals any premium store-bought version. The roasting process brings out deep caramel notes that perfectly complement the rich coconut cream base and fragrant vanilla bean.
I first created this recipe during a summer heat wave when I wanted something indulgent but lighter than traditional ice cream. The heavenly aroma of roasting bananas filled my kitchen and had everyone asking when it would be ready to eat.
Ingredients
- Ripe bananas: with a few black spots offers the perfect balance of sweetness and banana flavor
- Avocado oil: has a neutral taste that allows the banana flavor to shine through
- Refrigerated coconut milk: provides the rich creamy base without any dairy
- Coconut cream: skimmed from a second can intensifies the luxurious texture
- Whole vanilla bean: delivers authentic speckled vanilla flavor that extract simply cannot match
- Grade A maple syrup: adds subtle sweetness that complements the caramel notes
- Sea salt: enhances all the flavors and balances the sweetness
Step-by-Step Instructions
- Prepare the bananas:
- Preheat your oven to 400°F and line a baking sheet with parchment paper. Peel and slice each banana lengthwise, creating flat halves that will caramelize beautifully. Brush each piece lightly with avocado oil, being careful not to oversaturate. Place them cut side down on the parchment for maximum caramelization.
- Roast to perfection:
- Roast the bananas for 15-20 minutes, watching carefully during the final minutes. You want a deep golden color without burning. The sugars in the banana will transform into complex caramel compounds, creating an incredible depth of flavor impossible to achieve with raw bananas.
- Prepare the base:
- While the bananas cool, combine one full can of refrigerated coconut milk with just the cream skimmed from the top of a second can. Add your split vanilla bean pieces, maple syrup, and sea salt to the blender. The vanilla seeds will infuse the mixture with tiny aromatic specks throughout your finished ice cream.
- Blend and chill:
- Once the bananas have cooled enough to handle, add them to your blender with the other ingredients. Blend until completely smooth, making sure no banana chunks remain. For absolute perfection, strain through a fine mesh strainer, though this is often unnecessary if your blender is powerful. Thoroughly chill the mixture in the refrigerator for 3-4 hours before freezing.
- Freeze according to manufacturer instructions:
- Pour the chilled base into your ice cream maker and churn according to the manufacturer instructions. The ice cream is ready when it holds its shape on a spoon without immediately sliding off. Transfer to a freezer container for firmer texture.
 Pin it
Vanilla beans transformed this recipe for me. I once tried making it with extract when I ran out of vanilla beans, and while still good, it lacked the aromatic complexity and visual appeal of those tiny black specks that signal real vanilla bean to ice cream lovers. My family can always tell the difference.
Storage Tips
This homemade ice cream freezes quite solidly due to its lower fat content compared to commercial versions with additives. For the best experience, transfer the container from freezer to refrigerator about 30 minutes before serving. Store in an airtight container with parchment paper pressed directly on the surface to prevent ice crystals. Properly stored, it maintains optimal quality for about two weeks, though the banana flavor intensifies over time.
 Pin it
Perfect Pairings
This ice cream shines as a standalone dessert but pairs magnificently with warm treats. Try serving alongside warm brownies for a sophisticated twist on a classic combination. For breakfast-inspired dessert, serve a scoop with warm cinnamon-spiced waffles. The contrast between hot and cold creates a sensory experience that highlights the caramelized banana flavors.
Seasonal Adaptations
While ripe bananas are available year-round, consider seasonal accompaniments to enhance this versatile dessert. Summer calls for fresh berries scattered on top, while autumn begs for a drizzle of maple-bourbon sauce. Winter holidays? Add a pinch of nutmeg to the base and serve with spiced cookies. The coconut-banana foundation provides a canvas for countless seasonal variations.
Frequently Asked Questions
- → Can I use frozen bananas instead of roasting fresh ones?
While frozen bananas work well in many frozen desserts, this particular ice cream gets its distinctive flavor from the caramelization process. Roasting fresh bananas creates a deeper, richer flavor that frozen bananas can't replicate. The caramelization brings out natural sugars and adds complexity to the final product.
- → What can I substitute for avocado oil?
If you don't have avocado oil, you can substitute with any neutral-flavored oil with a high smoke point, such as refined coconut oil, light olive oil, or grapeseed oil. The small amount used is primarily to help the bananas caramelize properly in the oven.
- → Why does this ice cream freeze so hard, and how can I prevent that?
This ice cream freezes hard because it lacks the commercial stabilizers and high fat content found in dairy ice creams. To make it more scoopable, you can add 1-2 tablespoons of vodka or rum to the mixture before freezing (which won't freeze solid), or add 2 tablespoons of tapioca starch or cornstarch to the blended mixture. Always remember to let it soften in the refrigerator for 20-30 minutes before serving.
- → Can I make this without an ice cream machine?
Yes, though the texture won't be quite as creamy. After blending and chilling the mixture, pour it into a shallow, freezer-safe container. Freeze for about 45 minutes, then remove and vigorously stir or beat with a hand mixer to break up ice crystals. Repeat this process every 30-45 minutes for about 4-5 hours, until the ice cream is set but still slightly soft.
- → What can I use instead of maple syrup?
Honey works well as a substitute with a 1:1 ratio, though it will add its own distinct flavor. Agave nectar is another option that's slightly sweeter than maple syrup, so you might use about 25% less. Coconut sugar dissolved in a small amount of warm water can also work, providing a caramel-like flavor that complements the bananas nicely.
- → How ripe should the bananas be for the best flavor?
The ideal bananas should be fully yellow with a few black spots, indicating they're ripe but not overripe. These bananas have developed their full sweetness while still maintaining enough structure to caramelize properly in the oven. Overly spotty or brown bananas might become too mushy during roasting.