
 Pin it
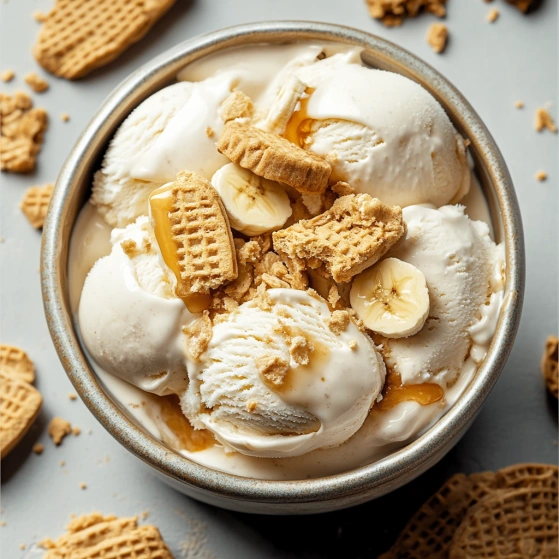
This nostalgic banana pudding ice cream transforms a classic Southern dessert into a cool, creamy summer treat. The sweet bananas and vanilla-infused custard base perfectly complement the iconic Nilla Wafer cookies for that authentic banana pudding experience in scoop form.
I first made this ice cream for my grandmother's birthday as a surprise nod to her famous banana pudding. The look on her face when she tasted it was priceless she said it captured all the flavors she loves but in a refreshingly cool new way.
Ingredients
- Heavy cream: creates the rich, velvety base essential for premium homemade ice cream
- Whole milk: balances the fat content while maintaining creaminess
- Granulated sugar: divided between custard steps for proper dissolution
- Egg yolks: provide that classic custard texture and golden color
- Pure vanilla extract: adds warmth opt for real extract not imitation
- Ripe bananas: with brown spots offer the sweetest most intense flavor
- Lemon juice: prevents browning and brightens the banana flavor
- Nilla Wafers: the authentic cookie for banana pudding flavor no substitutes
- Salt: enhances all flavors and balances sweetness
Step-by-Step Instructions
- Create The Custard Base:
- Combine heavy cream milk half the sugar and salt in a medium saucepan warming over medium heat while stirring occasionally until the mixture is hot but not boiling around 170°F. The sugar should completely dissolve creating a smooth liquid.
- Prepare The Egg Mixture:
- In a separate bowl whisk together egg yolks and remaining sugar until the mixture becomes pale yellow and slightly thickened about 2 minutes of vigorous whisking. This step is crucial for proper emulsification and a smooth final texture.
- Temper The Eggs:
- Very slowly ladle about half cup of the hot cream mixture into the egg mixture while constantly whisking. Continue adding hot cream in small amounts until you've incorporated about half the cream. This gradual warming prevents the eggs from scrambling.
- Cook The Custard:
- Pour the tempered egg mixture back into the saucepan with remaining cream. Cook over low heat stirring constantly with a wooden spoon or heat resistant spatula reaching all corners of the pan. Continue until mixture thickens enough to coat the back of a spoon about 5 to 7 minutes.
- Add Flavoring:
- Strain the custard through a fine mesh sieve into a clean bowl to remove any lumps or accidentally cooked egg bits. Immediately stir in vanilla extract mashed bananas and lemon juice mixing until well combined. The lemon juice prevents the bananas from browning.
- Chill Thoroughly:
- Cover the custard with plastic wrap pressed directly onto the surface to prevent a skin from forming. Refrigerate for at least 4 hours preferably overnight. This aging process allows flavors to develop and improves the final texture.
- Churn The Ice Cream:
- Pour the chilled custard into your ice cream maker and churn according to manufacturer's instructions usually 20 to 25 minutes. The mixture should increase in volume and reach a soft serve consistency.
- Add Cookies:
- In the final 2 minutes of churning add the crushed Nilla Wafers allowing them to distribute throughout the ice cream without becoming too soggy. Reserve some cookie pieces for layering.
- Freeze Until Firm:
- Transfer half the ice cream to a freezer safe container sprinkle with additional crushed cookies then add remaining ice cream and top with more cookies. Cover and freeze until firm at least 4 hours.
 Pin it
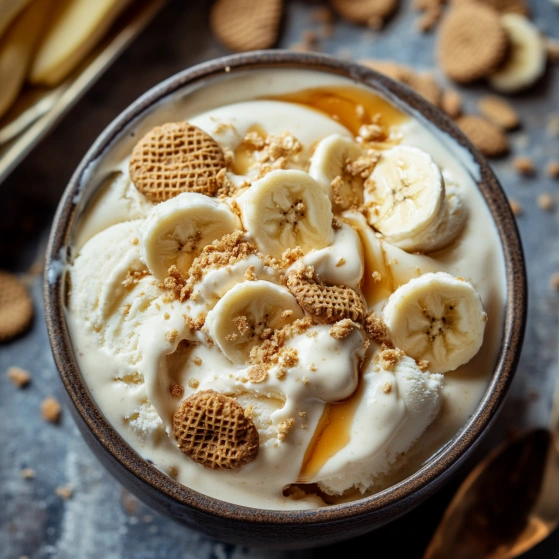
My absolute favorite part of this recipe is watching the transformation of the bananas from a simple fruit to the star ingredient in this luxurious dessert. It reminds me of Sunday afternoons at my grandmother's house when she would let me arrange the wafers along the sides of her banana pudding bowl.
Storing Your Ice Cream
For best texture and flavor this homemade ice cream stays fresh in the freezer for up to 2 weeks. Store it in a shallow airtight container with a piece of parchment paper pressed against the surface to prevent ice crystals from forming. The Nilla Wafers will gradually soften over time which many people actually prefer as it mimics the texture of traditional banana pudding.
 Pin it
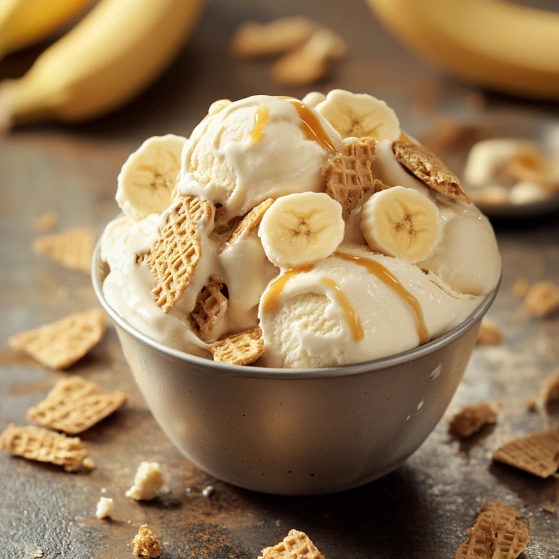
Perfect Banana Selection
The bananas are truly the star of this recipe and selecting the right ones makes all the difference. Look for bananas with plenty of brown spots on the peel these indicate peak ripeness and sugar content. If your bananas aren't quite ripe enough place them in a paper bag with an apple for 1 to 2 days to speed ripening. Avoid using green or just yellow bananas as they lack the necessary sweetness and will impart a starchy flavor to your ice cream.
Serving Suggestions
Transform this ice cream into a spectacular dessert by serving it as a banana split topped with chocolate sauce crushed pineapple cherries whipped cream and toasted nuts. For a quick dessert sandwich a scoop between two whole Nilla Wafers for mini ice cream sandwiches. At family gatherings I like to set up a sundae bar with this ice cream as the centerpiece alongside various toppings like caramel sauce chocolate chips and fresh banana slices.
The History Behind The Flavor
Banana pudding has been a beloved Southern dessert since the late 19th century when bananas became more readily available in the United States. The classic version featuring vanilla wafers custard and sliced bananas layered in a dish was popularized in the 1920s when Nabisco began printing the recipe on their Nilla Wafer boxes. This ice cream pays homage to that tradition while giving it a modern frozen twist. The combination of vanilla cookies and bananas has stood the test of time because the flavors complement each other so perfectly.
Frequently Asked Questions
- → Can I make this without an ice cream maker?
Yes, though the texture won't be as smooth. After chilling the custard mixture, place in a freezer-safe container. Freeze for 45 minutes, then stir vigorously to break up ice crystals. Repeat this process every 30 minutes about 4-5 times, folding in the crushed wafers during one of the final stirs.
- → How ripe should the bananas be?
Very ripe bananas with brown spots work best as they're sweeter and have stronger banana flavor. They should be soft but not mushy or fermented.
- → Can I substitute the Nilla Wafers?
Yes, vanilla shortbread cookies or graham crackers make good substitutes. You could also use golden Oreos with the filling removed for a similar flavor profile.
- → Why add lemon juice to the bananas?
The lemon juice prevents the bananas from browning and adds a subtle acidity that balances the sweetness while enhancing the banana flavor.
- → How long will this ice cream keep in the freezer?
Stored in an airtight container, it will maintain best quality for about 1-2 weeks. The wafers will gradually soften over time, similar to how they do in traditional banana pudding.
- → Can I use frozen bananas for this?
Yes, though thaw them completely and drain any excess liquid before mashing. Fresh bananas generally provide better flavor, but frozen can work in a pinch.