
 Pin it
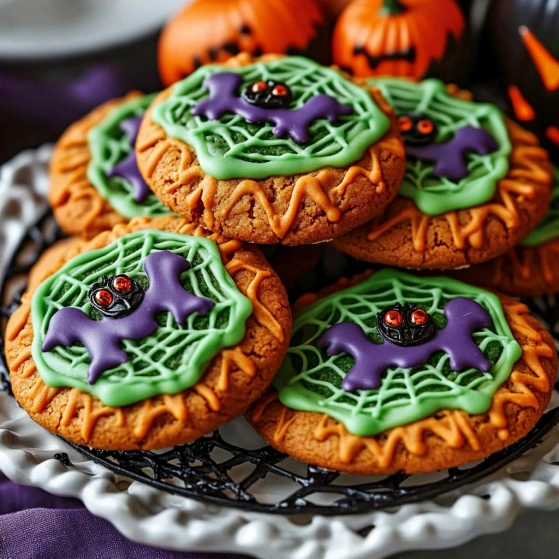
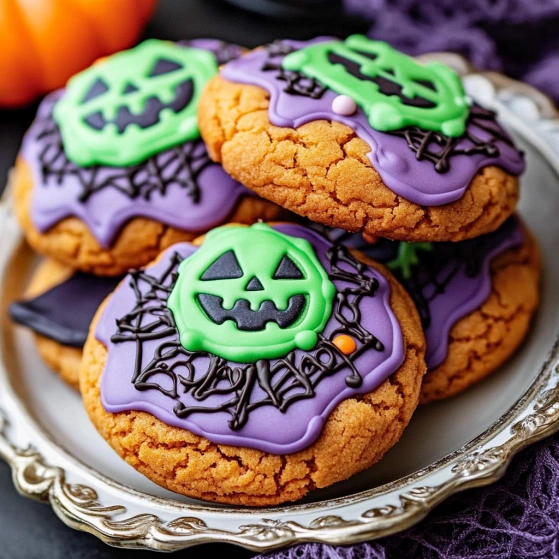
This wickedly delicious Hocus Pocus Halloween Cookie recipe transforms simple chocolate cookies into spooky treats with a surprising green "potion" filling that oozes out with every bite. Perfect for Halloween parties or a magical movie night treat that will cast a spell on everyone who tries them.
I first made these for my niece's Halloween party, and the children's faces lit up with excitement when they discovered the green filling inside. Now they're requested every October as our official Halloween tradition.
Ingredients
- Unsalted sweet cream butter: Ensures a rich, creamy texture in your cookies and provides better control over the overall saltiness
- Sugar and brown sugar: Combine to give these cookies the perfect chewy texture while the brown sugar adds a depth of flavor
- Large eggs: Bind everything together while adding moisture for that perfect cookie consistency
- Vanilla extract: Enhances all the other flavors without overpowering them
- All purpose flour: Forms the foundation of our cookie structure
- Unsweetened cocoa powder: Transforms these into chocolate cookies with a deep color perfect for Halloween
- Baking soda: Helps the cookies rise just enough while maintaining their chewy texture
- Salt: Balances sweetness and enhances all the other flavors
- White frosting: Serves as our potion base; look for a thicker variety for best results
- Neon green gel food coloring: Creates that perfect spooky potion look; liquid food coloring won't give the same vibrant effect
- Halloween colored M&Ms: Add festive flair and a crunchy texture contrast
Step-by-Step Instructions
- Oven Preparation:
- Preheat your oven to 350°F and line cookie sheets with parchment paper. The parchment prevents sticking and makes cleanup easier while ensuring even browning on the cookie bottoms.
- Candy Sorting:
- Separate your M&Ms by color so they're ready to use. This advance preparation makes the decorating process much smoother and ensures even distribution of colors.
- Dry Ingredient Preparation:
- Sift together flour, cocoa powder, baking soda, and salt. Sifting removes any lumps in the cocoa powder and helps distribute the leavening agent evenly throughout the dough.
- Butter Base Creation:
- Cream together butter and both sugars until light and fluffy, about 3 minutes. This incorporates air into the mixture which helps create that perfect cookie texture.
- Wet Ingredient Incorporation:
- Add eggs and vanilla to your butter mixture, mixing thoroughly. The eggs should be completely incorporated with no streaks visible.
- Dough Formation:
- Gradually add the dry ingredients to the wet ingredients, mixing on low speed. This gradual addition prevents flour from flying everywhere and ensures even mixing without overworking the dough.
- M&M Folding:
- Gently fold half the M&Ms into the dough, distributing them evenly. The folding motion prevents crushing the candies while ensuring they're spread throughout.
- Cookie Shaping:
- Form 2-inch dough balls and press remaining M&Ms onto the surface. This decoration not only looks festive but gives a hint of the flavors inside.
- Baking Process:
- Bake for 9-11 minutes until edges are set but centers remain slightly soft. This timing creates the perfect texture for injecting the filling while ensuring the cookies are fully baked.
- Frosting Preparation:
- Microwave frosting briefly and stir in green food coloring until vibrant. The short heating makes the frosting fluid enough to inject while maintaining its sweetness.
- Filling Injection:
- Insert flavor injector into the side of each cooled cookie and slowly squeeze until frosting cracks the surface. This creates that magical potion effect that makes these cookies special.
 Pin it
My family's favorite part is always the dramatic reveal when someone takes their first bite and discovers the bright green filling inside. My youngest always giggles with delight as the "potion" oozes out.
Make Ahead Options
These versatile cookies can be prepared in stages to fit your schedule. The cookie dough can be made up to 2 days ahead and refrigerated in an airtight container. You can even freeze the shaped dough balls for up to a month; just add 1-2 minutes to the baking time when cooking from frozen. The cookies themselves can be baked a day ahead then filled shortly before serving for maximum impact.
 Pin it
Magical Variations
While the bright green filling perfectly captures that "witch's potion" vibe, you can customize these cookies for different themes. Try purple filling for a galaxy theme, orange for pumpkin vibes, or even red for a vampire version. You can also substitute the M&Ms with seasonal sprinkles, mini chocolate chips, or candy corn pieces. For extra chocolate intensity, consider using dark cocoa powder instead of regular.
Troubleshooting Tips
If your cookies spread too much during baking, chill the dough for 30 minutes before forming balls. Ensure your butter is softened but not melted for best results. If the frosting seems too thick to inject, microwave it for another 5-10 seconds. When injecting, go slowly and steadily press the frosting into one spot until you see cracks forming rather than moving the injector around.
Frequently Asked Questions
- → Can I make these cookies ahead of time?
Yes, you can make these cookies 2-3 days in advance. Store them in an airtight container at room temperature. For best results, add the green filling just before serving if possible.
- → What can I use if I don't have a flavor injector?
If you don't have a flavor injector, you can use a piping bag with a small round tip. Alternatively, make a small hole in the cookie with a knife tip and use a squeeze bottle to add the filling.
- → Can I freeze these Halloween cookies?
Yes, you can freeze the unfilled cookies for up to 3 months in an airtight container. Thaw at room temperature and add the green filling before serving.
- → What other colors can I use for the filling?
While green creates a classic 'witch potion' look, you could also use purple for a magical effect, orange for a pumpkin theme, or even red for a vampire-inspired treat.
- → How can I make these cookies gluten-free?
Substitute the all-purpose flour with a 1:1 gluten-free baking flour blend. Ensure your cocoa powder and other ingredients are certified gluten-free.
- → What makes the cookies crack when adding the filling?
The pressure from injecting the filling causes the cookies to crack naturally. For best results, ensure cookies are fully cooled before injecting to create that distinctive cracked effect.