
 Pin it
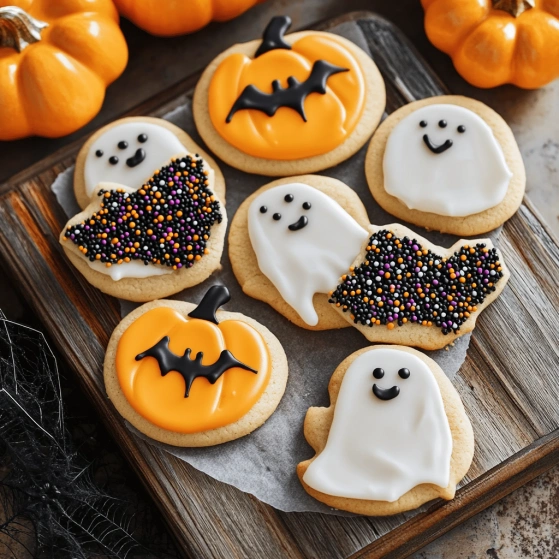
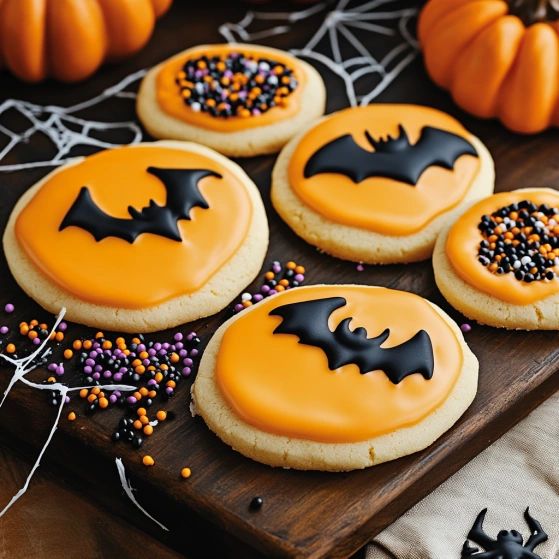
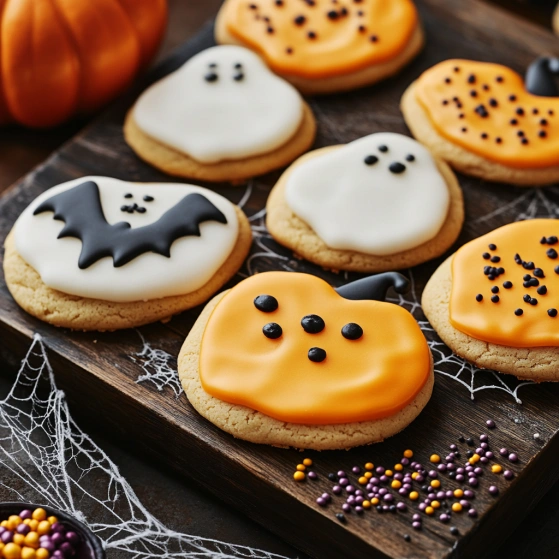
This Halloween sugar cookie recipe transforms ordinary sugar cookies into spooky seasonal treats that will delight both kids and adults alike. The buttery cookie base provides the perfect canvas for festive decorating, while the bright orange frosting adds a punch of Halloween spirit.
I first made these cookies for my daughter's kindergarten Halloween party. The room fell silent as the children devoured them, and now they're our official Halloween tradition every October.
Ingredients
- All purpose flour: Creates the perfect structure for rolled cookies that hold their shape
- Baking powder: Gives just enough lift without causing the cookies to spread too much
- Salt: Enhances all the flavors and balances the sweetness
- Unsalted butter: Provides richness and allows you to control the salt content
- Granulated sugar: Sweetens the dough while helping create those slightly crisp edges
- Large egg: Binds everything together and adds moisture
- Vanilla extract: Adds warmth and depth of flavor
- Powdered sugar: Creates a smooth frosting without graininess
- Orange juice: In the frosting adds natural flavor and beautiful acidity
- Orange food coloring: Transforms the frosting into Halloween perfection
Step-by-Step Instructions
- Prepare the Dough:
- Whisk together flour, baking powder, and salt in a medium bowl until thoroughly combined. This ensures even distribution of leavening agents for consistent cookies.
- Cream Butter and Sugar:
- Beat the softened butter and granulated sugar together for at least 3 minutes until the mixture becomes noticeably lighter in both color and texture. This incorporation of air creates the foundation for tender cookies.
- Add Egg and Vanilla:
- Incorporate the egg and vanilla extract, mixing just until they disappear into the butter mixture. Overmixing at this stage can lead to tough cookies.
- Mix in Dry Ingredients:
- Add the flour mixture gradually, mixing on low speed just until no dry streaks remain. The dough should come together but still feel soft. Overmixing develops gluten, leading to tough cookies.
- Chill the Dough:
- Divide the dough, shape into disks, and wrap tightly in plastic. Refrigerate for at least one hour, though overnight is even better. This crucial step firms up the butter, preventing spread during baking.
- Roll and Cut:
- Work with one portion of dough at a time, keeping the remainder refrigerated. Roll on a lightly floured surface to 1/4 inch thickness, rotating frequently to prevent sticking. Press cookie cutters firmly and lift shapes carefully onto prepared baking sheets.
- Bake the Cookies:
- Place cookies in a preheated oven and bake just until the edges show the slightest golden color, about 8 10 minutes depending on size. They will continue cooking slightly on the hot baking sheet.
- Make the Frosting:
- Beat the powdered sugar and softened butter first, then gradually add orange juice until you reach spreading consistency. Add food coloring a few drops at a time until you achieve your desired Halloween orange shade.
- Frost the Cookies:
- Wait until cookies are completely cool before frosting to prevent melting. Spread frosting evenly or pipe designs depending on your skill level and desired effect.
- Decorate:
- Add sprinkles immediately after frosting while it's still tacky enough for them to stick. Create faces, patterns or simply add festive sprinkles for Halloween charm.
 Pin it
You Must Know
These cookies became legendary in our neighborhood after my son took them to a Halloween party years ago. I still remember him coming home empty handed, saying everyone fought over the last bat shaped cookie. Now I always make a double batch.
Cookie Decorating Beyond Frosting
While the orange frosting is delicious and festive, you can expand your decorating options. Royal icing allows for more detailed designs like spider webs or ghost faces. For beginners, try painting designs with food coloring mixed with a drop of vodka (the alcohol evaporates). Cookie painting parties make wonderful Halloween activities for children and adults alike.
 Pin it
Make Ahead Strategy
Halloween gets hectic with costume preparations and decorating. Prepare the dough up to three days ahead and keep it refrigerated. You can even cut out the shapes, freeze them on baking sheets, then transfer to freezer bags once solid. Bake directly from frozen, adding just 1 2 minutes to the baking time. The frosting can also be made a day ahead and kept covered in the refrigerator. Bring to room temperature before using.
Dietary Adaptations
These cookies can be adapted for various dietary needs without sacrificing flavor. For gluten free versions, substitute a quality measure for measure gluten free flour blend. Dairy free bakers can use plant based butter sticks designed for baking. For egg allergies, try using 1/4 cup unsweetened applesauce in place of the egg. The texture will be slightly different but still delicious and festive.
Frequently Asked Questions
- → Can I make the cookie dough ahead of time?
Yes! The cookie dough can be made up to 3 days in advance and stored in the refrigerator. You can also freeze the dough for up to 2 months - just thaw in the refrigerator overnight before rolling and cutting.
- → What Halloween cookie cutters work best?
Popular Halloween shapes include bats, pumpkins, ghosts, cats, witches' hats, and skulls. Choose cutters that are about 3-4 inches for best results and easy decorating.
- → How can I tell when the cookies are done baking?
The cookies are done when they're set in the center and just beginning to turn golden around the edges, usually after 8-10 minutes. They'll continue to firm up as they cool, so be careful not to overbake.
- → How long do these cookies stay fresh?
Once decorated, the cookies will stay fresh in an airtight container at room temperature for 4-5 days. For longer storage, unfrosted cookies can be frozen for up to 3 months.
- → Can I use different colors for the frosting?
Absolutely! While orange is traditional for Halloween, you can use any food coloring to create black, purple, green, or multi-colored frosting to match your Halloween theme or decorations.
- → What's the best way to decorate these cookies?
For beginners, spreading frosting with a knife works well. For more detailed designs, use a piping bag with different tips. Allow a base layer of frosting to dry before adding details. Halloween sprinkles, candy eyes, and edible glitter make great decorative elements.