
 Pin it
This homemade onion ring recipe delivers the perfect balance of crispy exterior and tender, sweet onion inside. I've been perfecting this recipe for years, and it's become my go-to whenever I want to impress guests with restaurant-quality appetizers without leaving home.
I first made these during a football playoff party, and they disappeared faster than any other dish on the table. Now, they're requested at every gathering I host.
Ingredients
- Large Vidalia onion: Offers natural sweetness that balances the savory coating
- Canola oil: Provides a neutral flavor perfect for frying at high temperatures
- All purpose flour: Creates the base for a light batter that adheres perfectly to the onions
- Baking powder: Ensures the batter puffs slightly for extra crispiness
- Salt: Enhances all the flavors without making the rings overly salty
- Milk: Thins the batter to the perfect consistency look for whole milk for richness
- Egg: Acts as the crucial binder that helps everything stick together
- Panko bread crumbs: Deliver that unmistakable light and airy crunch regular breadcrumbs cannot match
- Seasoned salt: Adds a final layer of flavor that makes these rings irresistible
Step-by-Step Instructions
- Prepare Frying Station:
- Heat your oil to exactly 365°F using a thermometer for accuracy. This temperature is crucial too low and your rings absorb oil too high and they burn. Set up your draining station with the wire rack over foil for easy cleanup.
- Prepare The Onions:
- Slice your Vidalia into precise ¼ inch rings not thinner or they'll fall apart not thicker or they won't cook through. The ice water soak removes some of the harsh onion compounds and helps the batter adhere better. Allow them to soak for at least 5 minutes.
- Set Up Dredging Station:
- Arrange your three shallow dishes in order. First combine flour baking powder and salt whisking to distribute evenly. In the second dish beat the egg thoroughly before adding milk. In the third dish mix panko with seasoned salt ensuring even distribution.
- Coat The Rings:
- Work with just a few rings at a time to prevent crowding. Pat each ring dry before dredging in flour ensuring complete coverage with no bare spots. Dip into the egg mixture allowing excess to drip off before pressing into the panko. Use one hand for dry ingredients and one for wet to prevent breading your fingers.
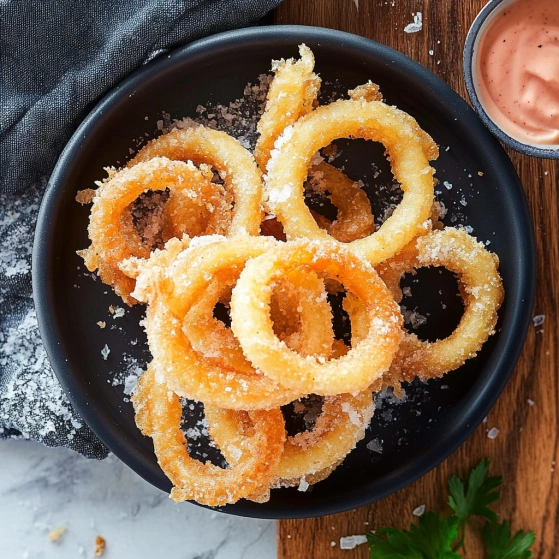
- Fry To Perfection:
- Carefully lower coated rings into the hot oil watching as they immediately begin to sizzle. Keep batches small to maintain oil temperature. Rotate them gently for even browning. The exact moment they reach golden brown about 2 minutes remove immediately.
- Drain And Season:
- Place fried rings on paper towels and immediately add a light sprinkle of salt while still hot. This final seasoning step makes all the difference in the final flavor.
 Pin it
The Vidalia onion is truly the star of this recipe. I once tried making these with regular yellow onions during a pantry cleanout, and while they were good, they lacked that special sweetness that makes Vidalias perfect for this application. It's worth seeking out this specific variety for the best results.
Make Ahead Options
These onion rings can be prepared up to the coating stage and refrigerated for up to 4 hours before frying. Simply place the coated rings on a baking sheet with parchment paper between layers to prevent sticking. This makes them perfect for entertaining since you can do the messy prep work well before guests arrive and just fry them fresh when ready to serve.
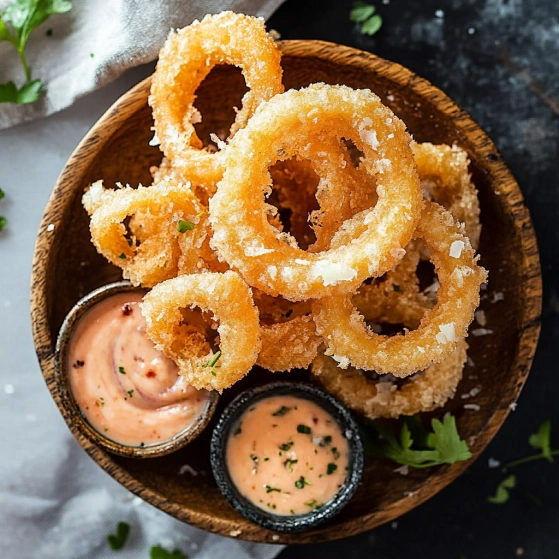
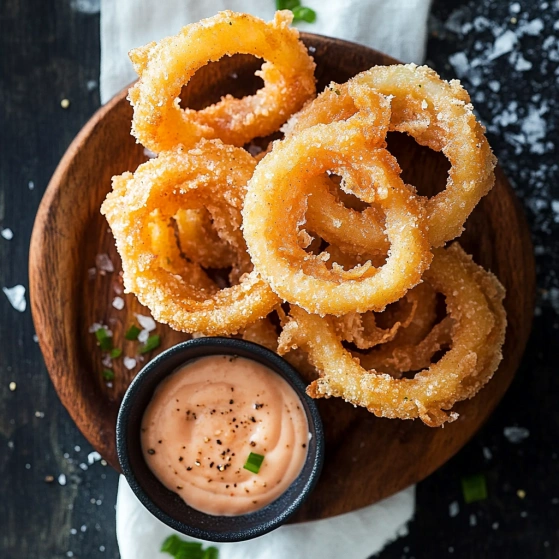
Perfect Dipping Sauces
While ranch and marinara are classic pairings, I've discovered several other fantastic options. My absolute favorite is a quick sriracha mayo made by combining ½ cup mayonnaise with 1 tablespoon sriracha and a squeeze of lime juice. For something different, try a honey mustard sauce or a tangy barbecue sauce. The slight sweetness of these options complements the Vidalia onions beautifully.
Troubleshooting Tips
If your batter isn't adhering properly, your onions might be too wet after soaking. Be sure to pat them completely dry before starting the coating process. If your onion rings are browning too quickly, your oil is likely too hot. Adjust accordingly and use a thermometer for accuracy. For extra insurance against batter slippage, you can refrigerate the coated rings for 15 minutes before frying.
 Pin it
Frequently Asked Questions
- → Why soak the onion rings in ice water?
Soaking the onion rings in ice water helps remove some of the sharp, pungent flavor while keeping them crisp. It also helps the coating adhere better to the onions during the breading process.
- → Can I use a different type of onion?
Yes, while Vidalia onions are ideal for their sweetness, you can substitute with other sweet onion varieties like Walla Walla, Maui, or Spanish onions. Regular yellow onions will work too, but may have a stronger flavor.
- → Can I bake these instead of frying?
Yes, you can bake them at 425°F for about 15-20 minutes, flipping halfway through. Spray them with cooking oil before baking for better browning. Note that they won't be quite as crispy as the fried version.
- → What's the best way to reheat leftover onion rings?
For the best texture, reheat onion rings in an air fryer at 350°F for 3-4 minutes or in a conventional oven at 375°F for 5-7 minutes. Avoid using a microwave as it will make them soggy.
- → Why use Panko breadcrumbs instead of regular breadcrumbs?
Panko breadcrumbs are lighter, airier, and larger than traditional breadcrumbs, resulting in an exceptionally crispy exterior. They absorb less oil during frying, keeping the onion rings crunchier and less greasy.
- → Can I make the batter ahead of time?
You can prepare the dry ingredients ahead of time, but it's best to mix the wet batter just before coating and frying. This ensures the baking powder remains active for the lightest texture.