
 Pin it
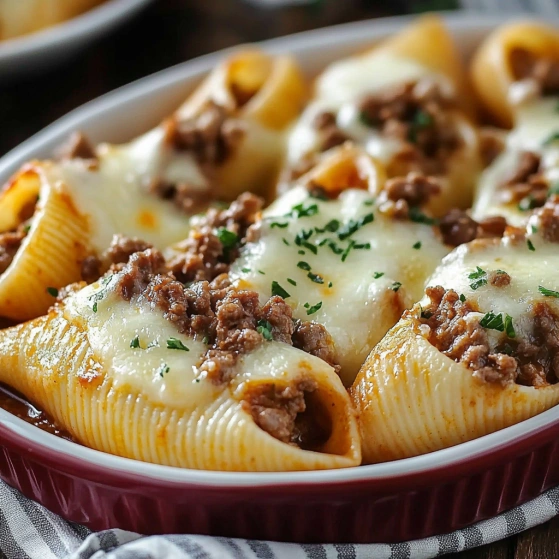
This comforting stuffed shells recipe transforms ordinary pasta into an extraordinary meal that will have your family requesting it weekly. The marriage of creamy ricotta and savory beef creates a satisfying filling for tender pasta shells, all blanketed in rich tomato sauce and melted cheese.
I first created this dish when my sister came to visit with her picky eaters. To my delight, even the kids who 'hate everything' cleaned their plates and asked for seconds. Now it's our go-to for family gatherings.
Ingredients
- Jumbo pasta shells: Provide the perfect vessel for holding the filling while maintaining their shape during baking
- Lean ground beef: Adds hearty protein without excess grease
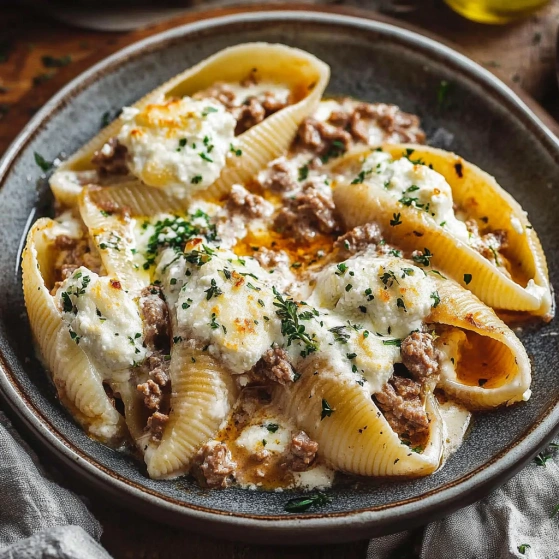
- Ricotta cheese: Creates a creamy texture that balances the meat perfectly
- Mozzarella cheese: Delivers that irresistible melty stretch when you take a bite
- Pecorino Romano cheese: Offers a sharp saltiness that elevates the entire dish
- Large egg: Acts as a binding agent ensuring your filling stays together
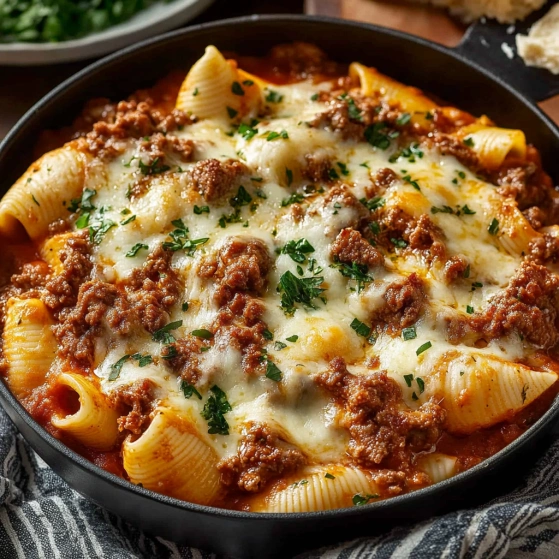
- Tomato basil sauce: Provides rich flavor without hours of simmering time
- Dried oregano: Infuses classic Italian warmth throughout
- Fresh garlic cloves: Offer aromatic depth that dried simply cannot match
- Fresh parsley: Brightens the finished dish with color and flavor
Step-by-Step Instructions
- Prepare the pasta:
- Cook shells in generously salted water until they're al dente about 8 minutes. They should be firm enough to hold their shape but pliable enough to stuff. Drain and separate them on a baking sheet to prevent sticking while they cool.
- Brown the meat mixture:
- Cook ground beef in a large skillet over medium heat breaking it into small crumbles as it browns. Once nearly cooked through add the minced garlic and oregano allowing the heat to release their essential oils. This step builds the foundational flavors of your filling.
- Create the filling:
- Combine your cooled beef mixture with ricotta cheese mozzarella Pecorino Romano and beaten egg in a large bowl. The temperature is crucial here if the beef is too hot it will cook the egg and melt the cheese prematurely. Season generously with salt and pepper tasting as you go.
- Prepare the baking dish:
- Spread a cup of sauce evenly across the bottom of your baking dish. This prevents sticking and ensures every bite has sauce. Use a 9x13 dish for best results.
- Fill and arrange shells:
- Spoon the filling generously into each shell compacting it slightly so you can close the shells partially. Place them open side up in neat rows allowing about half an inch between each shell.
- Add sauce and cheese:
- Pour remaining sauce over the shells ensuring each gets coverage but not swimming in sauce. Distribute remaining mozzarella evenly focusing on covering the exposed filling.
- Bake to perfection:
- Cover tightly with foil to trap steam and prevent the pasta from drying out during the first 25 minutes of baking. Removing the foil for the final 10 minutes allows the cheese to develop a golden bubbly crust.
 Pin it
My grandmother always insisted on adding a pinch of nutmeg to the ricotta mixture. I was skeptical at first but discovered it adds a subtle warmth that complements the cheese perfectly without being detectable as nutmeg.
Make Ahead Options
These stuffed shells actually benefit from being made ahead. The flavors meld together beautifully when the dish rests overnight in the refrigerator. Simply prepare everything up to the baking step cover tightly with plastic wrap and refrigerate. When ready to serve remove from the refrigerator 30 minutes before baking to take the chill off then bake as directed adding about 10 minutes to the covered baking time.
Perfect Pairings
This hearty pasta dish pairs beautifully with a simple arugula salad dressed with lemon juice and olive oil. The peppery greens and bright acidity cut through the richness of the cheese and meat. For a complete Italian experience offer warm garlic bread for sopping up extra sauce. A medium-bodied red wine like Chianti or Montepulciano complements the tomato sauce without overwhelming the delicate ricotta.
 Pin it
Troubleshooting Tips
If your shells tear while cooking reserve them for the bottom layer where they'll be less visible. For shells that stick together during cooking gently separate them under running cool water. If your filling seems too wet which can happen with some brands of ricotta drain the cheese in a fine mesh strainer for 30 minutes before mixing your filling. This removes excess liquid and prevents a soggy result.
Frequently Asked Questions
- → Can I make these stuffed shells ahead of time?
Yes! You can assemble the entire dish up to 24 hours in advance and refrigerate it covered. When ready to bake, add about 10-15 minutes to the covered baking time. You can also freeze the assembled dish for up to 3 months - thaw overnight in the refrigerator before baking.
- → What can I substitute for ricotta cheese?
Cottage cheese (drained and blended smooth) makes an excellent substitute for ricotta. You could also use a mixture of cream cheese and sour cream, or mascarpone for a richer option. Greek yogurt can work too, though it will provide a tangier flavor profile.
- → What sides pair well with stuffed shells?
A simple green salad with Italian dressing makes a perfect light accompaniment. Garlic bread or crusty Italian bread is ideal for soaking up extra sauce. Roasted vegetables like zucchini, bell peppers, or broccoli also pair nicely with the rich pasta dish.
- → Can I use ground turkey instead of beef?
Absolutely! Ground turkey, chicken, or even Italian sausage (removed from casings) work well as alternatives to ground beef. For a vegetarian version, you could substitute with finely chopped mushrooms, plant-based meat alternatives, or even cooked lentils.
- → How do I prevent the pasta shells from tearing?
Cook the shells just until al dente (slightly firm) as they'll continue cooking in the oven. Cool them slightly before handling. Drain them well and lay them out separately on a baking sheet rather than leaving them in a colander where they might stick together. Handle gently when filling.
- → How do I store and reheat leftovers?
Store leftovers in an airtight container in the refrigerator for up to 4 days. For best results, reheat individual portions in the microwave covered with a damp paper towel, or reheat larger portions in a 350°F oven until heated through (about 15-20 minutes).