
 Pin it
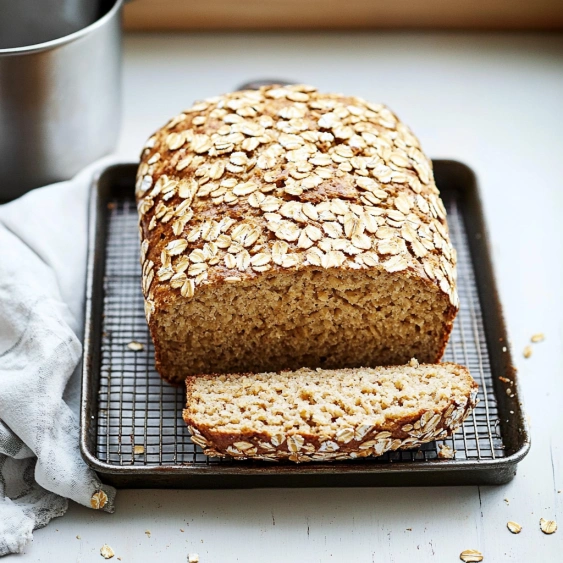
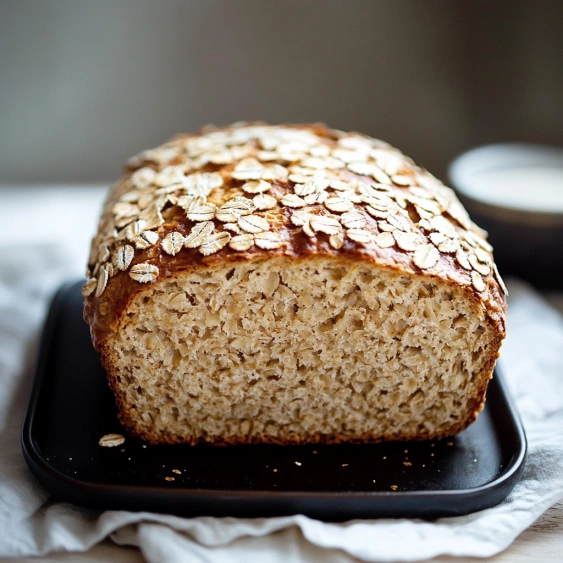
This rustic no-knead maple oat bread transforms simple ingredients into a hearty, slightly sweet loaf that fills your kitchen with the most comforting aroma. The maple syrup adds a subtle sweetness while the oats create a wonderful texture both inside and in the crispy crust.
I developed this recipe during a long winter weekend when I was craving something homemade but didn't want to spend hours in the kitchen. The first time my daughter smelled it baking, she declared it "better than the bakery" and now it's our Sunday morning tradition.
Ingredients
- Rolled oats: Provide texture and nutty flavor while creating that beautiful crust coating
- Maple syrup: Adds subtle sweetness look for pure maple syrup not pancake syrup for best results
- Bread flour: Gives structure and chewiness use high protein flour for best results
- Stone-milled or whole wheat flour: Adds depth and nutrition freshly milled is ideal if available
- Instant yeast: Ensures reliable rising without proofing first
- Butter (for greasing): Creates a perfectly released loaf with golden edges
- Olive oil: Helps with handling the sticky dough and adds subtle flavor
Step-by-Step Instructions
- Prepare the oat mixture:
- Combine oats with boiling water, maple syrup and salt in a large bowl then let stand for 10 minutes. This softens the oats and allows them to release their flavor throughout the dough.
- Add remaining liquids and yeast:
- Stir in room temperature water and yeast until completely incorporated. The mixture should be well combined but not overmixed.
- Incorporate the flours:
- Add both flours and stir with a rubber spatula until no dry pockets remain. The dough will look shaggy and feel sticky. A brief 15-30 second hand kneading may help everything come together.
- First rise:
- Cover bowl with a tea towel and let dough rise in a warm spot for 2-3 hours. The dough should double in size and look puffy with a few bubbles on the surface.
- Prepare the pan:
- Generously butter your loaf pan then coat with oats on all sides. This creates a beautiful textured crust and prevents sticking.
- Shape the loaf:
- Drizzle oil over risen dough and use your hand to release it from the bowl. Flip the dough and roll into a loaf shape, placing it seam-side down in the prepared pan.
- Second rise:
- Sprinkle reserved oats over the top and let the dough rise again for 45-60 minutes. The dough should dome above the rim of the pan by about an inch.
- Bake to perfection:
- Bake in a 375°F oven for 45 minutes until deeply golden brown. Turn the loaf onto a cooling rack and resist cutting for at least 30 minutes.
 Pin it
The maple syrup in this bread is my secret weapon. I discovered its magic when I ran out of honey one winter morning. The subtle sweetness paired so perfectly with the earthy oats that my family now refuses the honey version. Last Christmas, I baked mini loaves as gifts and received more compliments on this simple bread than my elaborate cookies.
Perfect Pairings
This versatile bread complements both sweet and savory applications. For breakfast, try toasting thick slices and topping with salted butter and additional drizzle of maple syrup. The contrast of the crunchy exterior and soft interior creates the perfect canvas. For lunch, this bread makes exceptional sandwiches, particularly with turkey and sharp cheddar. The slight sweetness balances perfectly with savory fillings.
Troubleshooting Tips
If your dough seems too wet after mixing, resist adding much more flour. This is supposed to be a sticky dough, and additional flour can make the final bread dense. Instead, use wet hands when handling. If your kitchen is cold, create a warm rising environment by preheating your oven for just 1 minute, then turning it off and placing the covered dough inside. Check your yeast expiration date if the dough isn't rising properly.
Storage and Freezing
Store the cooled bread in a paper bag at room temperature for up to 2 days for best freshness. For longer storage, wrap tightly in plastic wrap and keep at room temperature for up to 4 days. This bread freezes beautifully when wrapped first in plastic wrap then aluminum foil. Freeze for up to 3 months and thaw at room temperature before reheating. To refresh slightly stale bread, sprinkle with water and heat in a 350°F oven for 5-10 minutes.
Make It Your Own
While this recipe creates a perfect classic loaf, feel free to customize it to your taste. Add 1/2 cup chopped dried fruits like cranberries or apricots for a sweeter version. For a heartier texture, substitute 1/4 cup of the oats with your favorite seeds like sunflower or pumpkin. During fall, adding 1 teaspoon of cinnamon creates a wonderful seasonal variation that pairs beautifully with the maple flavor.
 Pin it
Frequently Asked Questions
- → Can I use different types of flour for this bread?
Yes, the recipe is flexible with flour choices. You can substitute all-purpose flour for bread flour, or experiment with different whole grain flours in place of the stone-milled/whole-wheat portion. Just be aware that using all whole grain flours may result in a denser loaf.
- → Why doesn't this bread require kneading?
This bread uses time instead of kneading to develop gluten. The long rising period (2-3 hours) allows the gluten to form naturally, creating proper structure without the traditional kneading process.
- → Can I substitute the maple syrup with another sweetener?
Yes, you can substitute honey, brown sugar, or even molasses for the maple syrup. Each will provide a slightly different flavor profile, but all will work well in the bread.
- → How should I store this bread to keep it fresh?
Once completely cooled, store the bread in a paper bag or bread box at room temperature for 2-3 days. For longer storage, slice the bread and freeze it in a freezer-safe container for up to 3 months.
- → Why is my dough too sticky to handle?
This is a relatively wet dough by design. Use wet hands or a light coating of oil on your hands when handling it. Avoid adding more flour as this can make the bread dry and dense.
- → Can I add mix-ins like nuts or dried fruit?
Absolutely! Add up to 1 cup of mix-ins like chopped nuts, seeds, or dried fruit after incorporating the flour. Fold them in gently to distribute throughout the dough.