
 Pin it
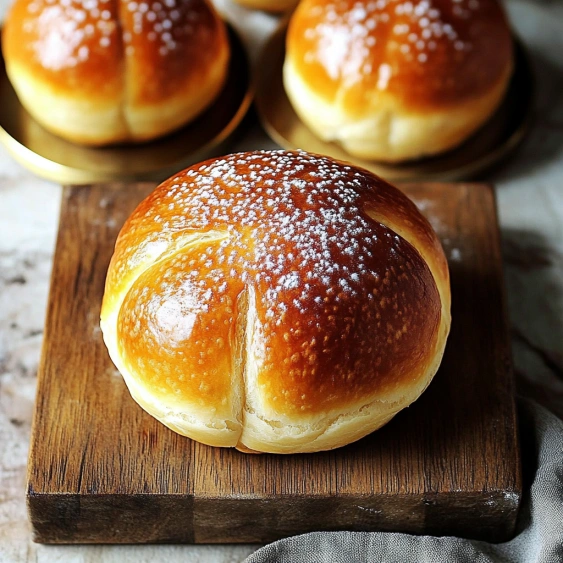
This brioche bun recipe has transformed my homemade burger and sandwich game completely. The pillowy soft texture with that perfect golden crust brings restaurant-quality bread right to your kitchen without any complicated kneading techniques.
I discovered this method during my quest to recreate my favorite bakery brioche after moving away from the city. After multiple attempts with traditional recipes, this simplified version actually produced better results and has become the most requested recipe among my friends.
Ingredients
- All-purpose or bread flour: Provides the structure yet keeps the buns tender, good quality unbleached flour works best
- Kosher salt: Enhances all flavors without making the buns taste salty
- Instant yeast: Ensures reliable rising, look for packages labeled instant or rapid-rise
- Sugar: Feeds the yeast and adds subtle sweetness that complements both sweet and savory fillings
- Cold water: Slows the initial fermentation for better flavor development
- Egg: Adds richness and helps create that signature brioche color and texture
- Milk: Creates tenderness in the final bun
- Butter: Gives the luxurious mouthfeel brioche is known for, unsalted works best
- Egg wash: Creates that bakery-quality shine and golden crust
Step-by-Step Instructions
- Combine dry ingredients:
- Whisk flour, salt, yeast, and sugar in a large bowl until evenly distributed. This ensures your yeast and salt are properly incorporated for even rising.
- Create the perfect temperature liquid:
- Whisk cold water and egg in a separate bowl. Heat milk and butter until butter fully melts, then pour into the cold mixture. This clever technique creates the ideal lukewarm temperature for activating yeast without requiring a thermometer.
- Form the dough:
- Add your perfectly lukewarm liquid to the flour mixture and stir with a spatula until you have a shaggy, sticky dough ball. The dough will look somewhat rough and not completely smooth. Drizzle with olive oil and rub to coat, which prevents a dry crust from forming during rising.
- First rise:
- Cover the bowl and let rise in a warm spot for 2-3 hours until doubled in size. Alternatively, place immediately in the refrigerator for 12-18 hours for enhanced flavor development. The cold fermentation creates complexity similar to sourdough without the starter maintenance.
- Shape the rolls:
- On a lightly floured surface, deflate the dough gently and divide into 8-10 equal portions. Roll each piece into a smooth ball using just enough flour to prevent sticking. Place on parchment-lined baking sheets with enough space between each for expansion.
- Second rise:
- Allow shaped rolls to puff up and feel light to the touch, about 30-45 minutes. They should look visibly larger and feel airy when gently pressed with a fingertip.
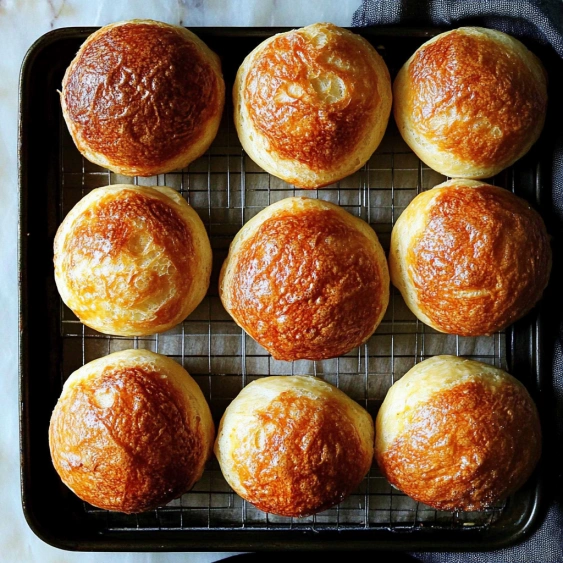
- Bake to golden perfection:
- Brush with egg wash for that bakery-style shine, then bake at 425°F for 15-20 minutes until golden brown all around. Transfer to a wire rack immediately to prevent soggy bottoms and allow to cool completely.
 Pin it
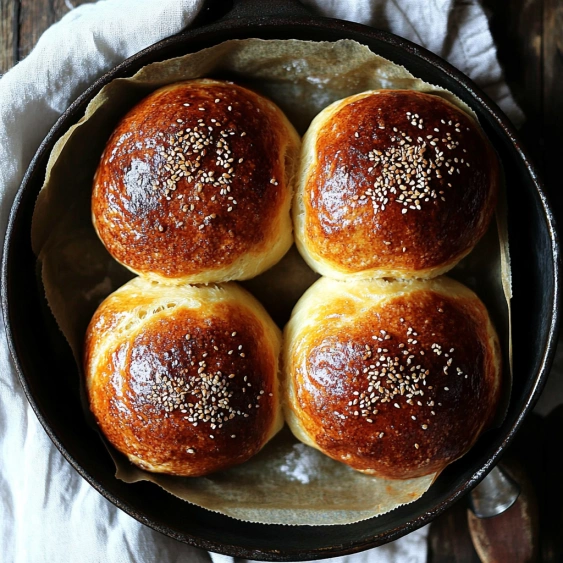
My absolute favorite thing about these buns is their versatility. My daughter initially thought they were too fancy for burgers until she tried one with a grilled patty. Now she specifically requests these "special buns" for everything from breakfast sandwiches to dinner rolls with holiday meals.
Overnight Refrigeration Magic
The cold fermentation option is truly where this recipe shines. By placing the dough immediately in the refrigerator after mixing, the yeast works slowly overnight, developing complex flavors impossible to achieve with a quick rise. I discovered this accidentally when interrupted during baking, but now I deliberately plan for overnight rises. The dough becomes more manageable when cold, making it easier to shape perfect rolls. The finished buns develop a subtle sourdough-like quality without any starter maintenance.
 Pin it
Substitution Guide
If you need dairy-free options, plant-based butter and milk work beautifully in equal amounts. For whole wheat versions, replace up to half the flour with whole wheat, but increase water by about 2 tablespoons to maintain proper hydration. No instant yeast? Active dry yeast works too, just dissolve it in the lukewarm liquid mixture first and wait 5 minutes before combining with flour. For sweeter breakfast buns, increase sugar to 4 tablespoons and add 1 teaspoon vanilla extract to the liquid mixture.
Serving Suggestions
These brioche buns elevate anything placed between them. For burgers, their slight sweetness balances beautifully with savory grilled meats. Split and toasted, they make extraordinary sandwich bread for chicken salad or deli meats. For breakfast, slice horizontally and use for french toast or fill with scrambled eggs and cheese. I also love serving them slightly warm alongside soups or stews for an elevated dinner experience. Leftover buns can be transformed into incredible bread pudding or croutons.
Frequently Asked Questions
- → Can I refrigerate the dough overnight?
Yes! You can place the dough in the refrigerator immediately after mixing and let it rise slowly for 12-18 hours. This cold fermentation actually enhances flavor development. When ready to bake, you can shape the rolls directly from the cold dough without waiting for it to warm up.
- → Why does this brioche not require kneading?
The high hydration level in this dough combined with the long rise time allows the gluten to develop naturally without kneading. The yeast works slowly through the dough, creating structure as gas bubbles form during fermentation.
- → How do I know when my buns are properly risen before baking?
The shaped buns should look noticeably puffed and feel light to the touch after their final rise (30-45 minutes). They won't quite double in size, but should expand and take on a pillowy appearance.
- → What can I serve these brioche buns with?
These versatile buns are perfect for gourmet burgers, pulled pork sandwiches, or breakfast sandwiches. They're also delicious simply sliced and toasted with butter and jam or used for elegant French toast.
- → Can I freeze these brioche buns?
Absolutely! Once completely cooled, place the buns in a freezer-safe bag and freeze for up to 3 months. Thaw at room temperature or gently reheat frozen buns in a 300°F oven for about 10 minutes until warmed through.
- → Why use cold water in the dough?
Cold water helps balance the temperature when mixed with the hot milk-butter mixture, resulting in the perfect lukewarm liquid for activating the yeast without killing it. This temperature control is key to successful fermentation.