 Pin it
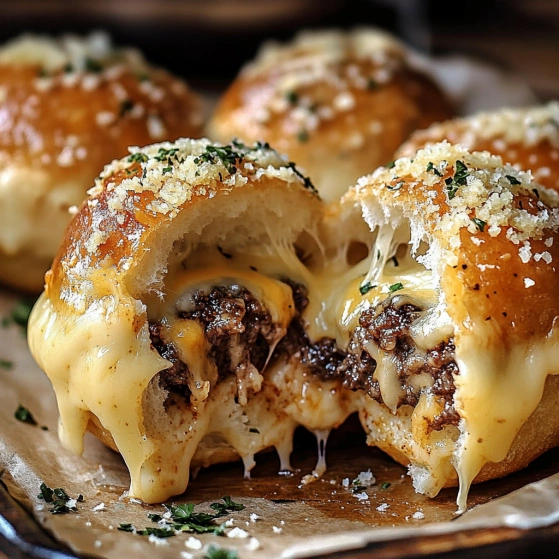
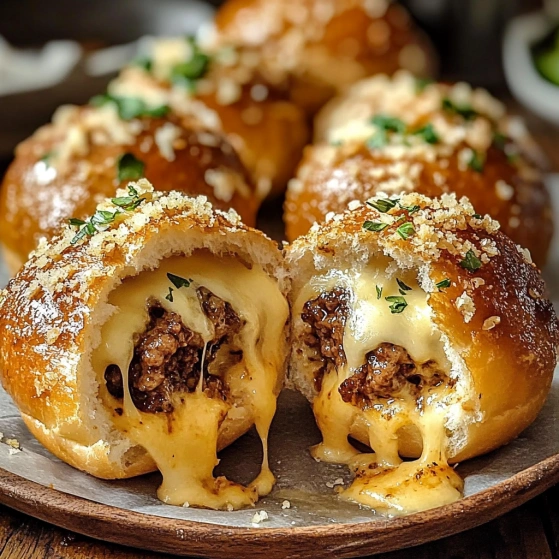
This garlic parmesan cheeseburger bombs recipe transforms simple ingredients into an explosion of flavors that will make your taste buds dance. These bite-sized delights combine the heartiness of a cheeseburger with the comfort of soft, buttery biscuits for a meal that satisfies every craving.
I first made these for my nephew's birthday party as an alternative to traditional burgers, and they disappeared faster than any other dish on the table. The kids and adults fought over the last one!
Ingredients
- Ground beef: Brings the classic burger flavor and protein. Choose 80/20 for the best balance of flavor and juiciness
- Minced garlic: Infuses the beef with aromatic flavor. Fresh is always better than jarred for the brightest taste
- Parmesan cheese: Adds a nutty salty kick that elevates these beyond ordinary cheeseburgers
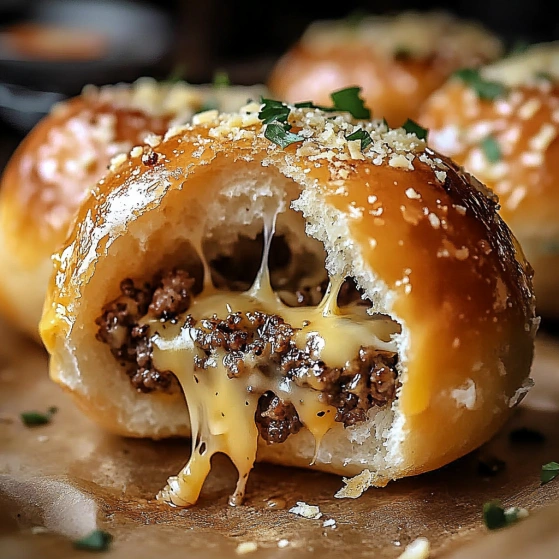
- Cheddar cheese: Creates those irresistible stretchy cheese pulls when you bite in. Sharp cheddar provides the most flavor
- Biscuit dough: Makes this recipe quick and foolproof. Look for the refrigerated kind that pops open
- Melted butter: Creates that golden crust and adds richness to every bite
- Chopped parsley: Brings a fresh finish and beautiful color contrast
Step-by-Step Instructions
- Prepare the Oven:
- Preheat your oven to 375°F and line a baking sheet with parchment paper to prevent sticking and make cleanup easier. This temperature is perfect for getting golden biscuits while ensuring the filling heats through.
- Cook the Beef Mixture:
- In a large skillet over medium heat, brown the ground beef, breaking it into small crumbles as it cooks. Add the minced garlic when the beef is about halfway done to prevent burning. Cook until the beef is no longer pink, about 5 minutes. Drain any excess fat using a colander or paper towels to keep the bombs from becoming soggy.
- Create the Filling:
- Return the drained beef mixture to the pan and remove from heat. Mix in both the Parmesan and cheddar cheese while the meat is still warm. Stir until the cheddar begins to melt slightly but still maintains some shape. This creates pockets of melty cheese in the final product.
- Assemble the Bombs:
- Open the biscuit can and separate the dough into individual biscuits. Flatten each one into a 4inch circle using your hands or a rolling pin. Place about 2 tablespoons of the beef and cheese mixture in the center of each flattened biscuit. Fold the edges up and over the filling, pinching firmly to seal completely. Roll gently between your palms to form a ball shape.
- Prepare for Baking:
- Place each filled bomb seam side down on your prepared baking sheet, spacing them about 2 inches apart. Brush the tops and sides generously with melted butter, which will help them achieve that beautiful golden color.
- Bake to Perfection:
- Bake in your preheated oven for 12 to 15 minutes, or until the biscuit exterior is puffed and golden brown. The exact time may vary depending on your oven, so start checking at the 10minute mark.
- Finishing Touches:
- Remove from the oven and let cool for 2 to 3 minutes before serving. This brief rest allows the cheese inside to set slightly so it does not burn mouths. Sprinkle with fresh chopped parsley just before serving for color and freshness.
 Pin it
You Must Know
- Each bomb contains a complete meal in one handheld package
- The recipe can be prepped ahead and baked just before serving
- These reheat beautifully in an air fryer or toaster oven
The moment these golden bombs emerge from the oven, the aroma fills my kitchen with a scent that rivals any gourmet burger joint. My favorite part is watching guests take their first bite when that molten cheese center reveals itself in all its stretchy glory.
Make-Ahead Magic
These bombs can be fully assembled up to 24 hours in advance and stored in the refrigerator before baking. Simply prepare through the assembly step, place on a parchment-lined baking sheet, cover lightly with plastic wrap, and refrigerate. When ready to bake, brush with butter and add about 2 minutes to the baking time since they will be starting cold.
Tasty Variations
Transform these bombs into different flavor experiences with simple swaps. Try using ground turkey or chicken instead of beef for a lighter option. Mix in bacon bits, diced pickles, or caramelized onions to the filling for different flavor profiles. For spicy lovers, add diced jalapeños or a dash of hot sauce to the meat mixture. You can even use different cheese combinations like pepper jack for heat or blue cheese for a gourmet twist.
Serving Suggestions
These cheeseburger bombs pair perfectly with classic burger accompaniments. Serve alongside a small bowl of ketchup, mustard, and mayo for dipping. A simple green salad dressed with vinaigrette provides a fresh contrast to the richness of the bombs. For a complete meal, add a side of sweet potato fries or a light tomato soup. These are perfect for casual gatherings where finger foods reign supreme.
 Pin it
Storage Solutions
Leftover bombs will keep in an airtight container in the refrigerator for up to 3 days. To reheat, place in a 350°F oven for about 10 minutes or in an air fryer at 325°F for 3 minutes until heated through. Avoid microwaving if possible as this can make the biscuit exterior tough and soggy. If you want to freeze them, cool completely then wrap individually in plastic wrap and aluminum foil and freeze for up to one month.
Frequently Asked Questions
- → Can I use pre-cooked ground beef?
Yes, you can use pre-cooked ground beef. Simply mix it with the minced garlic and cheeses before filling the biscuit dough.
- → What cheese substitutes can I use?
You can substitute Parmesan with Pecorino Romano and cheddar with mozzarella or your preferred melting cheese for different flavors.
- → How do I ensure the bombs seal properly?
Flatten the biscuit dough evenly, add a small amount of filling, and pinch the edges tightly to seal. Press lightly to secure the closure.
- → Can these be made ahead of time?
Yes, assemble the bombs ahead of time and refrigerate. Bake them fresh when needed for the best texture and flavor.
- → How do I reheat leftover bombs?
Reheat them in a preheated oven at 350°F (175°C) for about 5-7 minutes or until warmed through to avoid sogginess.
