
 Pin it
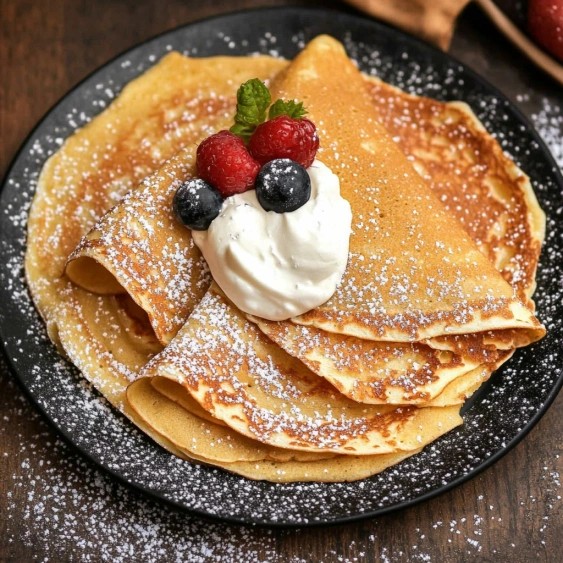
This classic crepes recipe transforms simple pantry ingredients into delicate, versatile wraps perfect for both sweet and savory fillings. The secret lies in the hot water technique that creates the ideal thin batter consistency every time.
I developed this recipe after many failed attempts at traditional French methods. When my daughter requested crepes for her birthday breakfast, I discovered this hot water technique that has never failed me since.
Ingredients
- 3 eggs: Fresh eggs at room temperature create a more cohesive batter
- 3/4 cup whole milk: Adds richness and helps with browning
- 1/4 cup vegetable or canola oil: Creates tenderness without the fussiness of melted butter
- 2 cups all purpose flour: Provides structure; use unbleached for best flavor
- 1 tsp baking soda: Creates slight airiness in the otherwise thin pancakes
- 1 tbsp brown sugar: Enhances browning and adds subtle sweetness
- 1/2 tsp salt: Balances flavors and enhances the subtle sweetness
- 2 1/2 cups hot water: The secret ingredient that creates the perfect consistency
Step-by-Step Instructions
- Prepare Hot Water:
- Begin by heating about 3 cups of water in a small pot until it reaches a boil. Then remove from heat. This ensures your water is hot enough when needed but not scalding.
- Create Base Mixture:
- In a large mixing bowl, thoroughly whisk the eggs, milk, and oil until completely smooth and well integrated. The mixture should look uniform with no visible egg streaks.
- Add Dry Ingredients:
- Add the flour, baking soda, brown sugar, and salt to your wet mixture. Whisk vigorously until all ingredients are fully incorporated. At this stage, the batter will be quite thick, resembling pancake batter.
- First Water Addition:
- Carefully measure 1 cup of the hot water and slowly pour it into your batter while continuously whisking. The batter will immediately begin to thin out as the hot water helps activate the baking soda and breaks down the flour.
- Second Water Addition:
- Repeat with another full cup of hot water, whisking constantly to prevent any lumps from forming. You'll notice the batter becoming substantially thinner.
- Final Water Adjustment:
- Add the final 1/2 cup of hot water while whisking. The batter should now have a consistency similar to heavy cream thin enough to coat the back of a spoon but still have some body.
- Prepare Cooking Surface:
- Preheat a good quality nonstick pan over medium to medium low heat. The pan should be hot enough that a drop of water sizzles gently but doesn't immediately evaporate.
- Grease Pan:
- Lightly rub butter across the bottom and sides of the pan using a paper towel. You need just enough to create a very thin coating too much will make your first crepe greasy.
- Pour and Swirl:
- Lift the pan off the heat, pour slightly less than 1/4 cup of batter in the center, and immediately swirl the pan in a circular motion to spread the batter into a thin, even layer covering most of the cooking surface.
- Cook First Side:
- Return the pan to the heat and cook for 30 to 45 seconds. The edges will begin to look dry and slightly golden, and tiny bubbles may form on the surface.
- Flip and Finish:
- Using a thin spatula, gently flip the crepe and cook the second side for only about 10 seconds. The second side needs minimal cooking time as the crepe is already mostly cooked through.
- Stack and Repeat:
- Remove the crepe to a large plate, and repeat the process with the remaining batter, stirring the batter gently before each crepe and adding a light butter coating to the pan each time.
 Pin it
The brown sugar in this recipe was a happy accident when I ran out of white sugar one morning. The subtle caramelization it adds has become my favorite aspect of these crepes, and my family now refuses to let me change it back.
Perfect Your Technique
The most common mistake with crepes is having your pan either too hot or too cold. If your crepes are tearing when you try to flip them, your heat is likely too high. If they're taking forever to cook or seem doughy, your heat is too low. The perfect temperature allows each crepe to cook in under a minute total.
Storage and Make-Ahead
These crepes store wonderfully in the refrigerator for up to 3 days. Simply stack them with a small piece of parchment or wax paper between each one, then wrap the stack in plastic wrap. To freeze, wrap the stack in plastic wrap then aluminum foil and freeze for up to 2 months. Thaw overnight in the refrigerator.
Sweet and Savory Fillings
For sweet options, try spreading Nutella, fruit preserves, or lemon curd before rolling or folding. Fresh berries with whipped cream make a perfect summer breakfast. For savory versions, fill with scrambled eggs and cheese, sautéed mushrooms, or leftover chicken with pesto. The neutral flavor of these crepes works beautifully with virtually any filling.
 Pin it
Frequently Asked Questions
- → Why add hot water to the batter?
Hot water helps thin the batter to the ideal consistency while activating the baking soda, resulting in delicate, thin pancakes with perfect texture. This method creates a smoother batter that spreads easily in the pan.
- → Can I make the batter ahead of time?
Yes, you can prepare the batter up to 24 hours in advance and store it covered in the refrigerator. Gently stir before using as some separation may occur. You might need to add a splash more hot water if it thickens too much.
- → How do I prevent tearing when flipping?
Wait until the edges look slightly dry and the surface has small bubbles before attempting to flip. Use a thin spatula and ensure your pan is properly heated and lightly buttered before each pour.
- → What fillings work best?
These versatile thin pancakes work wonderfully with both sweet fillings (fresh fruits, Nutella, jams) and savory options (ham and cheese, mushrooms, spinach and feta). They can be rolled, folded, or stacked depending on your preference.
- → Can I freeze them?
Absolutely! Place parchment paper between each cooled pancake, stack them, wrap tightly in plastic wrap and freeze for up to 2 months. Thaw in the refrigerator overnight and reheat briefly in a pan or microwave before serving.
- → Why is my batter lumpy?
For a smooth batter, whisk the wet ingredients thoroughly before adding dry ingredients. If lumps persist, strain the batter through a fine-mesh sieve or blend briefly with an immersion blender.