
 Pin it
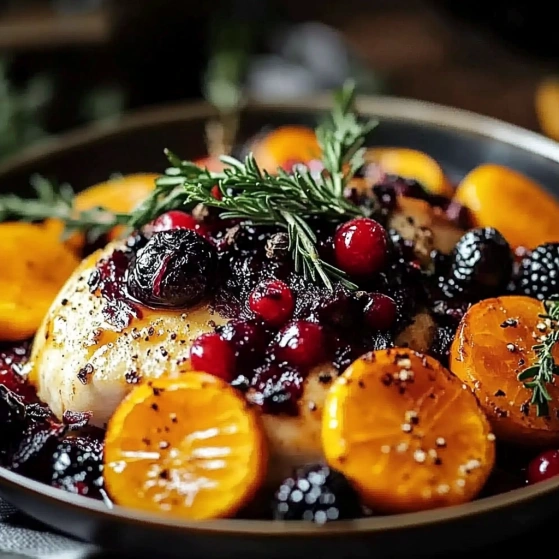
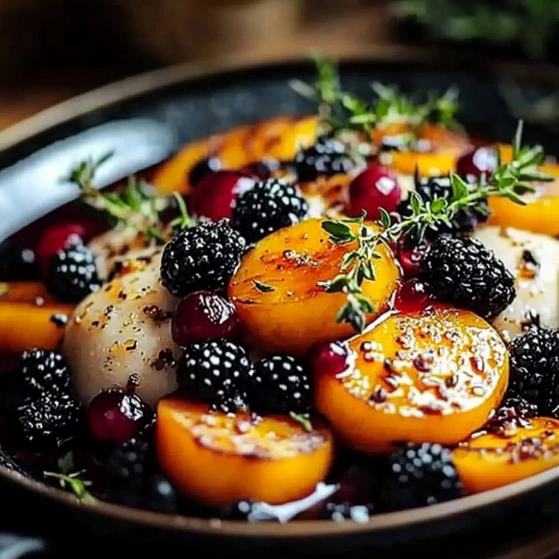
This brining solution transforms an ordinary turkey into a juicy, flavor-packed centerpiece for any holiday or special meal. After years of dry turkeys, I discovered this method that infuses moisture and subtle aromatics throughout the meat, guaranteeing compliments at your table.
I first tried this brine when hosting my first Thanksgiving dinner. Everyone was amazed at how tender and flavorful the turkey was. Now family members request I bring the brined turkey to every holiday gathering.
Ingredients
- Apple juice or apple cider: Adds natural sweetness that complements the savory turkey
- Cold water: Forms the base of your brine solution
- Fresh rosemary leaves: Contribute an earthy aroma; choose sprigs with vibrant green needles
- Garlic, minced: Delivers subtle depth; select firm bulbs without sprouting
- Kosher salt: The essential brining ingredient; use Diamond Crystal for most consistent results
- Brown sugar: Balances the saltiness; dark brown provides more molasses flavor
- Peppercorns, whole: Provide gentle heat; use multicolored for complexity
- Bay leaves: Add subtle herbaceous notes; look for leaves without discoloration
- Orange peel: Contributes bright citrus oils; use organic if possible
Step-by-Step Instructions
- Combine Ingredients:
- Add apple juice, water, rosemary, minced garlic, kosher salt, brown sugar, peppercorns, bay leaves, and orange peel to a large stockpot. The pot should be large enough to hold all ingredients with room for stirring without spilling.
- Dissolve Salt and Sugar:
- Place the pot over high heat and bring to a rolling boil while stirring frequently. Make sure to stir all the way to the bottom of the pot to prevent salt and sugar from settling and burning. Continue stirring until all crystals have completely dissolved, which typically takes about 5 minutes.
- Cool the Brine:
- Remove from heat immediately once boiling. Cover with a lid to prevent evaporation and contamination. Allow the brine to cool completely to room temperature. This usually takes 2 to 3 hours, but for faster cooling, you can place the covered pot in an ice bath, stirring occasionally.
- Brine the Turkey:
- Ensure your turkey is fully thawed and remove any giblets or neck pieces from the cavity. Place the turkey in a brining bag or a container large enough to submerge it completely. Pour the cooled brine solution over the turkey until fully covered. Seal the bag or cover the container and refrigerate for 16 to 24 hours.
- Rinse and Dry:
- Remove the turkey from the brine solution and discard the liquid. Place the turkey in a clean sink and cover with fresh cold water for 15 minutes to remove excess salt from the surface. After soaking, remove the turkey and pat completely dry inside and out with paper towels. Thorough drying is crucial for crispy skin when roasting.
 Pin it
You Must Know
The rosemary and orange combination in this brine is my secret weapon. My grandmother always used this aromatic duo in her holiday cooking, and the first time I smelled this brine simmering, it transported me back to her kitchen. Now my children associate this fragrance with our special family gatherings.
Safe Brining Containers
Food safety starts with proper equipment. For brining a turkey, you need something nonreactive and large enough to fully submerge the bird. Brining bags designed specifically for turkeys work wonderfully and take up less refrigerator space. Alternatively, large food-grade plastic containers, coolers, or stockpots work well. Avoid metal containers unless they are stainless steel, as the salt can react with aluminum or copper, affecting both the flavor and the container.
Timing and Temperature Guidelines
Perfect brining requires attention to time and temperature. For a 12 to 14 pound turkey, 16 hours is ideal, while larger birds can go up to 24 hours. Brining longer than recommended can result in overly salty meat with a spongy texture. Always maintain refrigeration at 40°F or below throughout the entire brining process. If refrigerator space is limited, use a cooler with ice packs, checking frequently to ensure temperature stays in the safe zone.
Roasting Your Brined Turkey
Brined turkeys cook slightly faster than unbrined ones, so start checking for doneness about 30 minutes earlier than your normal roasting time. Skip additional salt in your seasoning rub since the brine already provides sodium. For extra crispy skin, leave your brined and rinsed turkey uncovered in the refrigerator for 8 to 12 hours after patting dry; this allows the skin to dry out, creating the perfect foundation for browning. Roast as usual until the thickest part of the thigh registers 165°F.
 Pin it
Adjustments for Different Turkey Sizes
This recipe works beautifully for the standard 12 to 16 pound turkey, but can be adapted for any size. For smaller turkeys or turkey breasts under 10 pounds, reduce the brine by half. For larger birds over 20 pounds, increase the brine by 50 percent to ensure full coverage. The brining time remains relatively constant regardless of size, with the sweet spot being 16 to 24 hours for optimal flavor absorption without over-salting the meat.
Frequently Asked Questions
- → Can I use this brine for other poultry besides turkey?
Yes! This brine works excellently for chicken and duck as well. For smaller birds, reduce the brining time to 8-12 hours to prevent the meat from becoming too salty.
- → Can I substitute apple juice with something else?
Absolutely. While apple cider provides a nice sweetness, you can substitute with pear juice, white grape juice, or even a citrus juice blend. Each will impart slightly different flavor notes.
- → What if I don't have a brining bag?
A large food-safe bucket, cooler, or stock pot works well. Just ensure the turkey is fully submerged and kept refrigerated throughout the brining process.
- → Why is the final freshwater soak necessary?
The 15-minute freshwater soak helps remove excess salt from the surface of the turkey, preventing an overly salty exterior while maintaining the flavor and moisture benefits of brining.
- → Can I add different herbs and spices to this brine?
Definitely! This brine is versatile - try adding thyme, sage, allspice berries, or star anise for different flavor profiles. Feel free to customize based on your preferences.
- → How far in advance can I prepare the brine solution?
The brine solution can be prepared up to 3 days in advance and stored in the refrigerator. Just make sure it's completely cooled before storing.