
 Pin it
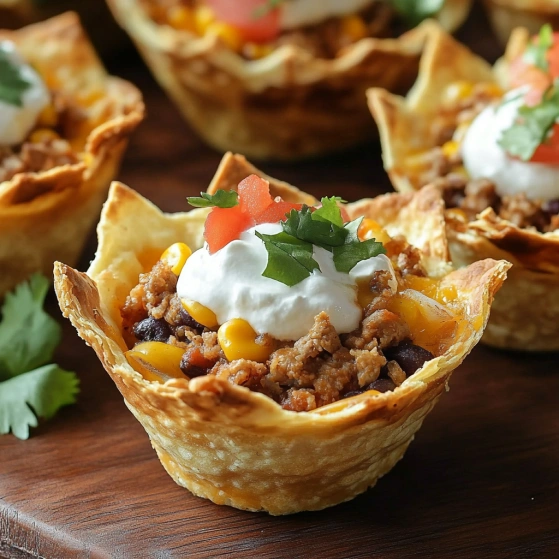
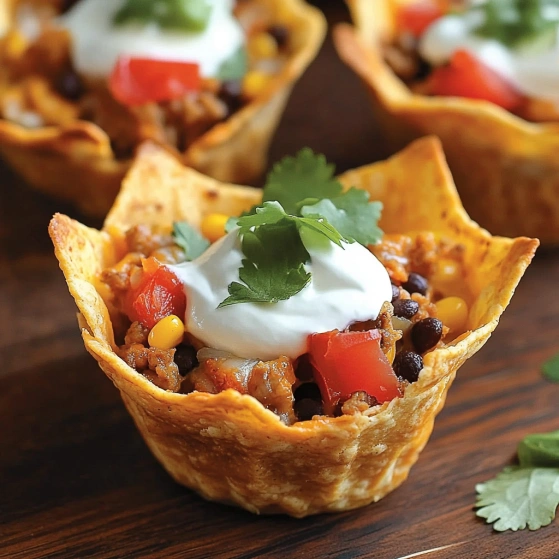
This crunchy taco cup recipe transforms traditional tacos into adorable, portable mini meals that are perfect for everything from game day to weeknight dinners. The combination of seasoned beef, melty cheese, and crisp tortilla edges creates an irresistible handheld treat that both kids and adults will devour.
I created these taco cups when hosting a football party and needed something people could easily eat while standing. They've become our most requested appetizer, with friends texting me specifically asking if I'm making "those taco things" before coming over.
Ingredients
- Lean ground beef: Provides the hearty protein base without excessive grease
- Taco seasoning: Infuses authentic Mexican flavor throughout every bite
- Diced tomatoes: Add freshness and acidity to balance the richness
- Canned green chilies: Bring mild heat and southwestern character
- Sharp cheddar cheese: Creates that essential golden melty topping and rich flavor
- Large flour tortillas: Create the crispy shell structure while remaining tender inside
Step-by-Step Instructions
- Brown the beef:
- Cook the ground beef in a large skillet over medium high heat until no pink remains, breaking it into small crumbles as it cooks. Drain any excess fat to keep the filling from becoming greasy and transfer to a mixing bowl.
- Season the filling:
- Add the taco seasoning, diced tomatoes, and green chilies to the cooked beef. Stir thoroughly to ensure every bit of meat is coated with flavor and the ingredients are evenly distributed throughout.
- Prepare the tortillas:
- Preheat your oven to 375°F. Transform your round tortillas by cutting them into squares, then divide each square into four smaller equally sized squares. This shape helps them fit perfectly into the muffin cups without excessive overlap.
- Form the cups:
- Generously spray a standard muffin tin with nonstick cooking spray to prevent sticking. Gently press one tortilla square into each muffin cup, allowing the corners to extend up and slightly over the edges for that crispy finish.
- Layer the ingredients:
- Add approximately 1.5 tablespoons of the beef mixture into each tortilla lined cup, pressing down slightly. Top with 1 tablespoon of shredded cheese, then repeat the layers once more, finishing with a final sprinkle of cheese on top.
- Brush and bake:
- Lightly brush the exposed edges of the tortillas with cooking oil to enhance browning. Bake for 18 20 minutes until the cups are heated through completely and the edges have turned a beautiful golden brown with a satisfying crunch.
 Pin it
The green chilies are my secret ingredient here. They add just enough heat without overwhelming the other flavors, and they bring a depth that regular taco seasoning alone doesn't achieve. My nephew who claims to hate "spicy food" devours these without hesitation and always asks for seconds.
Topping Suggestions
These taco cups are delicious straight from the oven, but adding toppings takes them to the next level. Set up a toppings bar with sour cream, guacamole, sliced black olives, chopped cilantro, and fresh salsa. Allow guests to customize their cups according to preference. The slight indent on top of each cup creates the perfect vessel for holding toppings without spillage.
Storage and Reheating
Store leftover taco cups in an airtight container in the refrigerator for up to three days. For best results when reheating, avoid the microwave which can make the tortilla shells soggy. Instead, place them on a baking sheet in a 350°F oven for about 10 minutes until heated through and crispy again. The cups also freeze exceptionally well placed in a single layer in a freezer container separated by parchment paper for up to two months.
Ingredient Variations
Feel free to customize these taco cups based on dietary preferences or what you have on hand. Ground turkey or chicken makes a leaner alternative to beef. Vegetarians can substitute black beans and corn for the meat. If you prefer corn tortillas for authentic flavor, they work beautifully but require a quick 10 second warm up in the microwave before cutting to prevent cracking. For spice lovers, add diced jalapeños or a few dashes of hot sauce to the beef mixture.
Make Ahead Tips
Prepare these taco cups up to 24 hours in advance for stress free entertaining. Assemble the cups in the muffin tin, cover with plastic wrap, and refrigerate. When ready to serve, simply remove from the refrigerator while the oven preheats, then bake as directed, adding 2 3 minutes to the cooking time to account for the chilled ingredients. You can also prepare just the meat mixture up to two days ahead, then assemble and bake when needed.
 Pin it
Frequently Asked Questions
- → Can I make these taco cups ahead of time?
Yes, you can assemble the taco cups ahead of time and refrigerate them covered for up to 24 hours before baking. You may need to add 2-3 minutes to the baking time if cooking from cold. For best results, don't brush with oil until right before baking.
- → What can I substitute for ground beef?
Ground turkey, chicken, plant-based meat alternatives, or even seasoned black beans work well as substitutes for the ground beef. Just ensure whatever protein you choose is properly seasoned with the taco spices.
- → Can I use corn tortillas instead of flour tortillas?
Corn tortillas can be used but they're less pliable than flour tortillas, making them more likely to crack when forming cups. If using corn tortillas, warm them slightly first to make them more flexible, and consider using smaller muffin tins.
- → What toppings can I add after baking?
These taco cups are delicious topped with sour cream, guacamole, fresh cilantro, diced avocado, sliced jalapeños, or a squeeze of lime juice. You can also add shredded lettuce for freshness and crunch.
- → How do I store and reheat leftover taco cups?
Store cooled taco cups in an airtight container in the refrigerator for up to 3 days. Reheat in a 350°F oven for 5-7 minutes until warmed through and crispy again. Avoid microwaving as this will make the tortilla cups soggy.
- → Can I freeze these taco cups?
Yes, baked taco cups freeze well for up to 2 months. Cool completely before placing in a freezer-safe container, separating layers with parchment paper. Reheat from frozen in a 375°F oven for about 10-15 minutes until heated through.