
 Pin it
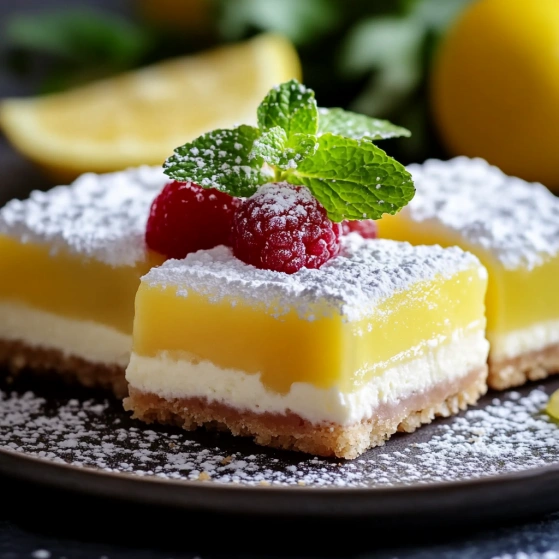
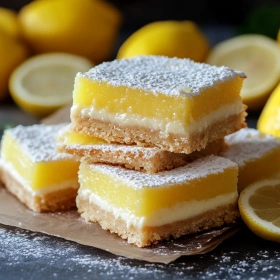
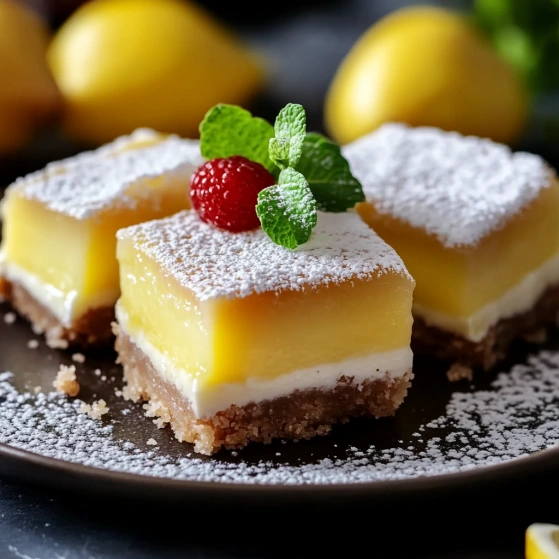
Creamy lemon squares transform an ordinary dessert moment into something truly special. The combination of a buttery graham cracker crust with a silky, tangy lemon filling creates the perfect balance of textures and flavors. This classic treat walks the line between refreshing and indulgent, making it suitable for everything from casual family gatherings to more elegant dinner parties.
The first time I made these squares for a summer garden party, they disappeared within minutes. I've since tweaked the recipe countless times to achieve the perfect consistency - not too firm, not too soft, with just the right amount of lemony zing.
Ingredients - What You'll Need
- 24 graham cracker squares: These provide the perfect crumbly, buttery base. Look for crackers with a fresh smell and no broken pieces in the package.
- 4 tablespoons unsalted butter: Unsalted allows you to control the flavor. Make sure it's completely melted but not browned.
- ¼ cup sugar: Helps bind the crust while adding sweetness to balance the tart filling. Fine granulated works best.
- 2 egg yolks: These create richness and help set the filling. Room temperature yolks blend more smoothly.
- 1 can sweetened condensed milk: The star ingredient that creates the dreamy, creamy texture. Check the expiration date for freshness.
- ½ can lemon juice: Fresh is best, but bottled works in a pinch. The acidity balances the sweetness and helps set the filling.
Step-by-Step Instructions
- Step 1:
- Heat your oven to exactly 350°F (180°C). Line an 8-inch square baking pan with parchment paper, leaving some overhang on the sides. This overhang is crucial—it will serve as handles later when you remove the cooled squares. Butter the parchment paper thoroughly to prevent any sticking.
- Step 2:
- Break the graham crackers into smaller pieces and add them to your food processor. Pulse until you have fine, even crumbs with no large chunks remaining. Add the sugar and pulse a few times to combine. Pour in the melted butter while the processor is running until the mixture resembles wet sand and holds together when pressed between your fingers.
- Step 3:
- Transfer the crumb mixture to your prepared pan. Using the back of a measuring cup or your fingertips, press firmly into an even layer covering the bottom and extending about 1 inch up the sides. Take your time with this step—a well-packed crust won't crumble when sliced. Bake for 10-12 minutes until just lightly golden at the edges. Remove from the oven and let cool completely on a wire rack.
- Step 4:
- While the crust cools, make your filling. In a medium bowl, combine the egg yolks and sweetened condensed milk. Whisk vigorously until completely smooth and slightly thickened—about 2 minutes by hand or 1 minute with an electric mixer. The mixture should fall from the whisk in a ribbon. Add the lemon juice gradually, whisking continuously to prevent curdling. Continue whisking until perfectly smooth and slightly thickened.
- Step 5:
- Once the crust has cooled completely (patience here prevents a soggy bottom), pour the filling evenly over the crust. Gently tap the pan on the counter a few times to remove any air bubbles. Return to the oven and bake for 15-20 minutes, until the filling is set but still has a slight jiggle in the center—like a firm custard. The edges might puff slightly.
- Step 6:
- Place the pan on a cooling rack and allow the squares to cool completely to room temperature—about 1 hour. Then refrigerate for at least 2 hours (preferably overnight) to fully set the filling and develop the flavors. The chilling step transforms the texture from merely set to perfectly creamy.
- Step 7:
- Once thoroughly chilled, use the parchment paper overhang to carefully lift the entire dessert from the pan and transfer to a cutting board. With a clean knife (wiping between cuts), slice into 16 small squares for finger food or 9 larger squares for a plated dessert.
 Pin it
My grandmother swore by adding extra lemon zest to the filling, claiming it was her secret to longevity. While I can't verify the health claims, I've continued her tradition. Something about the bright flavor of these squares brings back memories of summer afternoons on her porch, with the whole family gathered around her famous dessert tray.
The Perfect Variations
These creamy lemon squares serve as an excellent base recipe that welcomes adaptation. For a festive touch, add a teaspoon of lavender to the sugar when making the crust—the floral notes complement the lemon beautifully. During berry season, try topping the cooled squares with fresh raspberries or blueberries for added color and nutrition. You can even experiment with lime or orange juice instead of lemon for a different citrus experience altogether.
Storage and Make-Ahead Tips
These squares actually improve with time, making them perfect for busy schedules. They'll keep beautifully in the refrigerator for up to five days when stored in an airtight container with parchment between layers. For longer storage, wrap individual squares in parchment and freeze for up to three months. The texture remains remarkably consistent even after thawing in the refrigerator overnight. I often make a double batch, freezing half for unexpected company or late-night cravings.
 Pin it
The Science Behind the Creaminess
Understanding why these lemon squares achieve their signature texture helps ensure consistent results. The magic happens when the acidic lemon juice interacts with the proteins in the condensed milk and egg yolks, causing the mixture to thicken without requiring cornstarch or flour. This reaction, called acid-set custard, creates a smoother result than traditional baked custards. Proper chilling allows the emulsion to fully set, resulting in that perfect creamy-yet-sliceable consistency that makes these squares so addictive. I've found that allowing at least four hours of chilling time yields the absolute best texture.
Frequently Asked Questions
- → What makes the crust crunchy?
The crust is made from a mix of crumbled graham crackers, melted butter, and sugar, baked until light brown to achieve a deliciously crunchy texture.
- → Can I use fresh lemons for the filling?
Yes, fresh lemon juice works perfectly for the filling, enhancing the tangy flavor of the squares.
- → How do I ensure the filling sets properly?
Bake the filling until it is firm to the touch and no longer jiggles in the center—this usually takes 15-20 minutes.
- → Can I refrigerate the lemon squares for storage?
Absolutely! Refrigerating the squares after cooling enhances their flavor and makes the crust crunchier.
- → How do I cut the squares neatly?
Use the parchment paper to lift the cooled dessert out of the pan. Place it on a cutting board, then cut into squares using a sharp knife for clean edges.
- → Can I make these squares in advance?
Yes, these squares can be made a day in advance and stored in the refrigerator. They hold their texture and flavor beautifully.