
 Pin it
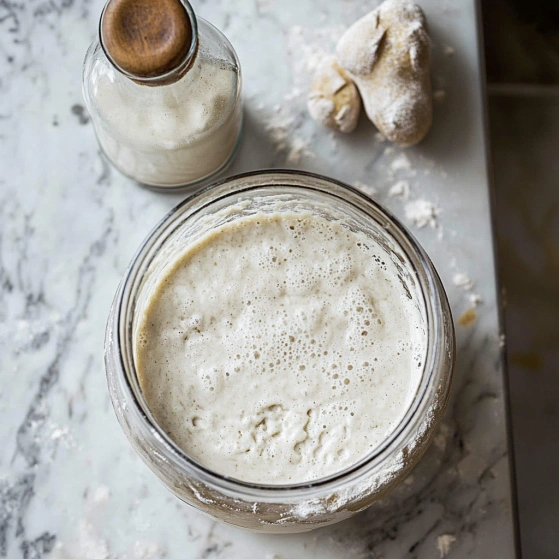
This sourdough starter recipe transforms flour and water into a living culture that will become the foundation of your homemade bread journey. The process captures wild yeast from your environment, creating a unique starter with character and flavor specific to your home.
I started my first sourdough starter during the lockdown days of 2020 and named her "Doughris Day." Three years later, she's still thriving and has produced countless loaves of bread with complex flavor that store-bought yeast simply cannot match.
Ingredients
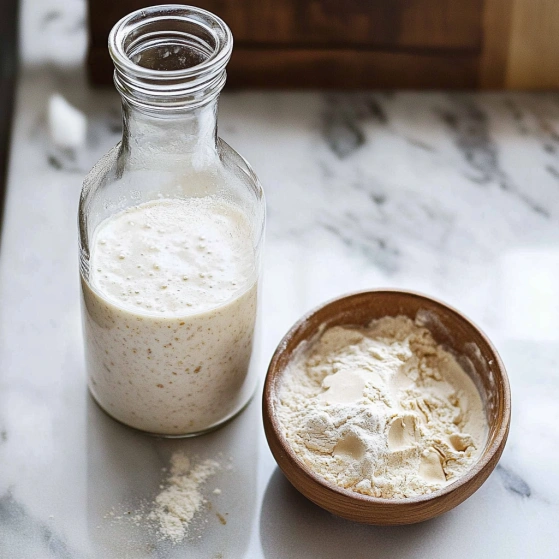
- Whole wheat flour: Provides essential nutrients and microorganisms that jump-start fermentation faster than white flour alone
- Unbleached all-purpose flour: Becomes the main food source after initial fermentation begins
- Room temperature water: Around 75°F activates natural yeasts without shocking them
- Glass jar: Minimum 32-ounce capacity allows room for your starter to grow and expand
- Paper towel and rubber band: Create a breathable cover that prevents contamination
Step-by-Step Instructions
- Initial Mix:
- Combine ½ cup whole wheat flour with ¼ cup water in your glass jar. The consistency should resemble thick pancake batter. If needed, add small amounts of additional water until you reach this texture. This initial mix creates the perfect environment for capturing wild yeast and beneficial bacteria.
- First 24 Hours:
- Cover your jar with the paper towel secured by a rubber band and place in a warm spot in your kitchen away from drafts. Ideal temperature ranges between 70-75°F. During this time, the wild yeast present in the flour and your environment begin to colonize the mixture and feed on the carbohydrates.
- First Feeding:
- After 24 hours, check for small bubbles on the surface or throughout the mixture. These bubbles indicate fermentation has begun. Add ½ cup all-purpose flour and ¼-⅓ cup water, mixing thoroughly to incorporate oxygen. If no bubbles appear, give it another day before feeding.
- Establishing a Routine:
- For the second feeding, discard half the mixture then add ½ cup all-purpose flour and ¼-⅓ cup water. Stir vigorously to incorporate oxygen. Discarding ensures your starter maintains proper acidity levels and doesn't outgrow your container. Continue this pattern of discarding and feeding daily.
- Reaching Maturity:
- By days 4-6, begin feeding twice daily by removing half and adding fresh flour and water. Watch for increased activity after each feeding. Your starter is ready to use when it predictably doubles in volume within 8 hours after feeding and develops a pleasant, yogurt-like sour smell.
 Pin it
My favorite part of maintaining a sourdough starter is its resilience. During a three-week vacation, I forgot my starter in the back of the refrigerator. Upon return, I feared it was lost forever, but after two feedings, it bounced back vigorously, proving these cultures are remarkably forgiving for beginners.
Understanding the Feeding Cycle
Your sourdough starter operates on a predictable cycle. After feeding, it becomes active, produces bubbles, rises to its peak, then eventually falls as the yeast runs out of food. Learning to recognize these stages helps you determine the optimal time to use your starter for baking. The ideal moment is typically when the starter has doubled in size and shows a dome-shaped top with plenty of bubbles throughout.
Troubleshooting Common Issues
A gray liquid sometimes forms on top of neglected starter. This is called "hooch" and indicates your starter is hungry, not ruined. Simply pour it off or stir it back in, then resume regular feedings. If your starter develops pink or orange streaks or smells like nail polish remover, it may be contaminated and should be discarded. Start over with fresh ingredients and clean equipment to ensure success.
Adjusting to Seasonal Changes
Your sourdough starter will behave differently throughout the year as temperatures fluctuate. During summer months, you might need to feed it more frequently or use cooler water as warmer temperatures accelerate fermentation. In winter, consider placing your starter in the warmest part of your kitchen or extending time between feedings. These seasonal adjustments ensure your starter remains vigorous regardless of outside conditions.
 Pin it
Frequently Asked Questions
- → Why use whole wheat flour for starting my sourdough culture?
Whole wheat flour contains more microorganisms and nutrients than all-purpose flour, helping to jump-start fermentation. The additional minerals and natural yeasts present in whole wheat create an ideal environment for your starter to develop quickly and robustly.
- → Why do I need to discard half the starter before feeding?
Discarding prevents the starter from growing too large and maintains the proper ratio of fresh food to established culture. This balance helps control acidity levels and ensures the wild yeasts and bacteria remain in optimal balance for leavening power.
- → How do I know when my sourdough starter is ready to use?
Your starter is ready when it consistently doubles in volume within 8 hours after feeding and shows abundant bubbles throughout. A mature starter will have a pleasant, tangy aroma and will float in water when a small portion is dropped in.
- → Can I use different types of flour for maintaining my starter?
Yes, once established, your starter can be maintained with various flours. All-purpose flour works well for regular feedings, but you can experiment with rye, spelt, or bread flour. Each flour imparts different flavors and fermentation characteristics to your starter.
- → What's the ideal temperature for developing a sourdough starter?
The ideal temperature range is 70-75°F (21-24°C). Cooler temperatures slow fermentation, while warmer temperatures speed it up. Consistency is key, so try to maintain your starter in a spot with minimal temperature fluctuations.
- → How should I store my sourdough starter for long-term maintenance?
For regular use, store your mature starter in the refrigerator and feed it weekly. For longer breaks, you can dry your starter by spreading it thinly on parchment paper, letting it dry completely, then storing the flakes in an airtight container. Rehydrate with water when ready to use again.