
 Pin it
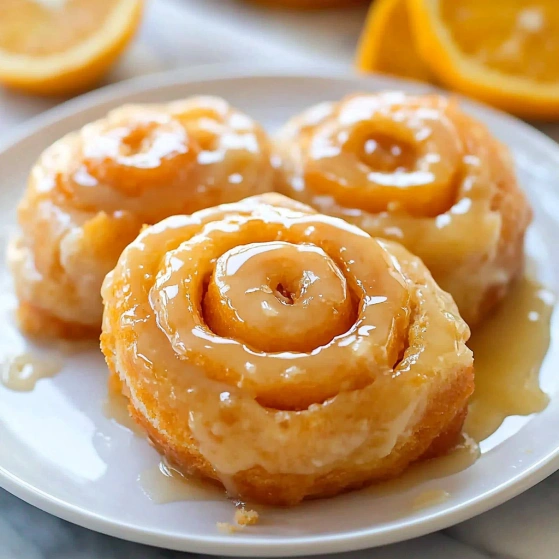
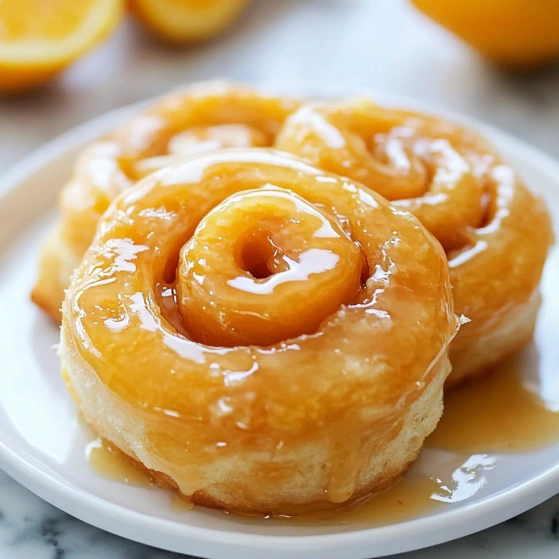
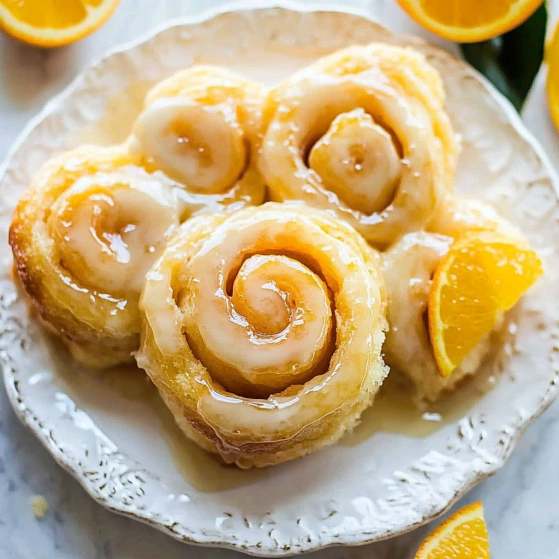
This homemade orange roll recipe transforms your kitchen into a bakery with its sweet citrus aroma and pillowy soft dough. When I first made these for Sunday brunch, everyone asked if I'd secretly visited a professional bakery. The orange marmalade filling creates pockets of bright, tangy sweetness that balances perfectly with the rich, buttery dough.
I developed this recipe after years of disappointing store bought orange rolls. The difference in flavor between those and these homemade versions is truly remarkable—my family now requests these for every holiday morning.
Ingredients
For the Dough
- 3 cups all purpose flour: Provides structure while keeping the rolls tender
- ¼ cup granulated sugar: Adds just enough sweetness to the dough without overwhelming
- 2¼ teaspoons instant dry yeast: Ensures reliable rising every time
- Pinch of salt: Enhances all flavors and balances sweetness
- ½ cup unsalted butter: Adds richness and that distinctive buttery flavor
- ½ cup buttermilk: Creates tenderness through its acidity
- 2 large eggs: Provide structure and richness
For the Filling
- 6 tablespoons unsalted butter: Creates the base for the filling to adhere
- 1 cup orange marmalade: Delivers intense citrus flavor and distinctive texture
- ½ cup light brown sugar: Adds caramel notes and creates the gooey texture
For the Orange Glaze
- ¼ cup orange juice: Provides fresh citrus flavor
- ½ teaspoon vanilla extract: Deepens the flavor profile
- 2 cups confectioners' sugar: Creates the perfect smooth consistency
- Pinch of salt: Balances sweetness
- 3 tablespoons milk: Adjusts thickness for the perfect pour
- 3 teaspoons orange zest: Provides bright visual appeal and concentrated flavor
Step-by-Step Instructions
- Prepare the Dough:
- Combine flour, sugar, yeast, and salt in your stand mixer bowl fitted with the dough hook. In a separate microwave safe bowl, melt butter then add buttermilk and heat until warm but not hot, about 120 to 130°F. Pour this warm liquid mixture and lightly whisked eggs into your dry ingredients. Knead with the dough hook for 5 to 7 minutes until the dough becomes smooth and elastic. The dough should pull away from the sides of the bowl but still feel slightly tacky to touch.
- First Rise:
- Transfer your dough to a large greased bowl, turning once to coat all sides. Cover tightly with plastic wrap and place in a warm draft free spot. Let rise for 2 to 2½ hours until it has doubled in size. The dough should look puffy and when gently poked with your finger, the indentation should remain.
- Prepare Baking Pan:
- Line a 9×13 inch baking pan with aluminum foil, making sure the foil extends up and over the sides for easy removal. Spray generously with cooking spray to prevent sticking. This preparation makes cleanup easier and allows you to lift the entire batch out for serving.
- Shape the Rolls:
- Punch down the risen dough to release air bubbles and transfer to a lightly floured surface. Roll the dough into a large 26×13 inch rectangle, keeping the thickness even throughout. Spread the softened butter across the entire surface, leaving a half inch border along one long edge. Evenly distribute the orange marmalade over the butter layer, then sprinkle with brown sugar, pressing lightly so it adheres. Starting from the long edge without the border, roll the dough tightly into a log shape, pinching the seam to seal.
- Cut and Second Rise:
- Use unflavored dental floss for clean cuts without compressing the dough. Slide the floss under the log, cross the ends over the top, and pull to slice through. Cut into 20 equal rolls and arrange them in your prepared pan with slight space between each. Cover loosely with plastic wrap and let rise for about 1 hour until nearly doubled in size and touching each other.
- Bake to Perfection:
- Preheat your oven to 375°F during the final 15 minutes of rising. Bake the rolls for about 15 minutes until the tops are lightly golden brown. The internal temperature should reach 190°F if you have a thermometer. Do not overbake or they will become dry.
- Create the Glaze:
- While the rolls are baking, prepare your glaze by whisking together orange juice, vanilla, confectioners' sugar, and a pinch of salt until smooth. Add milk gradually until you reach a pourable but thick consistency. Stir in 2 teaspoons of fresh orange zest, reserving the remaining teaspoon for garnish.
- Finish the Rolls:
- When the rolls come out of the oven, let them cool for just 5 minutes before pouring the glaze evenly over the top while still warm. This allows some of the glaze to seep into the rolls. Sprinkle with the remaining orange zest while the glaze is still wet for a beautiful presentation.
 Pin it
My favorite part of this recipe is the contrast between the aromatic orange filling and the soft, fluffy dough. I often find myself saving the very center of the roll for last, where the concentration of orange marmalade creates an almost jam-like pocket of citrus delight.
Make Ahead Instructions
These orange rolls are perfect for holidays or special brunches when you want to minimize morning work. Prepare the recipe through arranging the cut rolls in the baking pan, but instead of letting them rise a second time, cover tightly with plastic wrap and refrigerate overnight. The next morning, remove from the refrigerator and let stand at room temperature for about 45 minutes before baking. This slow refrigerator rise actually improves the flavor complexity of the dough while making your morning routine much simpler.
 Pin it
Perfecting Your Marmalade Layer
The quality of your orange marmalade significantly impacts the final flavor of these rolls. Look for a marmalade with visible orange peel pieces which provide bursts of intense citrus flavor. If your marmalade is particularly chunky, you might want to briefly pulse it in a food processor for easier spreading. For an elevated version, try adding a tablespoon of Grand Marnier to the marmalade before spreading it on the dough—the subtle orange liqueur notes create an amazing depth of flavor that adults will particularly appreciate.
Troubleshooting Dough Consistency
Achieving the perfect dough consistency can sometimes be challenging depending on your kitchen environment. The dough should be soft and slightly tacky but not sticky. If your dough seems too wet after the initial mixing, add additional flour one tablespoon at a time while kneading. Conversely, if the dough feels too dry or dense, add a teaspoon of buttermilk at a time until it softens. Proper dough hydration ensures your rolls will rise beautifully and maintain their soft texture after baking. Remember that during winter months or in dry climates, you might need slightly more liquid than during humid summer days.
Frequently Asked Questions
- → Can I make these orange rolls ahead of time?
Yes! You can prepare the rolls through the shaping step, then cover and refrigerate overnight. In the morning, remove from the refrigerator, let rise at room temperature for about 1 hour, then bake as directed. You can also freeze baked rolls for up to 3 months.
- → What can I substitute for buttermilk?
If you don't have buttermilk, add 1½ teaspoons of lemon juice or white vinegar to ½ cup of regular milk and let sit for 5-10 minutes before using. Alternatively, you can use ½ cup of plain yogurt thinned with 1-2 tablespoons of milk.
- → Can I use active dry yeast instead of instant?
Yes, you can substitute active dry yeast, but you'll need to activate it first. Mix the yeast with the warm buttermilk-butter mixture and a teaspoon of the sugar, and let it sit for 5-10 minutes until foamy before adding to the dry ingredients.
- → How do I know when my dough has risen enough?
The dough should approximately double in size during both rises. A good test is to gently press a finger into the dough—if the indentation remains, the dough is ready. If it springs back completely, it needs more time.
- → Can I use a different filling instead of orange marmalade?
Absolutely! You can substitute other citrus preserves like lemon curd or grapefruit marmalade. For a different flavor profile, try apricot jam, mixed berry preserves, or even a cinnamon-sugar filling.
- → Why use dental floss to cut the rolls?
Dental floss (unflavored) allows for clean cuts without compressing the dough as a knife might do. Simply slide the floss under the roll, cross it over the top, and pull to slice through. If you don't have floss, a very sharp knife will work too.